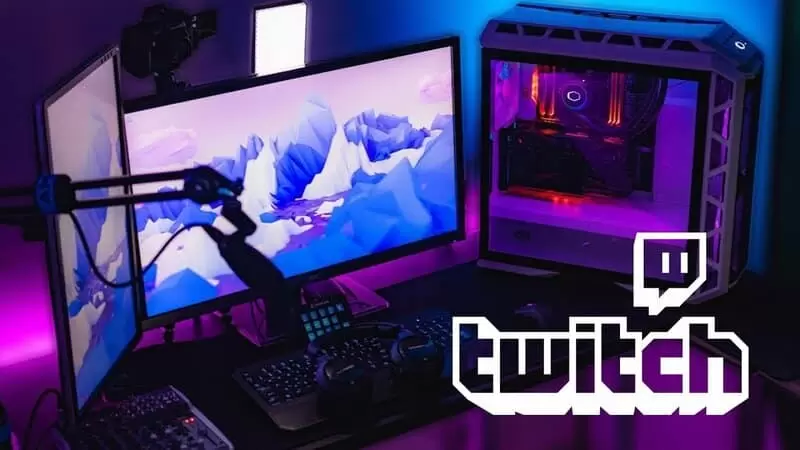
You cannot think about Twitch without thinking about streaming. It may have started as a simple gaming first platform, but its expansion to include content creators of all walks of life exploded it into popularity.
This year so far saw 1306 BILLION minutes watch on the platform, with 7.7 million unique creators streaming each month. In short, if you want to command an audience as a live streamer, then you MUST know how to use Twitch!
Follow the Steps Below
Having a Twitch account isn’t enough to become a Twitch star! Here are the basics of how you can start a Twitch stream on a PC.
- Create and sign in to your Twitch account
- Set up streaming gear (mic, camera, and capture card if you use one)
- Choose and install streaming software (OBS, Streamlabs, XSplit…)
- Copy Twitch stream key from your account page
- Paste the stream key to the streaming software
- Adjust stream settings in the streaming software (video and audio quality, latency, and more)
- Click “Start Streaming” or “Go Live” (depending on what software you’re using)
Keep reading to discover the secrets of how to stream on Twitch and go live in front of an audience of thousands.
Table of Contents
Tips & Tricks on How to Stream on Twitch
1. Sign In to Twitch
Here is where you find tangible answers to broadcasting on Twitch.
Your journey into the world of gameplay starts with creating an account and generate a Twitch name.
IMPORTANT: To view and to stream on Twitch, you must have an account!
Even if you are on Twitch to observe, you need to create an account and check the authentication email.
Start by accessing Twitch’s website and click the “sign up” button. This takes you to the registration form.
Provide the following details – username (be imaginative and creative!), password (to be re-confirmed), date of birth and e-mail, and practically, this is all.
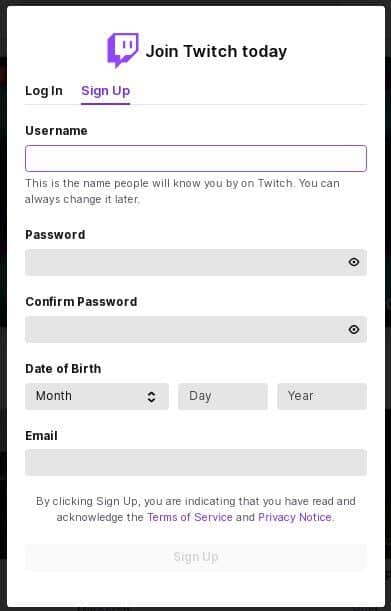
Next, verify your e-mail using the account you enlisted.
If you sign in with your mobile device, you’ll have to download the Twitch mobile app. In this case, it’s recommended to make the initial signing-in with the phone number only and to add the e-mail at a later time.
Once you decide to make the transition from viewer to a streamer, you will need two-factor authentication (2FA) enabled. The catch is you can’t activate it over on a mobile device. This can only be done via a desktop computer.
After signing up, choose the relevant categories you’d like to watch on Twitch. For example, choose the games you would like to play for your followers and something that is similar. That way, if your first choice is over-saturated, you have a similar alternative until you discover something new.
That’s all for the signing up process!
Related: How to Change Twitch Name in 2026 – Simple Ways and Benefits
2. Technical Requirements for Streaming on Twitch

Apart from having a good internet connection (or wi-fi), there are other technical requirements for Twitch to consider.
Knowing that you are anxious to find out what you need in terms of hardware and the (best?) Twitch streaming software, let’s get down to business!
3. Meet Hardware Requirements

What good is software without hardware?
An important and much liked fact about Twitch is that 4K streaming is not supported (at least, not yet). For you, a novice streamer, this means devices of lower video quality and resolution can be used. But, how low is the lowest low?
For one, you can relish the fact that the newest CPUs and DSLRs can be forsaken. So, that’s good news.
On the other hand, encoding and gaming together on a single device? Well, that can give CPUs a hard time. So, we say medium-quality gear is the way forward. Of course, if you have some hot, new, cool gear – feel free to use it!
Consoles and Phones
As already mentioned, multiple devices can be used for streaming.
It’s about what you are used to and what you like the best.
You prefer the PS5 – well, why the heck not?
You have a space shuttle of a mobile phone – that too works!
This is excellent from a “commercial” viewpoint. You bring diversity into your stream. You avoid being static and add personality. This is how you keep your audience anxious for new surprises they can’t wait to be a part of.
The best thing about smartphones and consoles streaming, is you don’t need to bother about software and the follow-up gear (mics, cameras…).
However, many a streamer that goes for gaming consoles prefer to bring a PC into the game for the broadcasting part.
So…
Personal Computers
PCs give you a better view and control of what you’re doing. You can use extra gear to equip your basic setup and make your streaming content all the more appealing to the audience.
For example, you can use multiple overlays or create layouts and interfaces as you see fit for the content you are broadcasting. You can use extensions to download/use anything you like (BTTV emotes, let’s say) that make your broadcast unique.
All of these are simpler to do on a PC.
Being at the start of your streaming career, it’s likely you’ve opted for the PC. Here are some “technicalities” to bear in mind when setting up your first streaming PC ever:
- Platform – PC, Mac, or even a laptop are viable options as long as they are fit for the purpose.
- CPU – go for the one that can take encoding and gaming at the same time. Otherwise, it’s all a lost cause;
- GPU – just as an aid to the CPU, a graphics card such as Nvidia RTX is an excellent choice since it comes with the integrated hardware encoders;
- Computer(s) – it would be simpler if you can use one, but typically, the setup will consist of two computers for two different actions – streaming and encoding. The one that has a stronger CPU should be dedicated solely to encoding.
Simply put, this means you can start your journey with 8 GB of RAM and an i5 processor. As time progresses and you become a skilled streamer, you can invest in better equipment to make your content all the more attractive.
On that note, our Twitch PC streaming experience would not be complete with just the basic equipment.
Speaking of which…
4. Use Additional Gear for Twitch Streaming

Computers are by far the most popular option for streaming.
However, for the best quality and content, here are helpful tools and equipment. Whether you want to stream privately on Twitch or to have a large audience consider these!
Camera
Presuming you want your audience to experience the quality of your broadcast content, you will dedicate your time and funds to finding the right camera.
Non-verbal communication is equally as important as verbal. A picture is (sometimes) worth a thousand words.
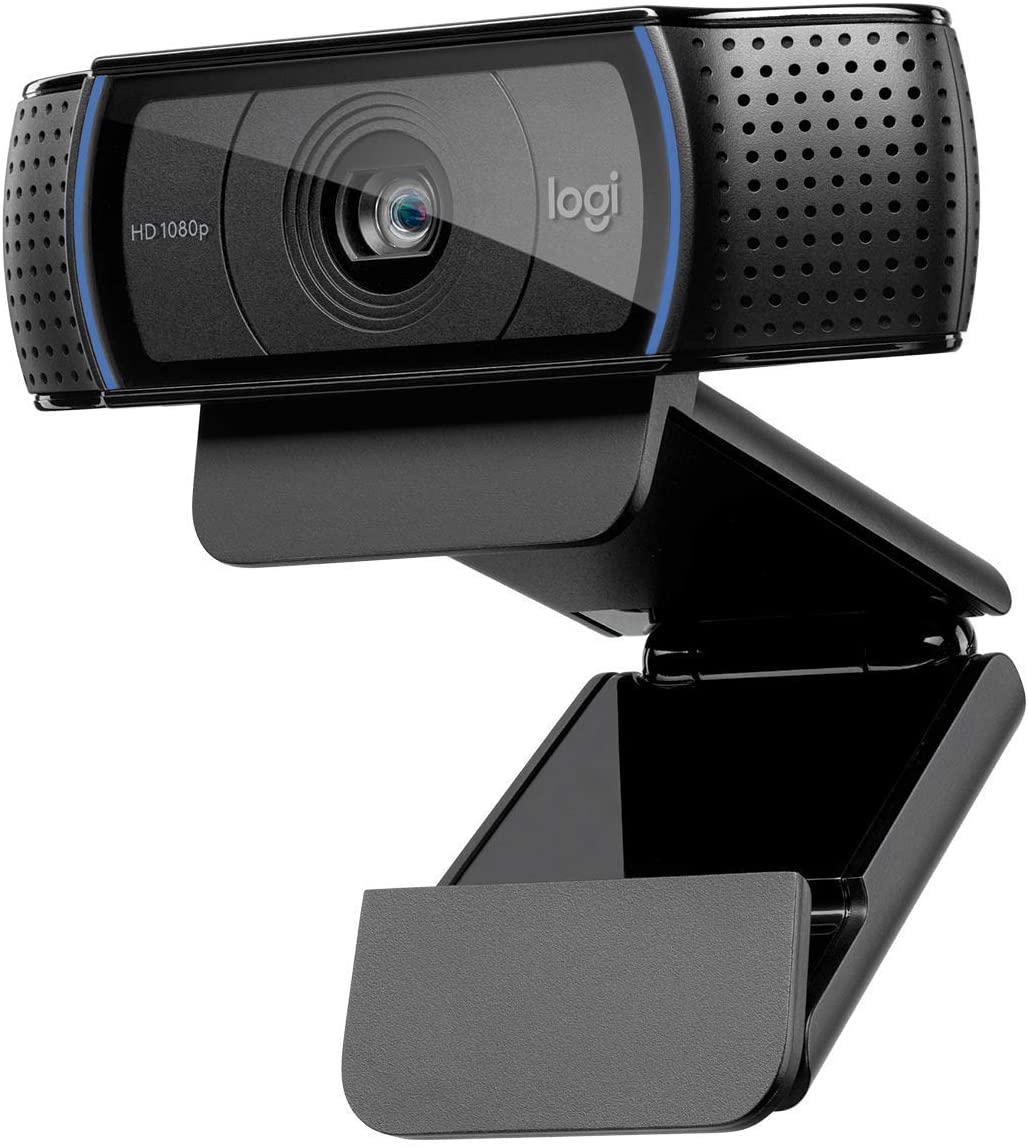
You’ll need a camera no matter what. If broadcasting from your laptop, you’d think to use the in-built camera, but still, give these cameras a chance as your webcam feed:
QUICK OVERVIEW: Best Webcams
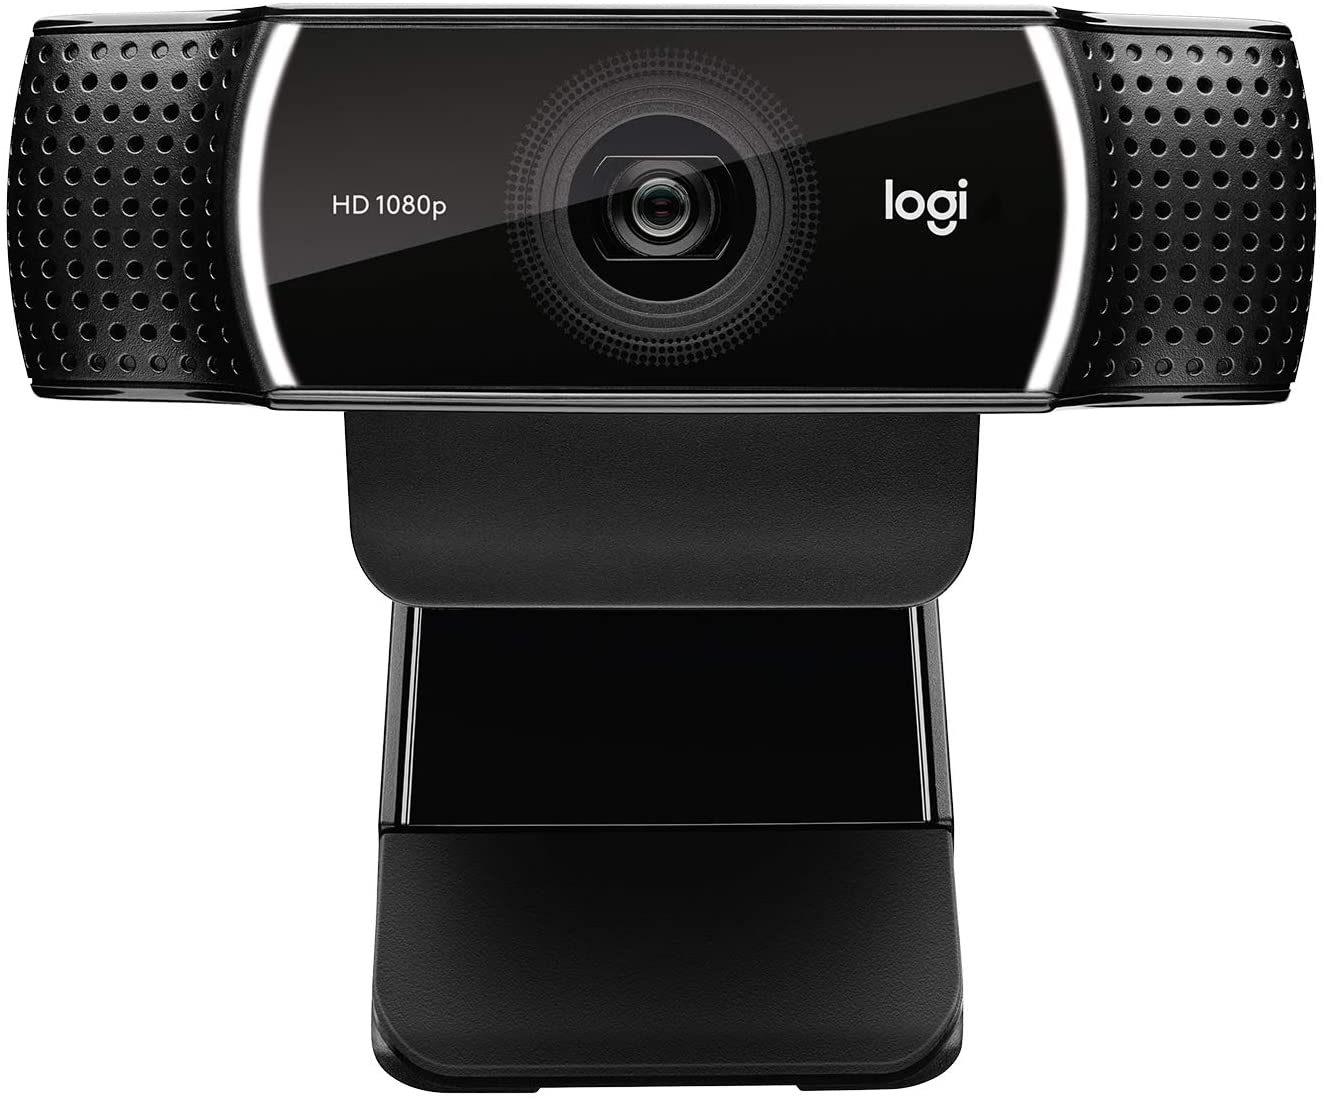 | Logitech C922x
| |
 | Best Seller Logitech HD
| |
 | Logitech Brio
|
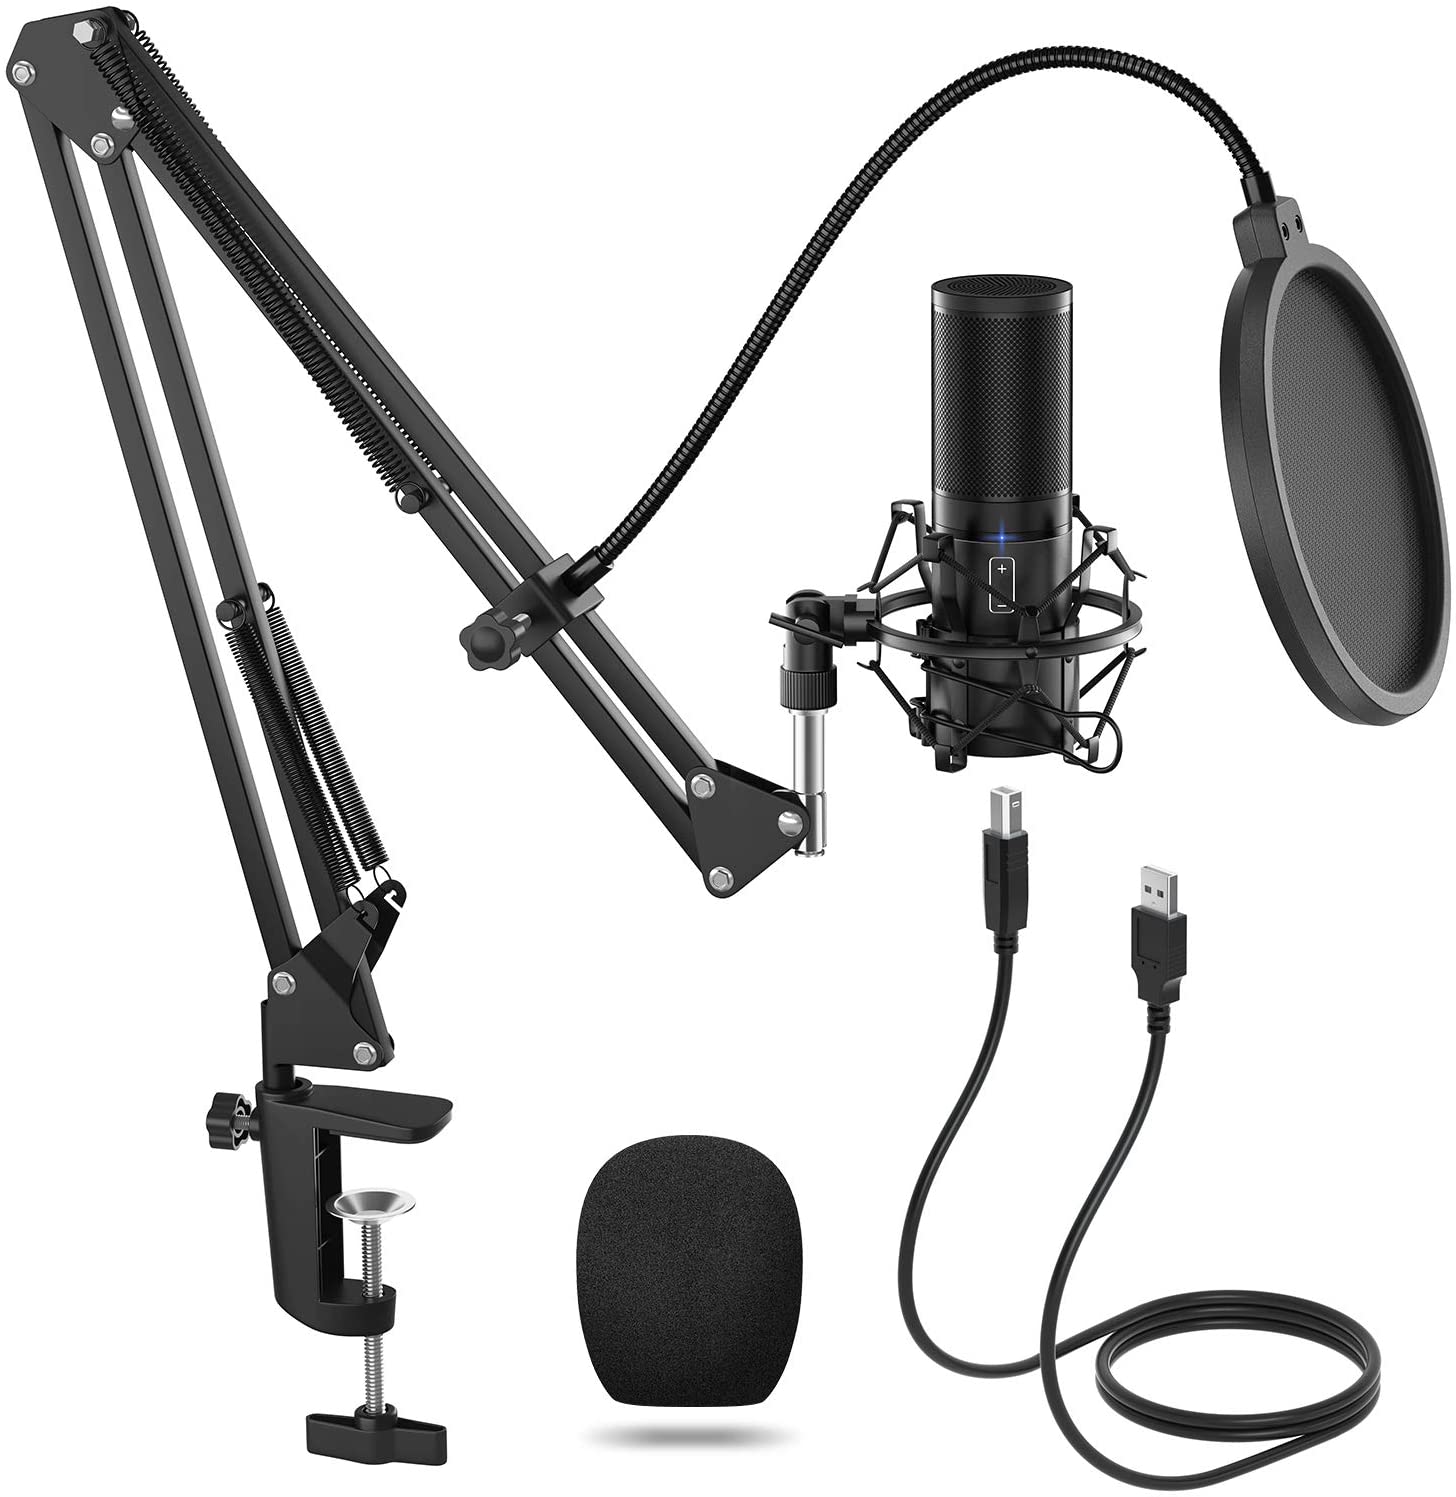
Microphones
One might easily ask – why the heck do I need a mic?
Let’s be candid – you’re still not that awesome a gamer. So, you will need something to keep your audience engaged.
Players who play video games with no audio feedback will soon become boring to others. You will see fewer viewers by the day.
This is why a good microphone is a must. Use it to comment and give genuine reactions during the course of gameplay. It is honestly boring to watch silent streams.
So, get a microphone. It doesn’t have to cost much! It will help your fans get to know you better. This is what gets them to stay and subscribe to your channel.
That’s the ultimate goal, right?
How to choose streaming microphones?
So, which mic to go for?
Ask five people, they will give you ten different options. Consult the store’s salesmen; they will push the most expensive ones. Remember, you are trying to earn money on a low starting budget.
Yet, you cannot afford the quality to suffer with a subpar mic.
A headset with an integrated mic might come to mind, but I’d strongly advise against those. To spare you further trouble, here’s a list of good products to consider for a beginner streamer:
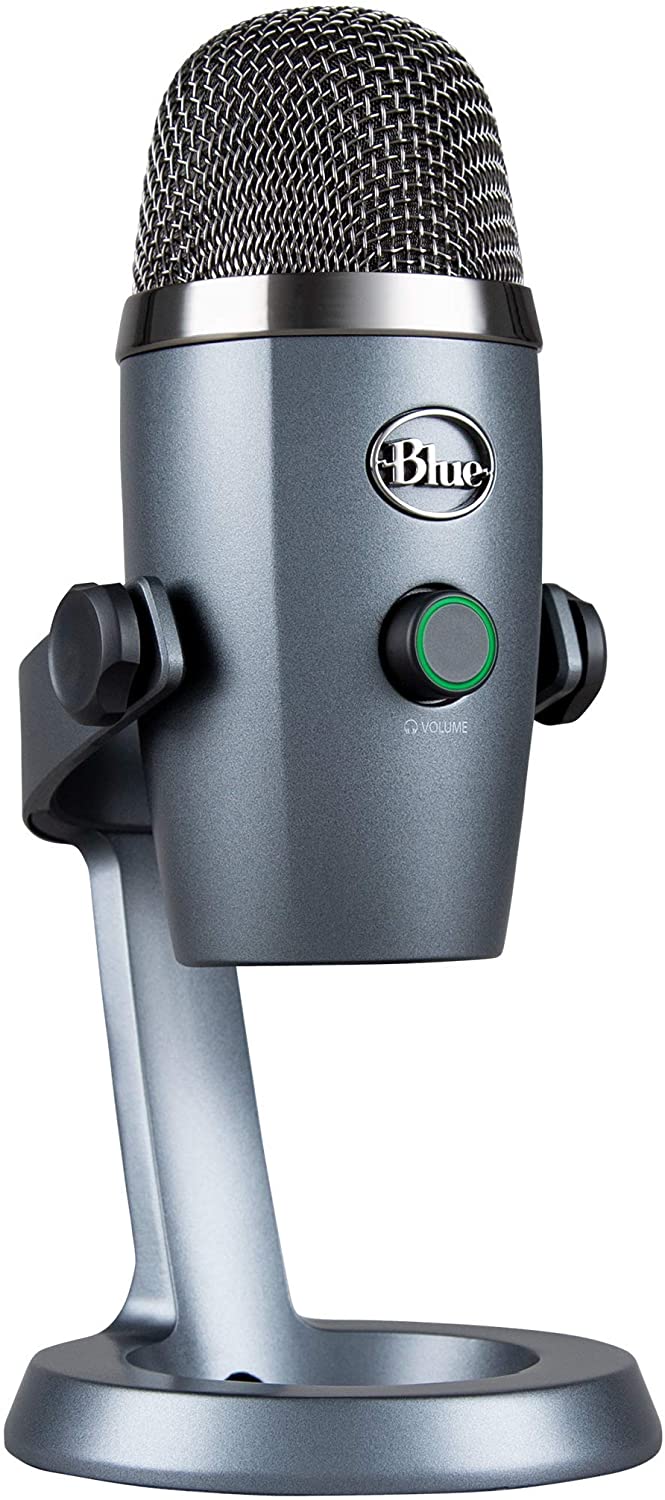
- Blue Snowball
- Blue Yeti X
- Samson G-Track Pro
- HyperX QuadCast
- Maono AU-04 USB Microphone Kit
- Zalman ZM-Mic1
You might still have doubts, but imagine replying to each question by typing out the answers!
Why on earth would you do that to yourself?
Get a mic, dude!
QUICK OVERVIEW: Best Microphone Under 100
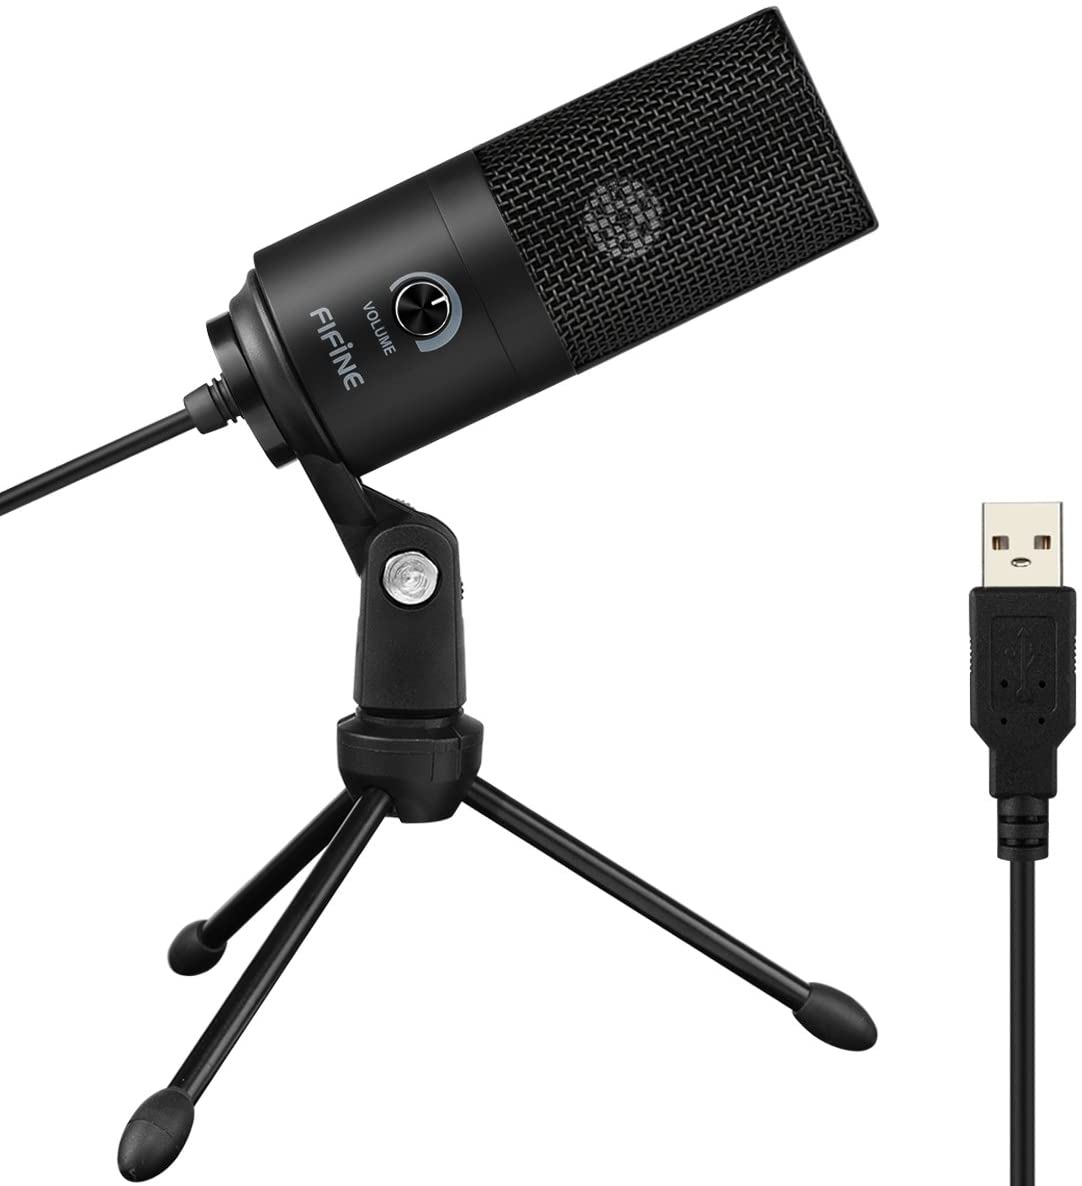 | Fifine
| |
 | Best Choice Tonor Q9
| |
 | Blue Yeti Nano 2
|
Other Streaming Gear
For optimum streaming quality, there are additional factors to consider over a computer, microphone and camera.
Specifically, this is what I have in mind.
- Game capture card – an extremely important asset to those streaming using two computers or a console+computer. You can go for internal or external but bear in mind that you won’t be able to find a good one for anything less than $150. Sorry!
- Green screen – a handy tool for adding/removing the background. In this way, you don’t need to worry about the mess in the room. Just put it on the screen and you’re good to go.
- Lighting – this is not a crucial asset, to be candid, but it will be a valuable one. It will give a better vibe to the overall setting so your stream will look more professional. To avoid too much inappropriate lighting, go with an LED system since it only enhances the existing light, without the interfering yellow rays. Also, beware of the angles how you place the lights – you do not want your face to be lit too much and you do not want to be in the shadow either.
With this, we’ve covered the most relevant aspects concerning the hardware you can stream from.
This means that we are coming to the most important part.
5. Software Requirements

Everybody chooses software to their own liking. Maybe it’s because of the outline, maybe it’s because of the navigation. That’s all fine as long as the software does the job.
There is a variety of streaming software available. However, Twitch beginners should opt for the software encoders (it’s kind of an unsaid rule). With hardware encoders already in the game, you might just as well skip these.
Such a set-up is logical – it’s affordable and simple to use. They are an excellent first choice for beginners opting to stream from their PC.
Typical software choices made by eager new streamers are as follows:
- OBS (Open Broadcaster Software ®) Studio – open-source and free to download, included cross-platform compatibility.
- XSplit – a paid one, so be prepared to spend some dollars to see this one actually work.
- Streamlabs OBS (SLOBS) – available for Windows, make sure your operating system supports this one.
- vMix – as a beginner this software might be a little complicated. Recommended for more experienced streamers.
Keep in mind the Twitch streaming platform is very user-interactive. Always striving to prevent doubts and help its users become valued members of their ever-growing community.
This is why they made a list of recommended software for broadcasting that you’ll find useful. They prepared some basics for each entry, so this is a perfect heads-up for all of you considering joining the community.
Moreover, Twitch offers its own broadcasting software (Twitch Studio) that is as aesthetically appealing as affordable and functional. It is great for all those who are just stepping into the Twitch world.
Before taking any further steps, get informed on each of these. See what they offer and what will work best for you.
And, just to get the gist of how it’s done once you download the software, let’s check a practical example.
6. Installing the Software and Getting Started
It is now time for installing the broadcasting software of your choice.
Let’s say you opted for Twitch OBS, i.e. OBS Studio for whatever reason(s).

The first step is to download the program. After that, you will be asked whether you’d like the OBS Studio to run the automatic configuration wizard. Now, being very impatient, I allowed this for the first time, depriving myself of the chance to get familiar with how it all works.
Later, when I replaced my old PC, I decided to go for the manual setup. As a novice, you will find this helpful in understanding some crucial points of streaming.
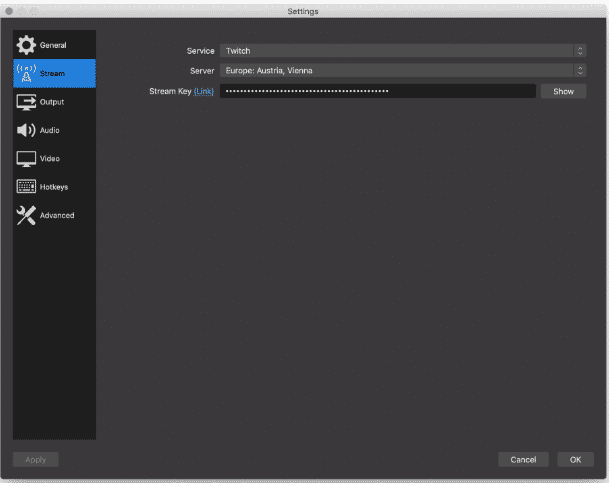
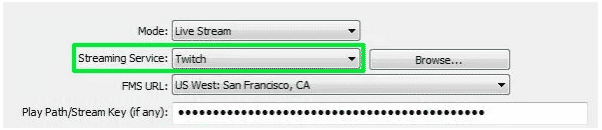
Once you’ve chosen the manual setup option, go to File > Settings > Stream in OBS Studio. You will be asked to choose the streaming service. In the drop-down menu, select “Twitch”. After this, you can either connect using the stream key or by connecting your Twitch account to OBS studio.
If you opt for activation with the key, go to Settings > Channel and Videos. This is where you will find the primary stream key. Copy / paste it into OBS Twitch.
If you opt for the second option, use your regular login information to connect your account to Twitch.
Related: Best OBS Settings
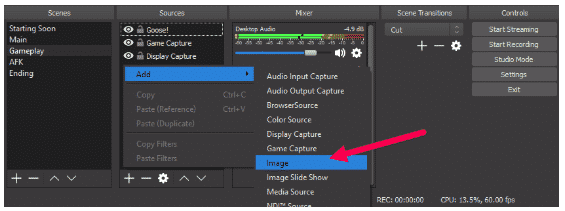
7. Adding Sources to Streaming Software

As we are answering the question of how to start a Twitch stream here, before any of that, know that you have to have adequate sources to stream with.
Video Sources
A stream without a video source is not a stream?
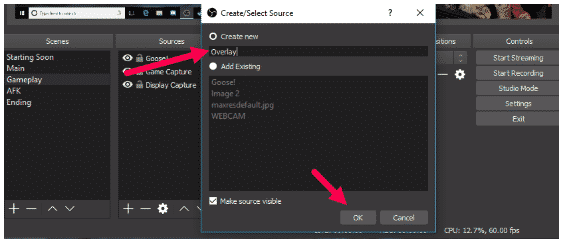
To add video sources to the streaming, click the “+” button in the “sources” field (the main panel of OBS Studio).
Here you’ll find all sorts of sources, such as games, cameras, images, web pages, text files, etc. Make sure to add as many as possible, since you never know when these might come in handy.
Audio Sources
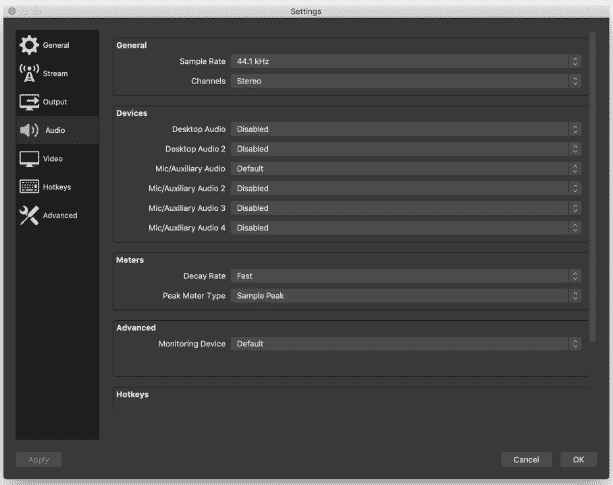
OBS Studio automatically recognizes some of the sources you want to use. Most specifically, it’s the audio sources we are talking about.
Should this not happen, don’t panic. It can be added manually. Go to File > Settings > Audio and make sure to find all the devices you’d like to use as audio sources.
However, there are two lines of thinking here – bear in mind you need different audio sources. One for your desktop (i.e. PC sounds, like the ones heard inside the game you are playing) and another for the sound you want to make (the mic to make your comments heard).
So, mics, cameras, desktops, even the games you want to play need to be added to OBS Studio. Don’t skip any of these, since these are here to make your streaming content worth watching… urging the viewers to come back for more.
Let’s be straightforward – streaming on Twitch sucks without sound. It’s highly impersonal and will cause anyone to lose interest quickly.
Wouldn’t you want to hear that magnificent blast when you finish someone off in a game? Come on, don’t deny your viewers this!
Make the Settings and Features Work for YOU
Streaming is all about making quality content that keeps people coming back for more. So, how do you Twitch stream and have viewers happy with what they see and hear?
Well, with the proper settings.
Naturally, you choose these based on the equipment you have at your disposal, as well as the content you want to broadcast.
You need to be aware of the possibilities with the equipment at hand.
Don’t be an overachiever. It’s not good at the very start! Try to customize the settings to work for your current situation.
For instance, customize audio levels according to how your viewers hear your stream. Don’t just copy someone’s settings, they might not work for you.
Get well acquainted with the upload bandwidth speeds at hand and the encoder power. These will have the greatest impact on the content you’d like to stream. The higher the bandwidth and the stronger the processor (such as newer Intel Core or AMD models), the higher quality of the settings.
I will refer you to the guide prepared by and available on the Twitch platform. It says that a bitrate of 3000 kbps and a basic 720p@30fps stream will do more than fine.
If you’re not sure what this means, in simple terms, you’ll need an upload speed of 5 Mbps. This is just enough for a solid quality stream for someone who’s just entered the streaming world.
Related: Best Twitch Bots
Other Options
We’ve already discussed the basic settings in OBS Studio.
However, if you want to cover up the fact that you are only a beginner, there are other useful options and features that will help you out.
To begin with, there is the option to add scenes that display when starting and finishing the stream, or while chatting with your audience.
For this, you can use your webcam or the current capture from your desktop. You can even make a combo of the two. Moreover, you can go for the pre-installed scenes from OBS Studio, which will also do the job.
Also, highly recommended is preparing a stand-by scene. This way, viewers and fans don’t have to look at your desktop or an empty chair while you are away.
Another useful tip is to use Twitch overlays, alerts, donations, effects, and Twitch panels. They allow you to add a professional look. You will find them under Sources.
The reason why they are good is that they will display basic data on the screen during the stream. This makes it more appealing to viewers.
Moreover, you can import emotes (with the BTTV extension). There is a variety to choose from and are an excellent addition for communication with your audiences.
Of course, this is just to get you covered for several starting streams. As time passes, you will discover a plethora of other possibilities (banners, logos, panels, etc.).
Going Live
At this point I assume you know what you want to stream (a little help coming up right next!)
Note, before deciding the time to go live, make sure to check the following:
- the software is properly installed and the settings are right,
- the camera(s) and mics are properly connected,
- the background is all set,
- you know what type of content you would like to stream,
- making sure the door is locked so there are no sudden interruptions.
If all of these are in order, it’s time to start streaming live, and this is how you can do it.
Press the “start streaming” button found on the dashboard.
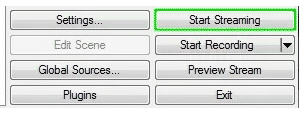
Congratulations – you are going live!
Related: How to Block Twitch Ads in 2021 – 4 Easy Ways
8. Streaming from Consoles

Are you one of those gamers that prefers streaming on a console such as Playstation 4, or maybe you lean towards a smartphone? No judging here!
With these, you can omit software setup, i.e. re-organizing your PC so it’s only good for gaming. And why do that if you have a fully functional console at home?
Maybe you prefer the compactness of your smartphone in your hand? All these are legit points, but how do they work in practice?
Though streaming from a PC is our main point of concern, let’s briefly go through the main steps on starting a Twitch stream from a console.
Step 1: Set Up the Console for Streaming on Twitch
There are several important settings you need to check and set up before streaming on gaming consoles.
- Disable the HDCP – easily found on system settings. Turn it back on when you want to view content from platforms same or similar to Netflix.
- Prepare communication devices – plug in your camera, headphones, or speakers with a mic
- Enable the audio sharing – to do this, click the share button on your PS4 controller and then go to Sharing and Broadcast Settings. Under the section Broadcast Settings, check the Advanced Settings, where you can find the Audio Sharing Settings.
- Set up and monitor the chat – here find the options “Display Messages to Spectators and Spectators’ Comments”, which are listed in the Advanced Settings sections in the previously mentioned Broadcast Settings.
Step 2: Connect the PS4 to your Twitch account
After the initial setup is complete, you will be asked to choose the platform on which you intend to stream. After you select and confirm Twitch as your choice, next make the relevant connection between your Twitch account and your PS4.
You can do this in two ways:
- Using the QR code you can see on your screen, or by
- Visiting the Twitch site from your PC browser or some other device and using the code which you can find on the screen.
After these, you are more or less ready to start streaming. Make a final check, connect and enable a separate camera, pick a name for your stream, and this is it.
9. Streaming from the Smartphone

Should you opt for streaming like this, be warned – broadcast gameplay content from your phone is not advised. You can stream anything else but gaming. This is where a PC has the advantage.
In any case, these are simple steps to doing it right:
- Download the application to your device and make sure to install it.
- Log in with your regular sign-in details (don’t forget the 2FA!).
- Tap the profile photo, found in the upper-left corner, to see the “go live” button.
- Click on this button to start the live stream on your phone.
- Set up the stream and check everything, such as:
- Choosing an attractive.
- Choosing the desired category from the menu.
- Choosing video and audio devices.
- Sharing the link to the stream through the apps on your device.
All that is left to do is to click on the “start stream” button.
10. Creative Requirements

Twitch requires both technical and creative skills. You want your content to be viewed and for your viewers to come back.
The ability to provide the best possible content quality technically is having the right settings, sounds and camera.
But, all of this is in vain if your content lacks this one thing.
I am talking about passion and creativity. It’s no longer enough of a method to play games and keep the viewers coming for more.
I know you’re good, but you’re not on THAT level yet!
Let’s walk through the process of creating interesting and lucrative content. You will learn the difference between good and bad content. This is something a successful Twitch player will understand.
11. Twitch Community Guidelines
Before any of that, there are certain guidelines you simply MUST follow! That is if you want your stream on Twitch to be accepted by the Twitch community.
Yes, there are Twitch community guidelines that you need to adhere to before going online, as well as rules such as Twitch age requirement, Terms of Service etc.
The content you’re going to broadcast needs to follow certain rules to be compliant with these guidelines.
So, nothing offensive, racist, violent, or otherwise inappropriate. Also, check out the list of banned words to avoid.
As an example, we all remember the case of Dr. Disrespect who was banned for good from the platform. He was known for his racist comments, although Twitch never disclosed the reason behind the ban.
Another example of Twitch’s strict policies in action is banning Brad “BlessRNG” Jolly from the platform.
Due to the confirmed accusations of abuse (proven to be true) against his ex-girlfriend, both he and the BTTW emote BlessRNG were removed for good.
It can’t be stressed enough that the Twitch community guidelines are the first thing you need to familiarize yourself with before making any actual moves.
If it seems these are too complicated for you to comply with, you might just as well drop it all before you even start.
Once you decide to push through these, make sure that these guidelines are always at hand (bookmark them or something) due to frequent updates.
As a prospective regular streamer, you must acquaint yourself with these changes in due time. If not, your content may be banned and you won’t know why.
12. Choosing the Best Content to Stream

What is the BEST content to stream?
There are multiple approaches to answering this question. However, here’s what you need to pay attention to.
Subjective “feeling”
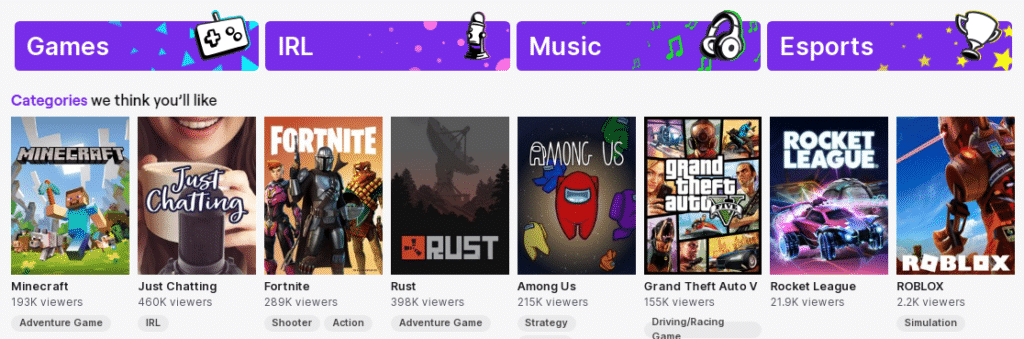
Obviously, gaming is the main reason you came to Twitch and decided to try your luck earning money through their affiliate program.
There are people who are not that great at gaming, and doing it would just result in the utmost frustration. The quick fix, in this case, is to find something else.
Here are some ideas:
- Full body make-up
- House tour
- Giveaway
- Cosplay
- Working out
- Culinary expertise
- DIY (fixing around the house, planting, or like, anything that comes to your mind)
- Fundraising
The key here is to find what you’re good at, what you feel comfortable doing.
Don’t underestimate your audience. They will see right through your attempt to present yourself as something that you’re not.
So, whatever your guts tell you to stream, give it a try.
Do the Research
You need to do some serious thinking about the contents to post and where to find them. So, if your immediate environment isn’t giving you any ideas, you can always resort to research.
Here’s what you can do.
Tip 1: Spend some time as a Twitch viewer
This is an excellent idea if you want to gather all the dos and don’ts in Twitch. For example, follow a couple of the most popular streamers, the ones with average ratings and the ones with the lowest amount of viewers and just observe.
See what you liked them doing, what annoyed you, what you thought was inappropriate. This is how you will gain a better understanding of your audience and what appeals to them (cause, you are the audience). Being merely a viewer for a while tells you what your future audience wants to see and be part of.
Tip 2: Mind the saturation
There are so many content creators out there doing the very same thing.
Find something similar, something that is gaining momentum, that is only to come. This will give you the necessary skills for later on and you’ll be better than the rest. Not to mention that it will give the audience a very much-needed diversity.
Tip 3: Read the forums
The threads on forums such as Reddit will be an eye-opener.
This is where you can find all sorts of ideas on streaming content. Besides, people are very open here with displaying their views of different topics, Twitch included, so consider these as an endless source of streaming ideas.
13. Keeping Your Audience Interested in Your Twitch Streams

The most important aspect of any stream is the audience. The first thing to note is that you need a catchy title to attract the audience.
This is how to do it.
- Brim with confidence – the audience wants to see someone who knows what she or he is doing. Even if you are a beginner, make sure to cover up your inexperience as best as you know.
- Be honest – the audience can tell when you are just beginning to stream. So, if you are aware that you reek of inexperience, tell them. Also, express your hopes and expectations that they will be there to laugh with you, root for you, and cry with you, if necessary. Also, writing a good Twitch bio can help here as well.
- Listen to what they have to say – no need to explain further.
- Choose what kind of streamer you want to be – plan if you want to stream one type of content only or you want to go into different topics. Let the audience know this ahead and stick to your choices.
- Be consistent – stick to your streaming choices while having streaming consistency. If you say you will follow-up on the same topic in the stream, make sure to really do it.
- Go easy – your first streams should be as simple and easy as possible. Go with something more demanding once you have acquired the skills. The audience does not want to come to your first stream to watch you struggle with gaming and chatting at the same time.
- The surprise factor – every once in a while, organize a surprise stream.
- Easy-going is the way to go – laugh with them at your mistakes. Don’t be stuck-up. Make fun of yourself and the mistakes you make. The audience will appreciate you more.
- Engage them – Ask them to suggest the next step in the game or ask them plainly what topics they want you to cover next. In this way, they are transitioning from observers to active participants.
- Be polite No. 1 – Avoid excessive cursing, however hard that may be sometimes. A juicy swearword will escape every once in a while, but try not to make it a habit.
- Be polite No. 2 – say “please” and “thank you”! Always say “hello” when you are just starting the stream, say “goodbye”, let them know that you cherish their presence.
- Make use of social media – social media keeps your audience engaged even outside Twitch. Plus, more people get to see and hear from you, as well as access your Twitch channel.
- Make use of other top streamers – Co-streaming makes the audience all the more interested in what’s coming up next. Perhaps you will make friends and get an invite to join a popular Twitch team at some point.
- Protection of the competition – Don’t advertise yourself in somebody else’s broadcasts. That is so not OK. You will turn out to be a pretentious ass.
- Use the software to the fullest – Start adding overlays, copyright music, scenes, emotes to make your stream more interactive and appealing to the audience.
- Always check things – that is, before any streaming session, check the hardware and gear, check the setting and settings too.
Final Word
This article is meant for all those of you who are struggling with getting the highly-needed audience for your stream and all of you out there who are still thinking about whether it’s all worth it.
Now, it’s up to you to heed the counsel of the wiser and reap the fruit of perpetual success. For any question you might have, shoot us a message! You can also check out the video about 100 tips to improve Twitch streams!
