Thanks to the open-source OBS, anyone can become a streamer.
Best OBS Settings
- Open OBS
- Open Settings and then Output
- Set Video Bitrate to 4000kbps
- Set Audio Bitrate to 320kbps
- Go to Advanced and set Keyframe interval to 2
Creators implemented a bunch of OBS settings for twitch, so streamers can create quality content even without any experience.
At first, the OBS might seem intimidating and, as a beginner, you could feel overwhelmed by the available features and options.
This article will cover the best OBS settings for Twitch streaming - features suitable for amateurs that want to learn how to use OBS, and professionals hoping to upgrade their twitch streams.
Best OBS Settings for Streaming
OBS is an open-source platform that you can easily download from the official OBS website to Windows or Mac computer.
This encoder software is RTMP-enabled. Any Twitch streamer knows the importance of a great encoder and OBS’s protocol connects a streaming platform (such as Twitch) and its encoder.
OBS studio streaming settings are numerous - you can add videos from multiple sources, connect the webcam to the OBS studio and share recorded videos, adjust audio, add layovers, or plugins.
Some of the OBS features are more important than others. If you want to create quality content, do your homework - learn more about OBS optimal settings for twitch
OBS and Streamlabs OBS
Which One to Pick?
Before we dig into the best streaming settings for OBS, let’s talk about the best two available OBS platforms.
Both OBS and SLOBS are free to download and use, so you are probably wondering which one would be better.
All of the best Twitch OBS settings mentioned in this guide are available in both versions.
When it comes to SLOBS, it is a lot simpler - OBS, in general, is a beginner-friendly platform, but SLOBS looks simpler than standard OBS, so you might feel more encouraged to use it as an amateur.
On the other hand, standard OBS will follow your progress. It might take a bit longer to learn to navigate it, but once you learn basic features, there will be many advanced ones to try.
Also, because OBS is created by multiple amazing tech-geeks, it is frequently updated, and new features are constantly added.
SLOBS also implements new features, but significantly slower.
Testing the Upload Speed
Good Connection is a Key to Success
If you do not have a good internet connection, with a proper upload speed, you will have trouble live streaming, no matter how you adjust the settings.
So, firstly, go to speedtest.net.
By clicking on the "Go" button, you can start the speed test. The program is looking at a few different parameters and performs several tests to get your internet speed.
When it is done, you will see results for Ping, Download, and Upload speed.
Streamers should focus mostly on the upload speed - everything above three megabits per second is great.
If you have an upload speed of over ten Mbps, you can use all of the best settings for OBS streaming.
Improving the Default Settings
Tweak Them as You See Fit
When you download OBS, some general and advanced settings are automatically set.
Firstly, you will have to change these default settings.
So, open OBS and click on the Settings, then open the tab for General Settings.
Many settings are considered general, and do not worry - you do not have to change everything.
For Output, uncheck the box for “Automatically Record when streaming”. If you are recording while streaming, you will slow down the program.
If this box isn’t checked, then just leave it as it is.
At this point, you can also change the theme or choose another language. Changing either won’t affect the stream in any way - these are for your comfort.
Now, you can adjust some of the advanced settings.
OBS should have priority over other programs, so go to Process priority and change it from normal to above normal.
Whatever is happening in the background won't affect the stream, because OBS has priority.
The next step will require you to restart OBS, so make sure that you have saved all of the changed settings.
In Sources you will see “Enable Browser Source Hardware Acceleration”, and in most cases, the box next to this setting is checked as well.
If you keep it that way, you can expect a few problems with the browser, especially if you are using Google Chrome.
Once it is unchecked, restart OBS, so you can proceed to the next thing.
Setting Up Stream Settings
General Adjustment
In this part, you won’t only learn about the best Twitch stream settings, but about streaming in general.
Adjusting the Stream Settings
Go to OBS, and open the Streams tab.
For Service, choose Twitch and for server past the link for one of the proposed ingest servers.
When it comes to linking Twitch and OBS, you can do it directly or with a stream key.
Both ways are simple, and here is how to do it.
1. Stream key
Every Twitch account has a unique Twitch stream key.
You can find it on your profile, copy it, and paste it in OBS.
With a stream key, the two platforms are linked, so you can easily share videos.
2. Direct linking
Many streamers prefer to link two platforms directly than to do it via stream key.
When you choose the Service, you can log-in to Twitch via OBS.
Right below the box for Stream Key, you will notice an option “Connect Account”.
Once you click on it, a new window will open - input your username and password.
Streamers that link Twitch and OBS directly unlock Docks.
This feature allows you to add Twitch chat and a few other Twitch tools to the OBS.
So, when you are editing something in OBS, you can see what is happening in Twitch chat.
Adding Docks
If you do not want to add Twitch tools, then you can move on to the next step.
Adding Docks is super easy.
When opening a default OBS window, click on "View" and then "Docks".
All of the tools will be listed, so check the ones you want to see and add. Then move them wherever you want.
Output settings
Simple and Advanced Modes
In Settings, right below Stream, you will find the Output tab.
Video and audio, the two most important settings, belong to the output settings, so when you are adjusting different parameters, take your time. If these are not set correctly, your viewers won't be pleased with the quality of the content.
Firstly, set the right output mode. There are two choices - simple or advanced.
Advanced output mode is recommended, but both will be reviewed, so you learn how to get the most out of OBS even if the less preferable option.
1. Simple mode
Simple output mode is a default setting, so you do not have to change anything.
If you plan on sticking to it, you will have to adjust a few other things in the Output tab.
Take a look at Streaming - some of the parameters are automatically chosen.
For both video and audio bitrate, lower numbers are placed.
Keeping these values will result in a low-quality video - you won't be happy with it, and your viewers won't be pleased either.
So change those values - choose a higher bitrate for both.
If you aren't sure how much you can improve the bitrate, go back to the internet speed test to see how fast your internet is.
Bitrate should be around half of the internet speed - either exactly half or just slightly below.
For example, for the upload speed of two thousand megabits per second, the bitrate should be not higher than one thousand megabits per second.
2. Advanced mode
As said, this is the preferred mode for streaming.
Changing these settings will be a bit more difficult, but the result is great - quality content that will help you stand out among thousands of streamers.
So, change the output mode from default simple to advanced mode.
Encoder
Now, let’s take a look at the encoder for streaming.
You have two options - CPU encoding or hardware encoding.
Keep in mind that not every hardware is able to stand hardware encoding, so sometimes you can't choose between the options and have to stick to CPU encoding.
- CPU encoding - if you choose CPU encoding, choose x264 for the encoder. This option has one big flaw, which is lower latency, but it allows you to create videos of great quality at lower bitrates. Also, if you have two PCs, you should consider sticking to CPU encoding. This is also a great option for PCs with a better CPU compared to GPU.
- GPU encoding with NVENC and QuickSync - with hardware encoding, you will significantly decrease the usage of CPU. Also, the latency period is higher, but you will have to set higher bitrates to create good quality videos.
Once you've chosen the encoder, check the box next to the "Enforce Streaming Service Encoder Settings”.
Rate Control
There are multiple options for Rate Control: CBR or constant bitrate, Lossless, VBR, and CQP.
Since streaming websites prefer controlled bitrate, always choose CBR - it will keep the bitrate the same throughout the entire stream.
CQP is mostly used for recording. It maintains the proper quality of the video, but the bitrate fluctuates so many streaming websites cannot support it.
Again, always check your internet speed. CQP is a superior option, but it will work well only if you have an outstanding internet speed. In this case, your internet will be able to transport these fluctuating bitrates and maintain the quality of the recorded video.
CBR is a safer option - once you’ve determined the upload speed, you can set the bitrate easily, and make sure that quality stays the same during the stream.
If you still aren’t sure which bitrate to set, head over to twitch - they have a table with suggested frame rate, bitrate, and resolution based on your internet upload speed.
Keyframe Interval, Preset, and Profile
OBS sets the keyframe interval to 0 automatically. You can keep this default setting - during the stream, the twitch will easily adjust.
However, it is recommended to change the default value to 2.
For choosing the right preset, firstly get to know your PC. This is only for streamers that use x264 encoding.
If your PC is average, then you shouldn’t use Max Quality. Even Quality setting might be too much for the computer. These settings are recommended to streamers that have top computers, that won’t struggle during the stream.
Others can go for either Performance or Max Performance.
When it comes to Profile, you have only two options - High or Main, out of which most chose the first one.
Stream Audio Settings
Choosing Devices, Sample Rate, Meters, Hotkeys, and Mixer
Right below Output is OBS Audio settings.
There are four things you should concentrate on.
1. Sample rate
In General, you will see the sample rate.
The default value is 44Hz, but you can set a slightly higher one. Windows default sampler rate is 48Hz, so if you are using Windows, why not adjust it to match theirs?
You can keep it at 44Hz - the audio will still be good, but 48Hz is one of the best OBS settings for Streaming on Twitch.
2. Devices
OBS automatically pickups desktop audio, but you can connect other devices as well.
If you plan on using a microphone, add it as one of the OBS devices, so the program can record your voice as well.
3. Meters
Leaving default settings for meters is okay.
If you want to have an insight into how load you are talking, then change to True Peak.
4. Hotkeys
With hotkeys, you can easily set different actions.
For example, they allow you to change a scene during a live stream or turn the webcam on and off.
Do not worry if you don’t figure out how they work immediately. This is one of the features that require some experience.
5. Audio Mixer
So, once you’ve connected additional audio devices, you should test the sound.
Your viewers should be able to hear your voice clearly, but also enjoy the sounds from the game.
The audio mixer contains all of the settings for audio quality, and it is super easy to adjust them to get a clear tone.
On the bottom of the default screen, you will find an Audio mixer.
Every device has a separate slider, so you can slightly lower the desktop audio and amplify the sound of your voice.
Also, there are many filters - sound effects that improve the audio quality.
Stream Video Settings
Resolution, Downscale, and FPS
What are preferred video settings?
Well, this will also depend on your desktop.
Firstly, you will have to set the right base or canvas resolution and output or scaled resolution.
If you go for a higher resolution, you will also have to set the higher bitrate, which will require better settings for the encoder - something that not every PC can easily handle.
So, there are a few rules you should stick to.
1. Base Resolution
This is the resolution of OBS’s canvas, and you can set it to match the resolution of your screen.
In most cases, this resolution is 1920x1080.
It is best to match the canvas resolution to stream resolution, so the CPU doesn't struggle too much.
2. Output Resolution
This is the resolution of the videos you share with your viewers.
As said, if you choose a higher resolution, you will have to adjust the bitrate.
Both have to match the encoder and you can take a look at the previously mentioned table on Twitch, to make sure that you are setting the right parameters.
3. Downscale Filter
Often, canvas and scaled resolutions do not match. Typically canvas resolution is slightly higher.
A downscale filter is there to help you deliver quality videos even when the two resolutions aren't matching. So you can set higher canvas resolution, and make streams with great scaled resolution.
If you cannot set too high canvas resolution, choose Lanczos for Downscale Filter - the videos will have a smooth look, without overloading the CPU.
4. FPS Value
There are a few tricks when it comes to setting an FPS value.
The parameters will significantly impact the quality of the stream, so you have to choose them carefully.
Setting the higher values can be too much for some computers.
If you are streaming in 720p, then set FPS to 60. This will look better than streaming in higher resolution, with 30FPS.
Also, you can change FPS from Common Values to Integer, and just input any number of you want.
Streamers with powerful computers can even set FPS to 120.
The Best Plugins for OBS
Useful OBS Addons
OBS has an advantage over other software because of its versatility.
It allows you to add plugins and expand its abilities, so you don’t ever feel the need to switch to another software.
So, once you’ve grasped the basics, you can consider adding one of these plugins (or all of them):
- ReaPlugs VST - this plugin will additionally improve the audio quality of your mic;
- Plugin for motion-effect - for extra transitions and animations
- Tablet-remote - if you do not own a stream deck, you can use OBS tablet-remote. It will simulate the stream deck on any smartphone.
How to Record with OBS
Step 1: Add a new source and scene
Go to the Sources tab, click on the “+” icon and add the new source. Then go to the Scenes tab, and add the new Scene in the same way.
Step 2: Record with OBS
1. Record your screen - If you want to record everything happening on your screen, choose Display capture in Sources. If you have another monitor, then select “1+.”
2. Webcam recording - Use a “Video capture device” to record what is happening on your webcam.
3. Audio recording - If you want to record the desktop audio, you should select Output capture. Select Input capture if you want to record microphone audio. Audios from the two sources will be recorded on one track. You can choose separate tracks in Advance audio properties.
Step 3: Pause the recording
You can press Pause and stop recording whenever you want. Add new scenes, layers, or sources, and continue recording.
Why should I choose the OBS screen recorder?
Why should you choose OBS instead of another software?
Here are a few pros.
1. You can record different audio channels at the same time.
As you probably already know, when you are streaming, OBS automatically picks up desktop audio.
Well, this audio is captured even when you are recording.
You can also add other devices, such as a microphone, or speaker, and record these sounds as well.
Furthermore, sound from video conferences will be just as clear as well.
Options are endless, and you won’t have to worry about the quality of the sound.
2. Multiple video sources
When it comes to recording, there are a few options.
Desktop capture will record what is happening on your screen. Because many need only one tab to be recorded, they choose Window capture.
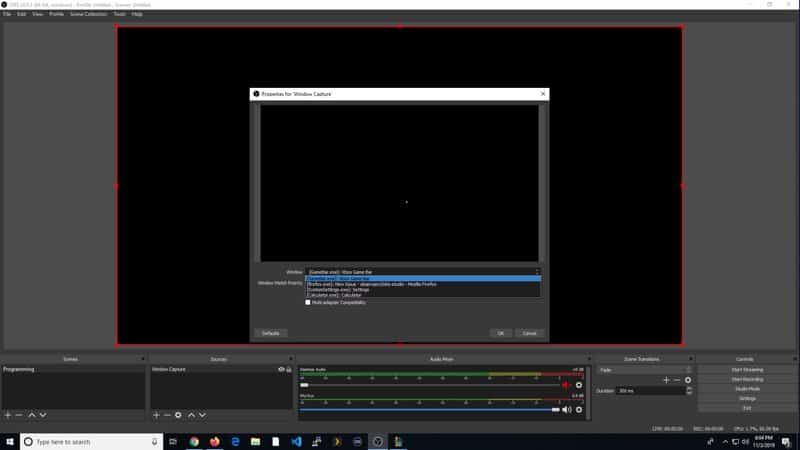
In that way, you can select only one of the open tabs, and keep everything else open on your desktop hidden.
3. Layers
All sources in OBS function as layers, which gives you plenty of versatility.
As said, you can connect multiple devices, and show captures from different angles.
During recording, you can switch between different layers, show all these angles, and create quality videos.
4. Compatibility
Not as much software is compatible with multiple OS and multiple streaming platforms. OBS is!
Once you are done recording, you can easily share the video with your Twitch audience, or upload it to YouTube, Facebook, Mixer…
Where are Recordings Stored?
By default, OBS is saving all videos in the Video folder and you can easily change the location of the files.
Firstly, create the folder on your computer.
Open the OBS settings menu, and choose Output.
Open the Recording tab and add the location in the Recording path - you can either past the location or click on Browse to add it.
If you need to convert files, select Remux recording in Files.