Donations are important part of the streamer’s income. Let’s take a look at how to set up donations on Twitch by following these simple steps.
Step 1: Set Up Donation Panel
First thing you can do is create and customize the donation panel on your Twitch profile page. This helps your viewers to easily navigate to the donation page via the link.
Step 2: Use Third-Party Software to Set Up Donations
There are number of different tools you can use to set up donations on Twitch, including Streamlabs, StreamElements, and more. In this guide, I used Streamlabs, read about it below.
Step 3: Set Up Payment Option
As for the payment option to use for donations, most streamers use PayPal, so I explained how to set up PayPal on Twitch in this guide. You can also set up donations in cryptocurrency, which is also explained below.
Step 4: Attract the Audience to Donate
In order for people to donate to you, there must be some incentive. I listed some of the most common ways to attract viewers to donate on Twitch.
If you want to earn some extra money and achieve your dreams as a streamer, now is the perfect time to set up a donation panel on Twitch.
Doing this should certainly assist you in developing your channel and maintaining the right direction on your path to success and growth on this popular platform.
In this straightforward guide, you will learn how to set up donations on Twitch easily.
Stay with us as we delve into it.
Table of Contents
How to Set Up a Twitch Donation Panel?
In this section of the guide, we will teach you how to set up a Twitch donation button in a few simple steps.
The first step is to set up a Twitch donation panel. This enables you to receive donations from your dedicated audience, which will aid in your growth as a live streamer.
You can easily arrange this panel directly on your profile. By following these simple steps, you should be able to set up a Twitch donation panel without any difficulty.
You can easily do this from your Twitch channel. There, you can set up a donation panel and customize it by simply pressing the panel button.
After a quick click, a large box will appear. Inside the box, you will see a cross sign. Click on it again.
You can then choose between two options: inserting a text panel, which is the first option, or inserting an image panel.
After these initial short steps, consider the next important factors.
Select a name and an appropriate description for your Twitch panel. Ensure that both elements accurately reflect your brand in the best possible way.
Just one more step is needed to complete the setup of your donation settings and Twitch donate button. That final step is to choose the payment options you wish to use. After that, you can begin receiving tips.
You now know how to set up a donation button on Twitch.
Remember to express your gratitude to everyone who supports you.
Wishing you the best of luck!
Third-Party Platforms for Setting Up Twitch Donations
Among the many options available, some sites provide stream alerts and payment services for donations at no cost. Stream alerts are notifications that appear on your screen after a donation is made.
The top third-party platforms commonly used for setting up Twitch donations are Muxy, Stream Elements, StreamLabs, and Own3d Pro. These platforms are the most popular among streamers.
This guide will demonstrate how to set up donations on Twitch using StreamLabs. Other platforms have comparable settings, so it would be beneficial to learn more about what those settings offer in StreamLabs.
How to Set Up Twitch Donations Using StreamLabs?
Let’s explore the best way to set up Twitch donations with StreamLabs.
The first step to accepting payments through SteamLabs is to link your StreamLabs account with your PayPal account.
However, if you have never used PayPal and do not already have an account, you will need a few minutes to create a new one.
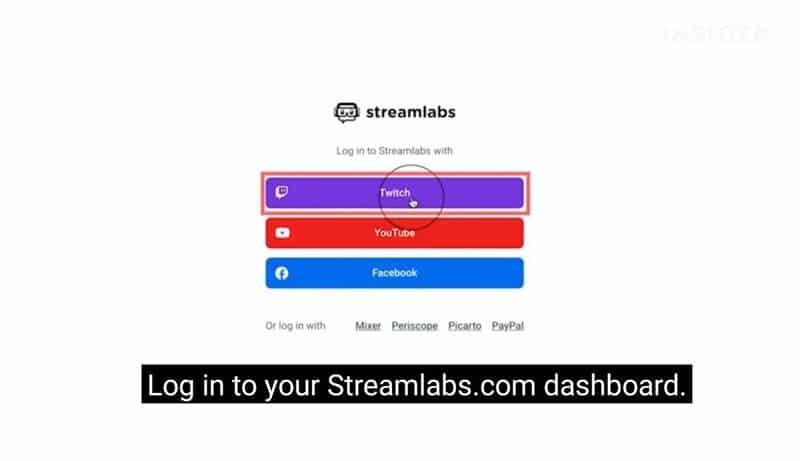
The next step is to select an option to log in to StreamLabs. Click the Twitch button and proceed with the process.
In the bottom left corner, you should see the Settings Options section. Click on it, and then select the payment option that suits you best.
This option enables you to connect donations from your viewers to StreamLabs.
Next, you should create a donation panel that links directly to your Twitch channel.
In the top right corner, tap on your user icon.
When you click on it, select the third option from the top, which is the Channel button.
Click “Chat”.
Next, navigate to “Edit panels.”
Once there, you just need to add a photo or insert the text you want.
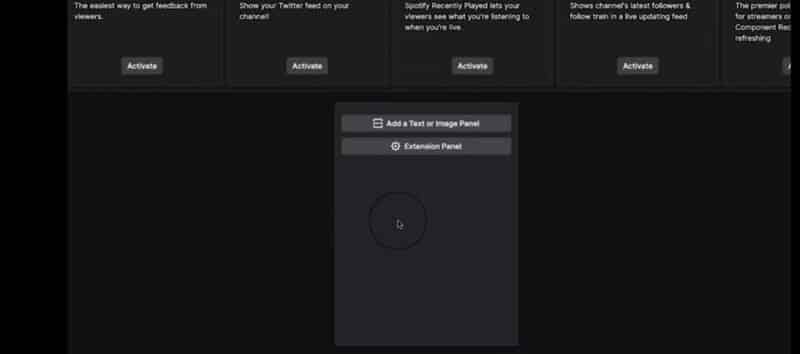
It would be beneficial to fill in all the gaps you have. Consider your panel name and its description.
This is how you can appear more confident to other streamers who appreciate your work and wish to support you.
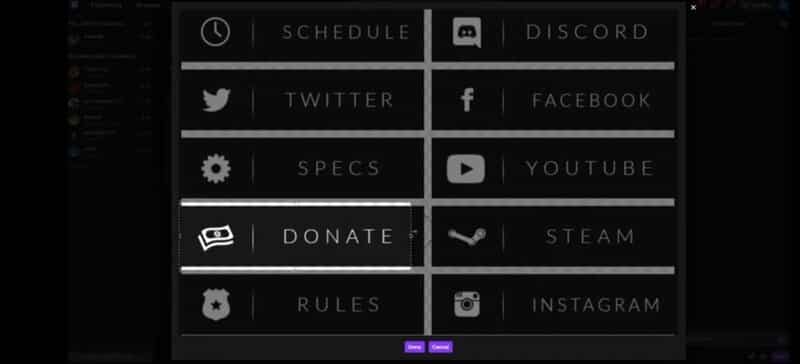
However, if you don’t have much time to do that, you can simply add an image to your donation panel.

After you have added a picture to your panel, select the donation option available in your Twitch bio panel.
The next step is to add the link for your donation, which you can find on your StreamLabs page.
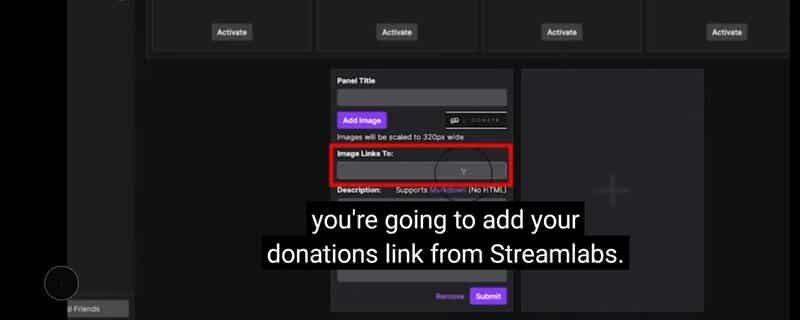
To locate the link in question on StreamLabs, you need to access the StreamLabs dashboard.
In the search field, type Donations Settings. Once you open it, copy the yellow bar above that contains the link.
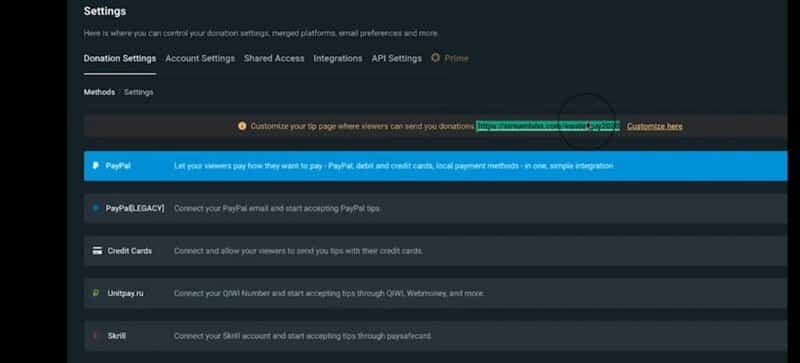
Take a few steps back, copy the link you need, and paste it into the appropriate field.
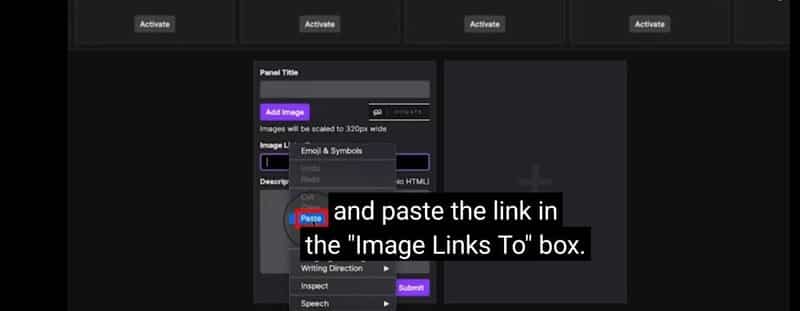
This is the final step you need to take. In a few seconds, you should see a donation link that will be visible to your viewers whenever they visit your channel.
How to Set Up PayPal for Twitch
The vast majority of popular streamers use PayPal as their default payment option for receiving Twitch donations.
To set up a PayPal payment option on Twitch for receiving tips, the best choices are the Twitch bits or subscription option.
Follow the steps below to set them up.
If you choose to use PayPal to configure your Twitch donation settings, it could save you a significant amount of time.
Setting Up Donations as a Twitch Partner
However, if you choose to set up Twitch donations through subscriptions, the first step is to go to your Twitch channel.
Search for the option Achievements.
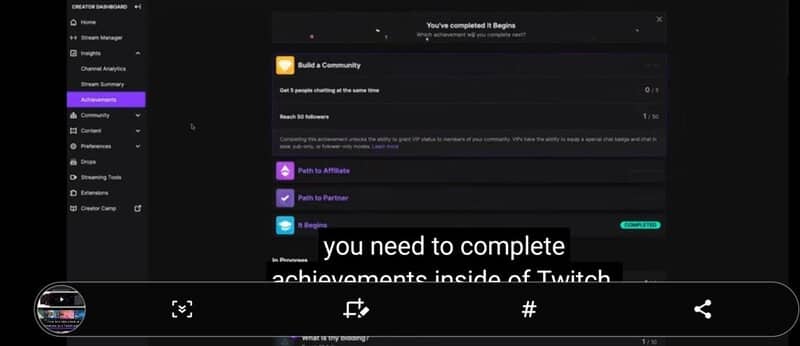
Below the Build a Community section, find the option Path to Partner and click on it.
You can choose from the following benefits. Review them and select the first monetization option.
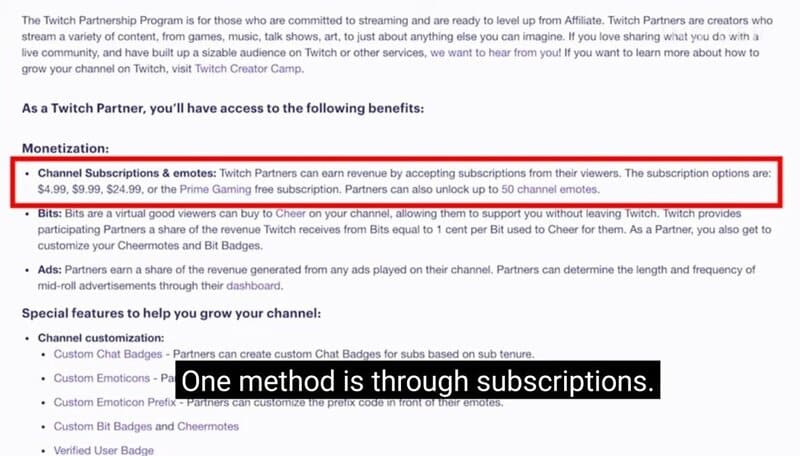
This option enables you to make monthly donations as a live streamer. Check out the image to see what you can offer and what you will receive each month.
If you are wondering how to enable bits on Twitch, select the second option and continue with your action. To learn more, refer to the picture below.
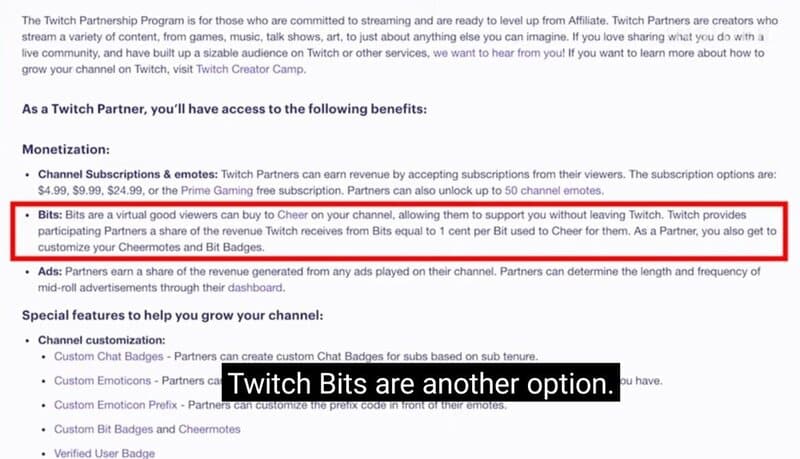
The window containing Bits currency forms will appear immediately after selecting Bits monetization.
Choose the option that is most convenient for you and proceed with the process.
To proceed, please click on the button Get Bits.
This step will open a link to your PayPal account.
This allows you to log in and will link your PayPal account immediately. It will also facilitate a donation process for all your viewers who wish to donate.
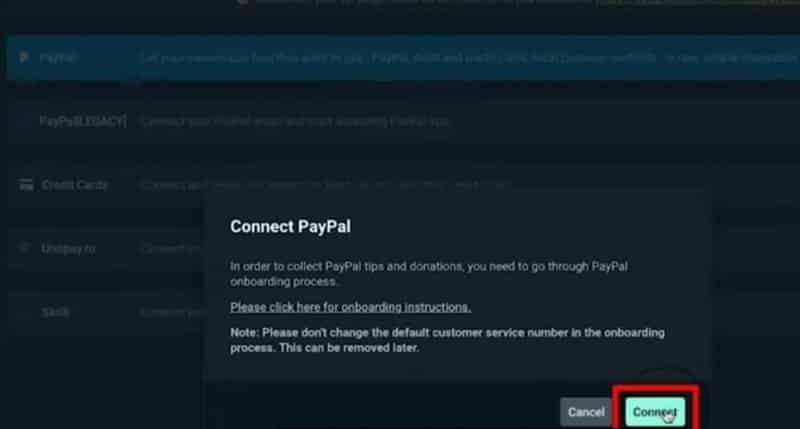
Confirm the final step and begin utilizing donations. Now that you know how to enable donations on Twitch as a Twitch Partner, you can do so once you are verified on Twitch.
How to Donate on Twitch with Cryptocurrency?
To avoid scams and fraud on the internet or major platforms like Twitch, using cryptocurrency is the best option. Let’s explore how to donate on Twitch with cryptocurrency!
Cryptocurrency is essentially digital money. You do not receive physical cash; everything occurs online.
You can purchase it using our credit card, and a portion of this digital currency is stored in digital wallets. Funds can be stored online on your computer or other hardware.
To utilize these types of donations, the first step is to create your digital wallet.
The most popular wallets used by streamers are Bitpay and Coinbase.
The next step is to select a donation currency.
The final step is to verify all the previous steps. Once you have completed these steps, copy the link to your donation panel and confirm the action.
External Twitch Donation Risks
Donation risks may arise when an individual cancels a donation transaction a few days or weeks later. While this occurrence is rare, it can still happen.
Before you begin any type of transaction on Twitch, be aware that as a streamer who accepts donations, you are required to pay all taxes and fees as mandated by law.
As a streamer, the only issues you may encounter are fees from various payment services that you must cover if someone cancels a donation after a transaction.
To prevent similar situations, consider using alternative methods for making donations, such as Bits or cryptocurrency donation options.
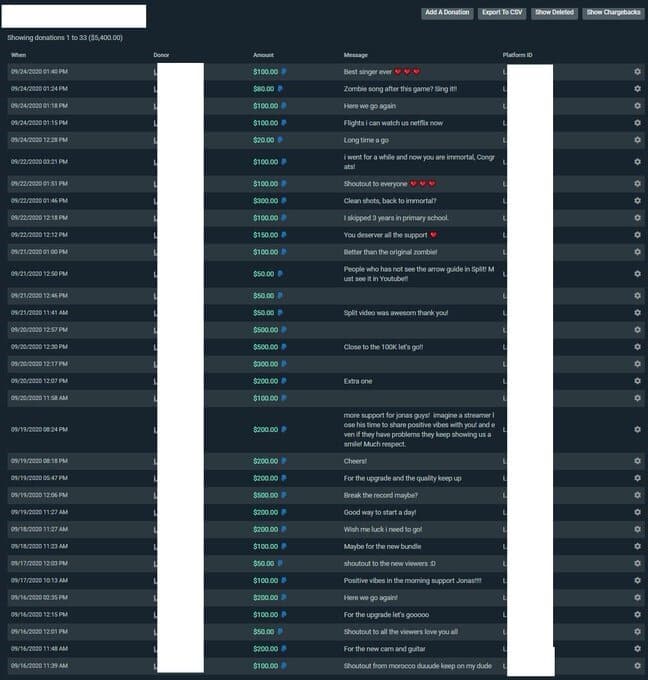
How to Obtain Donations on Twitch Through Alternative Methods?
There are several actions you can take to receive donations on Twitch, and they are entirely free.
These actions are enhancing the streaming quality on your Twitch channel daily, attracting more viewers who are inclined to donate to you.
Here are a few examples.
1. “Thank All My Viewers” List
This is the first item on your must-do list as a streamer.
Create a list of your viewers and express your gratitude to each one. Thank all the viewers who have contributed to your channel, as well as those who have not yet donated.
In this way, you appreciate any effort someone has made to help you achieve your goal as a Twitch streamer.
Other viewers who have not yet donated may change their minds and begin contributing to you.
Being grateful costs you nothing, and it is a lovely gesture.
2. Giveaways Streaming
People who follow you will value you more if you offer them something as a reward for their efforts. Demonstrate your gratitude by giving your followers some symbolic gifts.
If you are a gamer, you can provide them with a game character, a weapon, or some additional coins and lives.
Avoid being selfish and demonstrate that to the world.
3. Twitch Donors List on Your Twitch Profile
That is also one of the best gestures you can make to thank your donors.
Compile a list of your top donors and share it on your channel. You can categorize the list in a way that you find most suitable for you and your donors.
List their names and surnames, and include their donation amounts next to each name.
This is an effective way to engage potential donors, as people enjoy competition. More importantly, everyone likes to win and to feel special.
4. Progress Bar Leading to a Goal
People are always curious about how a streamer they follow utilizes their donations and what items or causes the streamer chooses to support with those funds.
If you invest that money in enhancing your presence on a platform like Twitch, inform others about it.
Create a progress bar on your Twitch channel to display your final goal to your audience.
For instance, if you plan to use donations to enhance your game streaming, provide more details about how you will implement these upgrades.
Conclusion
Every Twitch streamer understands how challenging the streaming journey can be, and each one is aware of how difficult it is to make progress among streamers on major platforms like Twitch.
The support of other viewers is significant, and it can impact a streamer’s objectives.
Always remember your identity and your objectives.
We hope this guide on setting up Twitch donations will assist you in growing within the streaming world and that you will begin to make significant progress with it.
