You may be familiar with the Blue Yeti microphone, the best-selling USB microphone for streaming and podcasting. However, you might not be aware of the optimal Blue Yeti settings for streaming.
The Blue Yeti is one of the most popular microphones for streaming, but it can be challenging to set up. That’s why we’ve created this blog to help you make your Blue Yeti USB microphone work effectively for you.
The Blue Yeti USB microphone is generating significant buzz in the market for live streaming.
Many people are using the Blue Yeti microphone to deliver a clear and focused voice that resonates well with their audience. The Blue Yeti is an outstanding microphone suitable for streaming.
In this section, we will examine the Blue Yeti settings for streaming and how you can adjust them to enhance your live streaming experience.
Blue Yeti Basic Settings for Streaming
If you're looking to begin streaming, the Blue Yeti USB microphone is an excellent choice. It's a versatile microphone suitable for various applications, and it's quite affordable.
To set it up for streaming and improved broadcast vocal effects, there are a few steps you need to follow.
First, you will need to adjust the microphone's gain. This refers to the level of amplification that the microphone applies to your voice.
Begin with a lower gain setting and gradually increase it until your voice is sufficiently amplified.
Next, you will need to adjust the microphone's pattern. The pattern dictates how the microphone captures sound. For streaming, it is advisable to use a cardioid pattern.
This pattern captures sound from the front of the microphone, making it ideal for streaming.
Finally, you'll need to adjust the microphone's output. This refers to the volume of the signal that the microphone produces. You should adjust this until it reaches a comfortable level for you.
Once you have adjusted these basic settings, you will be ready to begin streaming with your Blue Yeti microphone.
Do I Need a Mic Stand for Blue Yeti to Stream?
A mic stand can assist in positioning the microphone in the ideal location for your needs and keeping it out of the way when not in use.
This will enable you to place your microphone in the best position for optimal audio quality while also helping to minimize any unwanted noise or echoes.
Additionally, using a microphone arm stand will free up your hands, allowing you to concentrate on your game or any other activity while streaming.
If you're serious about streaming, you'll need to invest in a microphone stand.
Blue Yeti Pro Settings
If you want to maximize the performance of your Blue Yeti Pro streaming setup, there are several steps you can take to optimize your settings.
First, ensure that you have the correct input levels set. You should adjust the mic gain so that your voice is clear and loud, but not so loud that it causes clipping.
Next, examine your output settings. If you are using the Blue Yeti Pro as your primary audio source for streaming, set the output level to line level. This will ensure that you receive the best possible audio quality from the Yeti Pro.
Finally, if you are using the Yeti Pro for both streaming and recording, set the sample rate to 48 kHz. This will provide you with the best audio quality for both applications.
By following these straightforward tips, you can optimize your Blue Yeti Pro settings for a better streaming experience.
Blue Yeti Advanced Settings for Streaming
If you want to elevate your streaming experience, it's essential to understand the advanced settings of the Blue Yeti. By adjusting a few key settings, you can significantly enhance the quality of your stream, providing your viewers with a much better experience.
First and foremost, ensure that your internet connection is reliable. A weak connection can lead to choppy video and audio, so it's essential to have a strong signal.
Once you've addressed that, it's time to focus on the settings.
First, open the Control Panel and select the 'Settings' tab. From this section, you can adjust various parameters, including microphone gain, headphone volume, and more. Experiment with the settings until you find a configuration that sounds good to you.
Next, navigate to the 'Advanced' tab and ensure that the 'Enable Automatic Gain Control' option is checked. This will guarantee that your microphone level is consistently optimized, resulting in clear and reliable audio.
Finally, review the 'Compression' section and ensure that the 'Enable Compressor' option is checked. This will help balance your audio levels, preventing your stream from sounding excessively loud or too quiet.
By following these simple steps, you can significantly enhance the quality of your stream. So, go ahead and give it a try—your viewers will appreciate it!
Key Settings for Blue Yeti in Twitch Software
If you're considering starting to stream on Twitch, one of the most essential items you'll need is a quality microphone. The Blue Yeti is a favored choice among many streamers, and for good reason. It delivers excellent sound quality, is relatively affordable, and is easy to use.
To achieve optimal sound quality from your Blue Yeti on Twitch, there are several settings you should adjust. Here are the ideal Blue Yeti settings for streaming on Twitch.
First, ensure that you set the microphone to "cardioid" mode. This will help minimize background noise and enhance the clarity of your voice.
Next, adjust the microphone gain until it reaches a comfortable level for you. You want to avoid having the microphone set too loud or too quiet.
Finally, if you are using an audio mixer, you will want to send the Blue Yeti's signal to the mixer's "mic" input.
This will enable you to adjust the microphone's volume and EQ using the mixer, providing you with greater control over your sound for Twitch streaming.
Blue Yeti Mic Settings for OBS
If you want to enhance the sound quality of your Blue Yeti mic in OBS, there are several steps you can take.
First, ensure that you are using the correct settings in OBS. Navigate to Settings > Audio and set your microphone to 'mic 2'. Next, go to the Audio Mixer and confirm that the 'mic 2' channel is boosted by +20dB.
Next, consider adjusting the position of your mic. The Blue Yeti is a directional mic, so it will perform best when it is aimed directly at your mouth.
Ensure the microphone is correctly positioned—approximately 6 inches from your mouth and slightly tilted upward so that your voice is directed straight into the mic.
Next, adjust the mic's sensitivity settings to ensure it clearly picks up your voice or sound source without capturing excessive background noise.
Finally, consider investing in a pop filter, which can help reduce unwanted plosives in your voice. This tool can eliminate popping sounds, enhancing the audio quality of your YouTube videos and providing a clearer listening experience.
By following these simple tips, you can significantly improve the sound quality of your Blue Yeti mic on OBS.
When to Use Blue Yeti for Streaming?
If you're searching for a high-quality USB microphone for streaming, the Blue Yeti is an excellent choice. It provides outstanding sound quality, delivering clear and rich audio.
It is ideal for use with Skype, Twitch, and other streaming platforms, and it delivers clear, professional-sounding audio.
It is also very easy to use, featuring a simple plug-and-play design. Additionally, it is quite affordable, making it an excellent choice for budget-conscious streamers.
If you're ready to elevate your streaming experience, the Blue Yeti is an excellent choice.
There is no universal answer to this question, as the optimal time to use a Blue Yeti for streaming will depend on your individual needs and goals.
However, generally speaking, the Blue Yeti is most effective for streaming when you require high-quality audio that can be easily captured and transmitted in real-time.
Additionally, the Blue Yeti is suitable for streaming if you need to record your stream for later use.
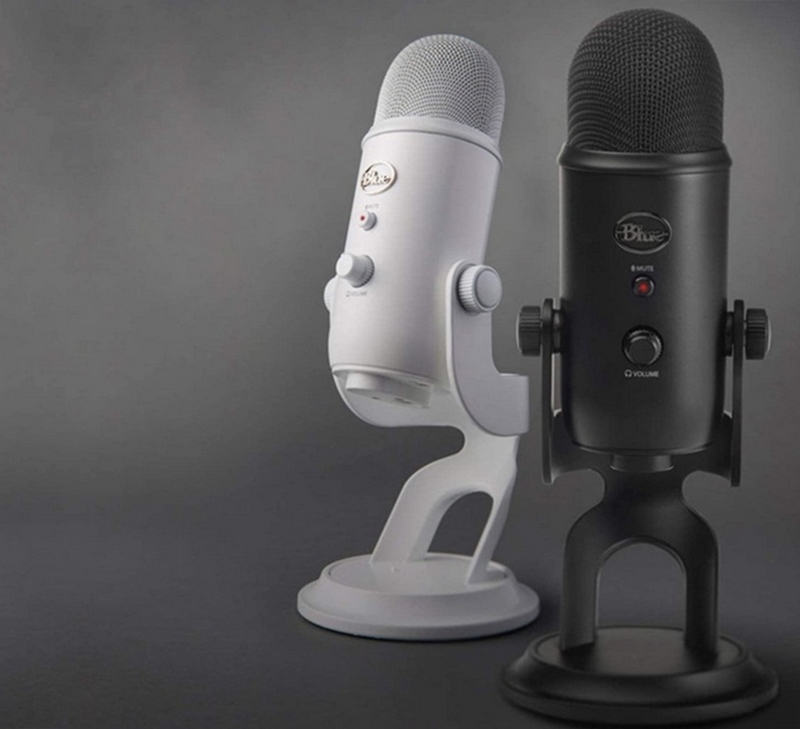
Difference Between The Yeti, The Yeti Pro, And The Yeti Blue
The difference between the Yeti, the Yeti Pro, and the Yeti Blue lies in their specifications: the Yeti is the original version of the microphone, the Yeti Pro is a more advanced model, and the Yeti Blue is a more affordable option.
The Yeti Pro offers superior audio quality compared to the original Yeti, while the Yeti Blue has lower microphone quality than the original Yeti audio input device.
The Yeti, Yeti Pro, and Yeti Blue are all microphones designed for professional use. They are USB microphones, which means they connect to a computer through a USB port.
The Yeti is the most fundamental model, featuring two pattern settings (cardioid and bidirectional) and a built-in pop filter.
The Yeti Pro is a more advanced model, featuring four pattern settings for recording (cardioid, bidirectional, omnidirectional, and stereo) and a detachable pop filter.
The Yeti Blue is the premium model, featuring four pattern settings (cardioid mode, bidirectional mode, omnidirectional mode, and stereo mode) and a built-in pop filter.
All three models are compatible with both Mac and PC.
The Yeti is the most fundamental model, designed for use with Skype and other VoIP applications. The Yeti Pro is a more advanced model suitable for music recording and capturing ambient sounds.
The Yeti Blue is the most advanced model, designed for recording music, multi-person podcasts, broadcast audio, and various other sound sources.
Blue Yeti Mic Not Working
If you notice that your mic is not functioning, or if Blue Sherpa is unable to detect Yeti, there are a few steps you can take.
First, ensure that the mic is turned on and the volume is adjusted to a suitable level. If that doesn't resolve the issue, try unplugging the mic and then plugging it back in.
If it is plugged in and you still do not hear any sound, try unplugging it and then plugging it back in. Occasionally, the connection may be loose and requires reseating.
If that doesn't work, try rebooting your computer.
Ensure that the microphone is securely connected to your computer. If it is, check your computer's sound settings to confirm that the Blue Yeti is selected as the default input device.
If that doesn't work, you may need to update your Blue Yeti drivers. You can do this by visiting the Blue Yeti website and downloading the latest drivers for your specific operating system.
If none of these solutions work, you may need to reach out to Blue Yeti customer support for further assistance. Hopefully, one of these options will help you get your mic functioning again.
How To Use Blue Yeti Microphone On Mac
If you want to use your Blue Yeti microphone for streaming on a Mac, there are a few steps you need to take first.
First, connect your microphone to your Mac using the USB cable that came with it. Once connected, open your audio settings and select the microphone as the input device.
You may also need to adjust the microphone's input level in your software settings. To do this, open the Audio MIDI Setup utility. In the window that appears, you will see the Blue Yeti listed as a device. Double-click on it to access the device settings.
In the device settings, set the format to 44.1kHz, 16-bit. This will ensure that the audio quality is sufficient for streaming. Next, select the input and output channels.
For the input, select the microphone channel. For the output, you can choose either the built-in speakers or headphones.
Once you have configured the audio settings, you are ready to begin streaming. Open your preferred software and select the microphone as the input. Then, simply click the go live button and start streaming in your broadcast studio!
Conclusion
The optimal Blue Yeti settings for streaming vary based on the type of stream you are conducting and the quality of your internet connection.
If you're just starting, it's advisable to keep things simple and run a lower-quality stream. Once you feel comfortable, you can begin experimenting with the settings to find what works best for you.
There is no one-size-fits-all answer, so experiment to find what yields the best results for you. Happy streaming!
FAQ
Which Blue Yeti setting is best for streaming?
The bidirectional setting captures sound from both the front and back of the microphone, which can be beneficial for streaming in a noisy environment.
Is Blue Yeti good enough for streaming?
Moreover, it is very easy to set up and use, which is another important factor for streamers. Overall, the Blue Yeti microphone is an excellent option for anyone seeking a quality microphone for streaming.
How do I set up my Yeti to stream?
You will need to adjust your Yeti's settings to achieve the best sound quality, so experiment with the gain and pattern controls until you are satisfied with the results.
Once your Yeti is set up, you are ready to start streaming! Just hit the "go live" button in your streaming software and begin sharing your voice with the world.
How do I make my Blue Yeti mic sound better on OBS?
Finally, access the Windows sound settings and make sure the Blue Yeti microphone is set as the default microphone.