Stream Marker – Full Guide and 5 Best Ways to Add Markers

Updated On:

Editing down your VODs in order to get great stream highlights can be a very consuming task for both you, your mods, and editors, and the feature on Twitch called stream markers is very useful in that regard

Today, we’re gonna be focusing on what is stream marker and everything you need to know about them as well as several different ways of creating and using them.

And I’m very happy to tell you that it’s not hard at all to create them, so let’s jump right in and see what it’s all about.

Basics of Stream Marker

As you might have heard, the Twitch stream markers are a very useful thing for streamers, especially if you post your VODs (which you should be doing.)

While these are visible only to you, they will inevitably be very helpful to engage existing fans, mostly when editing clips and highlights.

Stream markers tend to be mostly used for timestamping, in order to then make it easier for you and your editor to create highlights from past broadcasts.

You can add markers to multiple segments and create clips that will be used to share your content on other social media platforms, like Instagram, so you can promote your content to a larger audience.

Or, you could even make full YouTube videos out of these.

Overall, the main purpose of these is easier editing.

Whenever you start a new broadcast, you will be able to add them to your current stream, so it will save you a lot of time since you won’t need to rewatch the content again and again.

Now, I assume that you’re wondering how exactly you should go about making these from your previous streams, or even a future live stream, and there are many different ways to go about it, so let’s go and make some Twitch stream highlights.

Adding Stream Markers

You don’t have to be a world-renowned video producer to find your way around this, it actually takes only a few simple steps.

twitch dashboard
  1. Open Twitch and go to Creator Dashboard
  2. Click on the Quick Actions tab
  3. Press “+” on the right side section and Add Stream Marker, and it’s the one that you should pick
  4. The timestamp you chose will be added to your Highlighter’s timeline
twitch markers

You can use markers in multiple different ways, and you can go around creating highlights in different ways, too.

Using Stream Markers

The main purpose of markers is to edit your content and create highlights.

You add them to the current timestamp‚ and by doing that marker quick action, that specific time will be marked.

You can then use these when highlighting and making a new highlight with the highlighter tool.

Having this will ease the process immensely.

Just remember, for this to work on your Twitch stream, you will need to enable Past Broadcast storage on your Twitch account, and that’s how you store Past Broadcasts.

You can’t have a Premiere or a Rerun for markers, so that’s something to keep in mind.

Now that you know this basic use, let’s see how you can take advantage of stream markers.
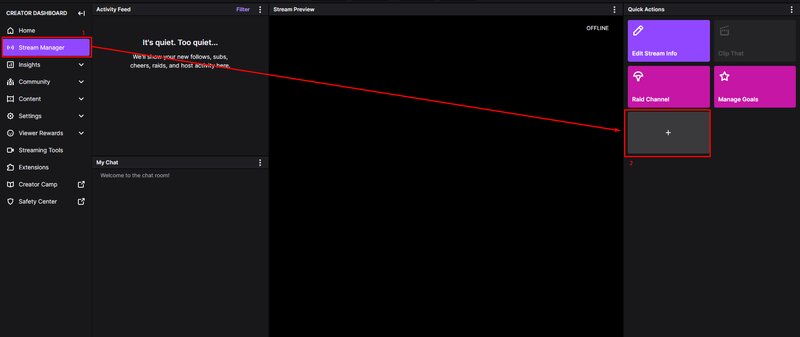
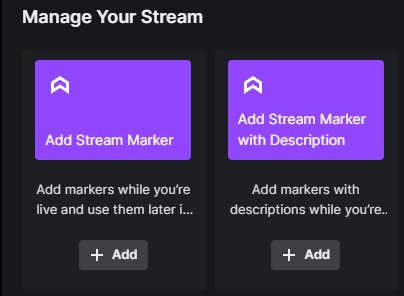
1. From the quick actions panel

One way to use the markers is via the quick actions panel. This is how to do it:

  1. First thing’s first, you have to be live when you’re doing this
  2. Once you’re in, access the Creator Dashboard
  3. From here, navigate to the Stream Manager page
  4. A Stream preview will open, and in the mid section, you will see your livestream
  5. On the right side is the Quick Action menu, where you should click on Add Stream Marker with Description

2. Hotkey for stream markers

You may or may not know this, but Twitch actually assigns different hotkeys and it’s the same ones overall, so if you already have an account on Twitch, you are able to use them.

These are default for both PC and Mac.

On PC, you can just press Ctrl + B to add a stream marker, and on Mac, press ⌘ + b.

Before starting to do this, you need to be on the Quick Action panel inside your Stream manager.

If it’s not, then none of the shortcuts will work.

3. Chat command

You can do this by typing a command in chat, and all you need to do is type the “/marker” command.

If you want your marker to have a description, which I recommend you do since it will make the process of making a highlight even easier, then you just type in the same command, only with the description you want.

For example: /marker game over.

You can type in anything you want, since this is something that’s going to be visible only to you.

Once you add in the marker, you will get a chat message, saying that this is visible only to you.

The description cannot be more than 140 characters long, so you don’t have too much space for describing your Twitch chat commands.

4. Nightbot commands

Nightbot is a chat bot that is able to do quite a lot of things, and one of them is creating markers for your stream.

There are a few steps you need to follow if you want to have commands for Nightbot as your main tool for doing this:

  1. You will do this from their website, so go to nightbot.tv, and once it loads, and then proceed to sign in
  2. Nightbot should then be authorized to have access to your Twitch account
  3. Now, find the Nightbot Dashboard, and there you should find a button that says Join Channel, and that’s how Nightbot will join your channel
  4. In case you see a red button that says Part Channel, then you don’t need to do anything, since this means that your channel is already joined
  5. Now, follow the path Nightbot Dashboard > Commands > Default commands, and have the command called Stream marker command be enabled
  6. Now you need o check whether the !marker command is enabled, and if it’s not, you just need to click on the Enable button that’s on the right from the command
  7. Go back to your Twitch stream
  8. Once you open the chat, type in /mod nightbot and that’s how the Nightbot will become the moderator of the chat on your channel
  9. Now all you need to do is type in !marker or the same command with a short description, and it will be added as a marker

5. Via stream deck

Elgato stream deck and a stream deck software that you like working with can also be used for this, as you can set a button on your stream deck to be used to automatically add markers.

  • In the software for your streaming deck, open the Stream deck software preferences
  • In the section where all your accounts are, add your Twitch account, and log in with the needed details
  • After that, choose Create Stream Marker in your stream deck software
  • Choose one of the buttons on your deck and assign it to this action, the Create Marker one
  • Now, all you need to do for making a marker is hit that button

Using Stream Markers for Highlights

Stream Marker

As you know, markers are best used for making highlights on your channel.

To do this, you need to go to the Video Producer section and take the following steps:

  1. Start by going to the Twitch Dashboard
  2. Visit the Content tab
  3. Now go to the Video Producer
  4. All of your previous videos will be shown now
  5. Find the video you want to make highlights of, and from all the options, choose the Highlight option
  6. Your marker will stand as a yellow stamp in the Timeline section
  7. Click on the 10-20 seconds before your marker and that’s going to be your start segment
  8. Hit the Start segment at the playhead button, or drag the marker how long you want it to be
  9. Click on the timeline on a point that’s 10 to 20 seconds after the marker, and that will be the end of your clip
  10. Click on the button that says End segment at the playhead
  11. The stream will now only play the highlighted segment, so you can check if you have what you want
  12. Enter the title you want for the highlight
  13. Publish your clip

Adding the Stream Marker to OBS

Adding a Stream marker is also possible to do in OBS, and here’s how you do it:

  1. Open the Creator Dashboard on Twitch
  2. Find the Quick action menu in the Stream Manager
  3. By clicking the three dots in the upper right corner of this section, you will find the Pop-up option
  4. Copy that URL
  5. Open your OBS
  6. Access the OBS Docks menu
  7. Find the Custom browser docks option and choose that one
  8. Name the dock Quick action menu
  9. Paste the previous URL you copied
  10. Now you need to click on Close and then apply
  11. You might have to log in to your Twitch, but otherwise, that’s it!

Fixing the Stream Marker Not Working

If you are only starting with streaming, it’s not a big issue if something’s not working, so firstly, don’t worry about this one.

Now that you’re all calm, go to your settings and make sure that you have the Always Publish VoDs checkbox on.

This is how you will do that:

  1. Go to Twitch and straight to your Creator Dashboard
  2. Go to the Settings section
  3. Once you’re in there, click on the Stream section
  4. Go to VoD-related settings
  5. Enable he option to allow Twitch to Store Past Broadcasts
  6. Turn on the Always Publish VoDs option that’s in the same section

Conclusion

Stream markers can be quite good to use for both you and your editors, and it’s also very easy to use them and add them in, so there is no reason why you should avoid them.

You have several different ways of adding them in, so I’m sure that you will find a way to incorporate them into your streaming routine.

FAQ

How do I find stream markers?

Stream markers can be found on the Timeline when you go to your Video producer section. When you open the clip you want to edit, the markers will show up as yellow stamps on the timeline.

What is a stream tag?

Tags are things that are used by streamers in order to filter and describe their streams if they want to go beyond just the simple category they are in. They are used to better describe the stream and to push the content to more viewers.

What are good stream tags?

Good stream tags are the ones that describe the streamed content well. The tags need to be relevant to your streaming style, so whether you’re family-friendly, and also they need to have something to do with your game.

newsletter subscription

Download FREE Twitch Growth Book + 2 Emoji Packs

Join the crew and download anything you like from our resource center.

author on the blog

Dyami Rodriguez

Hey! I'm Phantom and welcome to the boo crew, I love making content for spooky games or honestly even FPS. I hope to be able to interact with all of you (especially you…you reading there..(: ) Come check out my streams! A follow wouldn't hurt anyone either (; Stay ghastly and keep it nasty!

Follow me on:

Twitter

Twitch

TikTok