Having a quality microphone is essential for streaming, but it can be quite costly. This can pose a challenge for new streamers, as the paycheck is often not very high when starting out.
However, you don’t need an extremely expensive mic to achieve good sound quality. Today, I will teach you how to make your microphone sound great on stream. The most important factors to consider are:
Remember that these tips are applicable to any microphone you own, so you don’t need to spend hundreds of dollars on professional mics.
Table of Contents
Stream Mic Settings That Will Enhance Your MIC SOUND by 10x! [OBS & Streamlabs]
Audio (podcast) format for those of you on the go
Mic Placement and Positioning
Let’s begin with microphone placement and positioning.
Mic Distance
One of the most apparent facts you likely already know is that the closer the microphone is to your mouth, the louder the sound will be.
First, you need to determine a balanced distance based on the type and quality of the microphone.
You don’t want to position it too far away, as it may be too quiet. Conversely, you also don’t want to place it too close, as the sound it produces could be excessively loud.
Polar Patterns
Now that I’ve mentioned mic type, an important factor to consider is the polar pattern of your microphone.
The polar pattern type essentially determines the direction from which your microphone captures sound in its environment.
There are six primary types of microphone polar patterns:
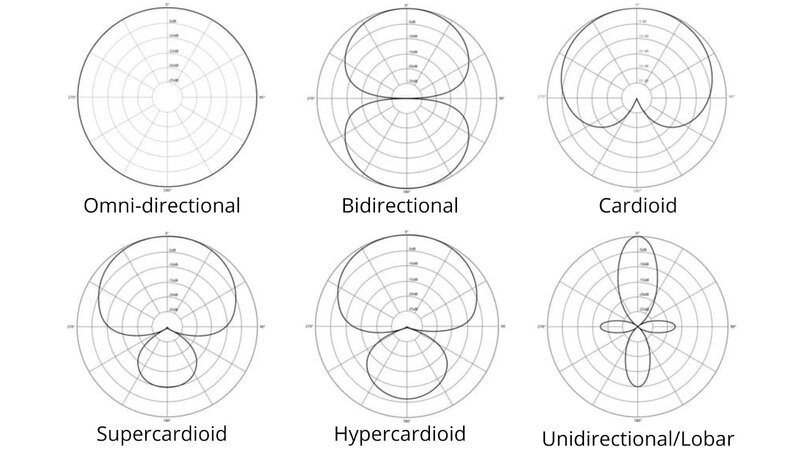
Understanding your microphone’s polar pattern can assist you in positioning it correctly.
For example, most USB streaming microphones are cardioid, meaning they primarily capture sound from the front and somewhat from the sides, while the back does not pick up any noise.
This means you can position the front side towards your mouth and the back side towards your keyboard, ensuring it won’t pick up keyboard noise or may only capture a slight amount of it.
On the other hand, you may have noticed many streamers holding their microphones upside down. This is because they use a microphone that captures sound from both the front and back. By positioning the mic upside down, they can avoid picking up typing noise.
Mic Stand/Boom Arm
To assist you further with microphone positioning, you can use additional accessories such as a mic stand or a boom arm.
Adjusting Streaming Software Settings
Having explained mic placement and positioning, let’s now move on to a more advanced topic.
In the next section, I will explain how to use various settings in your streaming software to enhance your microphone’s sound quality during the stream!
For this purpose, I will use OBS Studio, as it is one of the most popular streaming software options available.
However, please remember that much of what I will discuss can be applied to Streamlabs and other streaming software.
Adding a Device to OBS
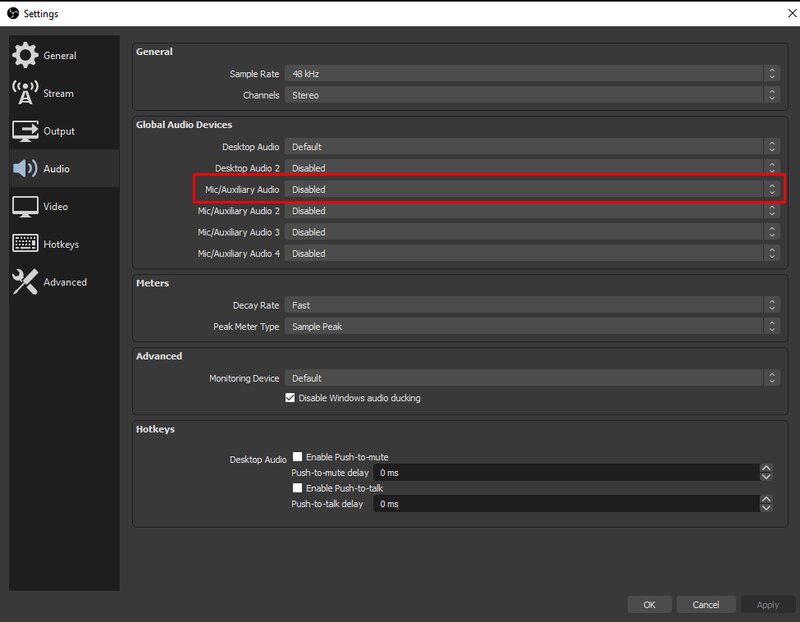
Before we proceed, you need to add your microphone to the Audio Mixer in OBS. To do this, go to File > Settings > Audio > Mic/Auxiliary Audio and select your microphone.
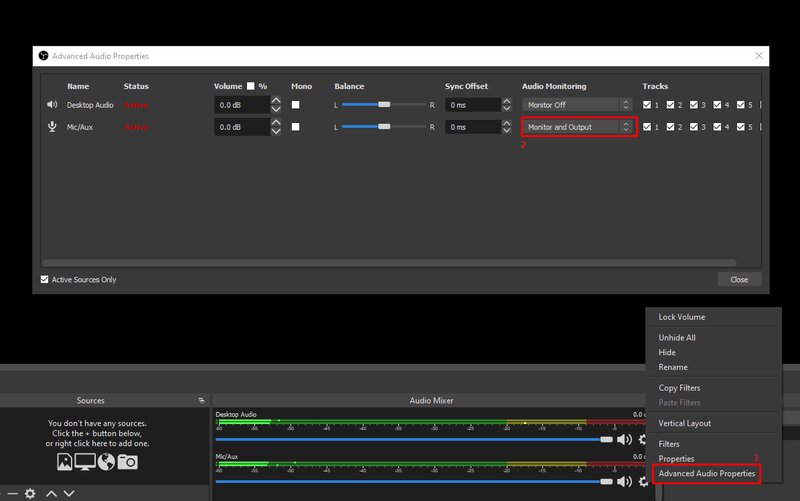
After that, since this is a test, you want to hear yourself speaking through the mic in your headphones, right?
To enable this setting, simply click the cog icon next to your microphone in the Audio Mixer at the bottom, select Advanced Audio Properties > Mic/Aux, and in the drop-down menu, enable Monitor and Output.
How to Make Your Microphone Sound Great with Filters?
Now that your mic is prepared for use, the next step is to add specific audio filters that can help to enhance the sound quality of your streams.
1. Compressor
The first filter I want to introduce is the Compressor. Its function is to equalize your microphone audio, ensuring a consistent level regardless of how loud or quiet your voice may be.
To add this filter, click the cog icon again, as in the previous step, go to Filters, and a new window will appear. Then, click the “+” sign in the bottom left corner and select Compressor.
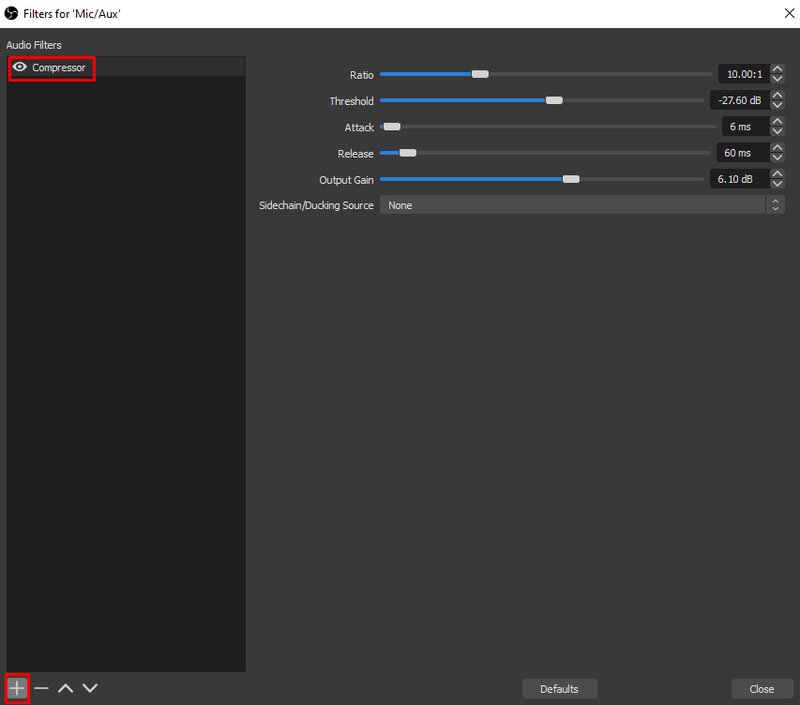
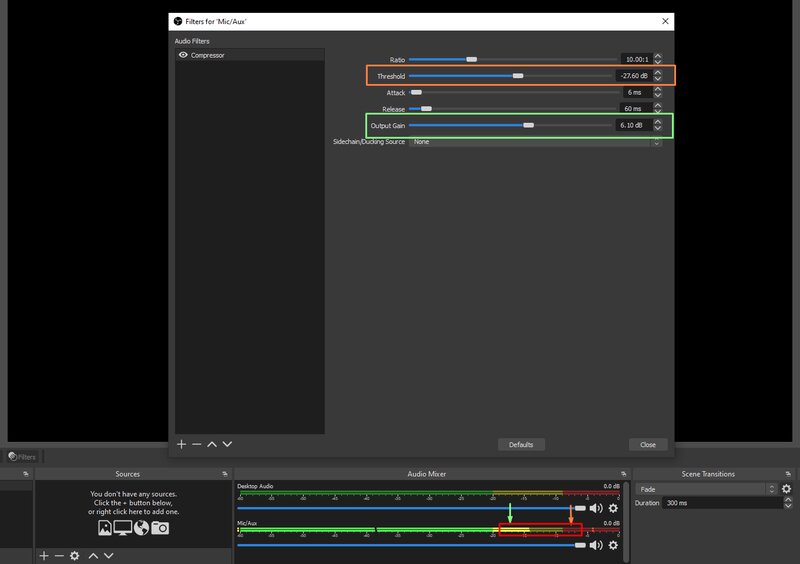
Depending on your microphone, you will need to adjust these settings. They may seem a bit complicated, but trust me, they are very simple.
The only two settings you need to focus on are Threshold and Output Gain. Threshold helps you lower the volume when you make a loud noise or when something falls next to your mic.
Ideally, you should adjust it so that whenever you yell or make loud noises, the audio level does not reach the maximum red line.
Your goal should be to reach the end of the yellow line or slightly into the red. For the Output Gain, it is helpful to increase the volume when you speak softly. Once more, target a level between the beginning and end of the yellow line.
2. Expander
Once the Compressor is added, it resolves one issue but creates another. By increasing the audio level when the voice is quieter, the compressor also amplifies all the surrounding noise you produce, including the sound of keyboard typing.
To address this issue, you can easily add another highly useful filter, known as Expander. This filter allows you to customize how your microphone picks up sound and lets it through from a specific level.
In simpler terms, background noise below a specific level will not be detected by your microphone.
To add the Expander filter, click the cog icon again and navigate to Filters. Click on the “+” sign and select Expander.
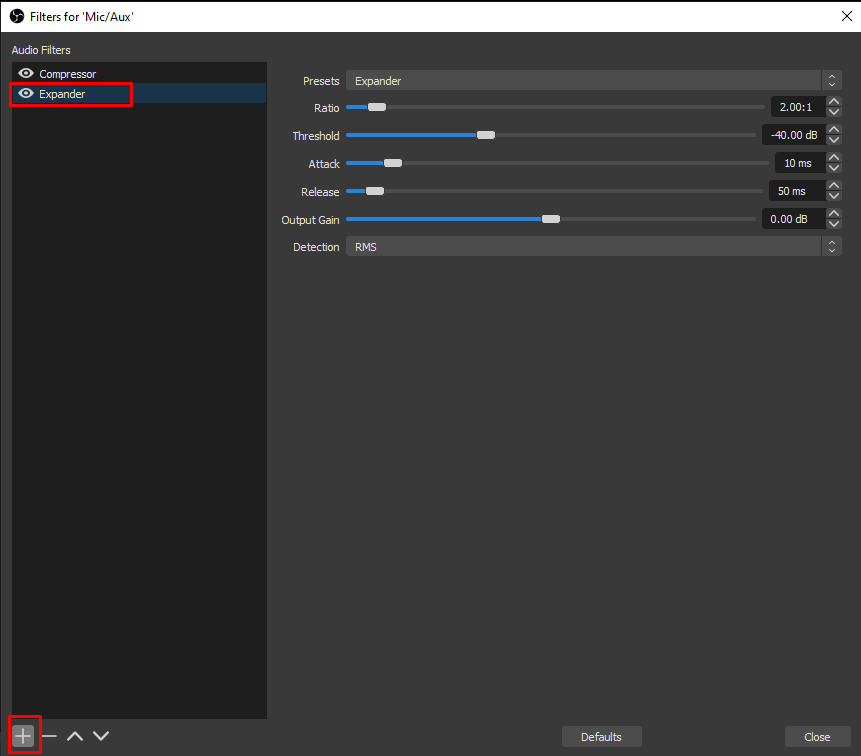
First, you need to configure the settings to start the adjustment:
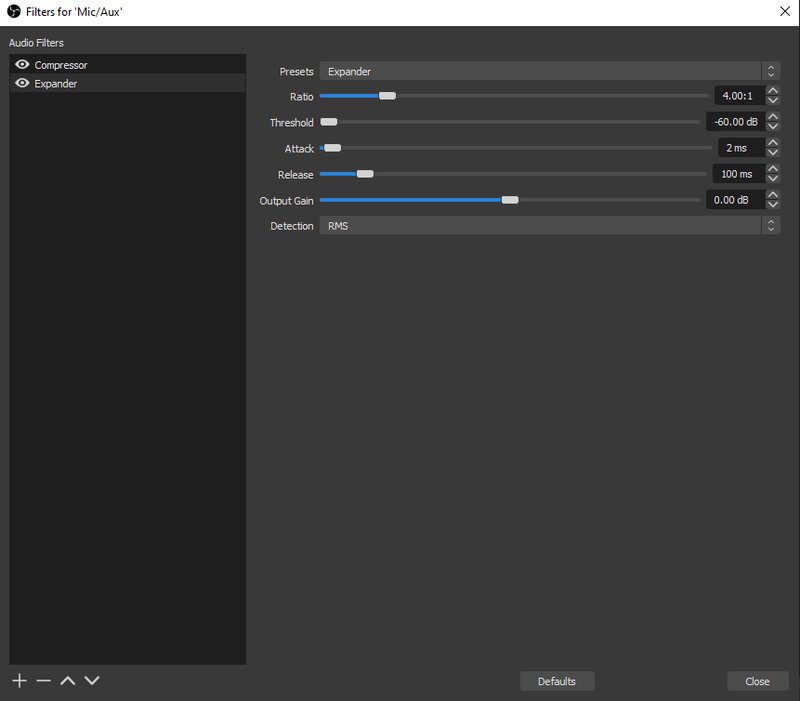
When the Threshold is set to 0, every sound you produce will activate the microphone.
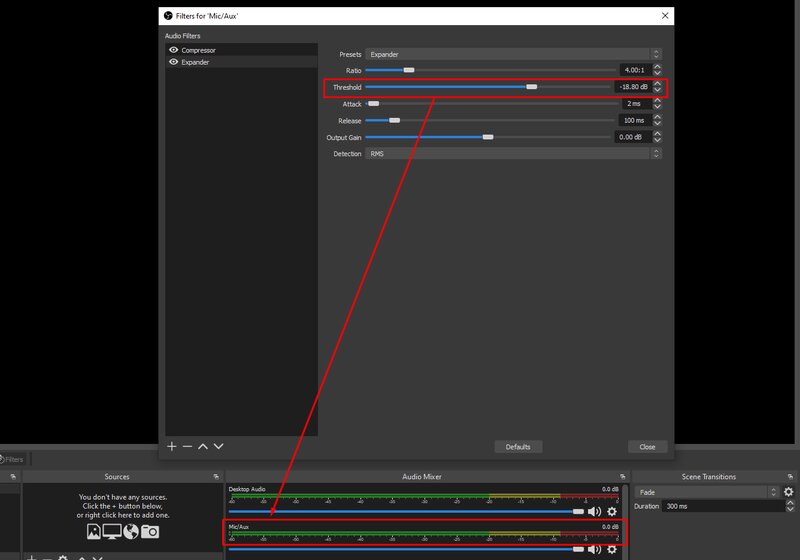
To resolve this issue, simply stop talking and create a lower noise, such as typing on a keyboard, while dragging the Threshold to the right.
Once you see that the mic has ceased picking up noise in the Audio Mixer below, you can stop adjusting the Threshold.
As before, this could lead to another issue, such as the first letter of the words you say being cut off. However, you can adjust the Expander to resolve that as well.
Simply lower the Threshold again or reduce the Ratio until you are satisfied.
3. VST Filter
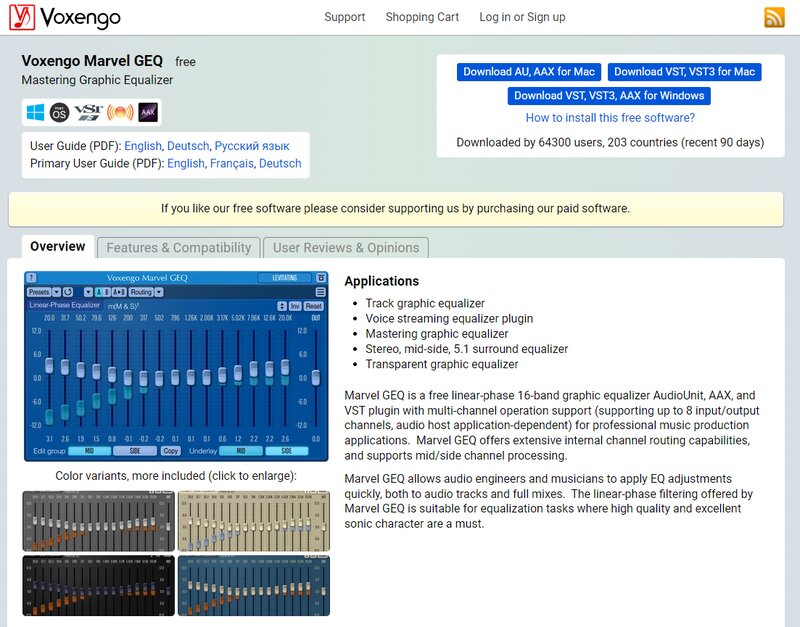
To make your voice sound more natural, instead of resembling a phone conversation, you can use the VST filter.
This filter is not included in OBS itself, so you will need to download it separately. You can obtain it from the Voxengo website; the link will be in the description below.
After downloading the VST, you can install it anywhere; it does not need to be in the same location as OBS. OBS will automatically detect it on its own.
To add a VST to OBS, simply follow the same steps as for the previous two filters. Go to Filters, click on the “+” sign, and select the VST you installed from the drop-down menu.
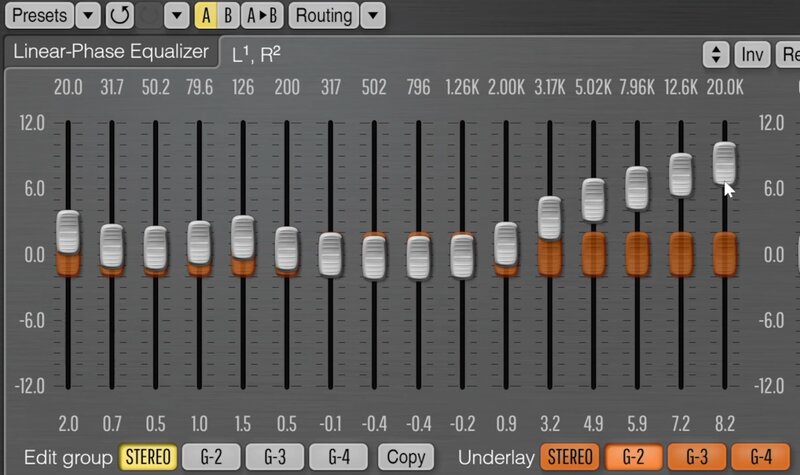
Now, let’s click on the VST filter, and a new window will appear. Here, you can adjust the settings, which I will not explain at this time, as they will vary for each microphone you use.
Simply adjust the sliders and experiment until you are satisfied with the sound. If you wish to reset a slider, simply double-click on the slider you want to reset, and it will return to its default position.
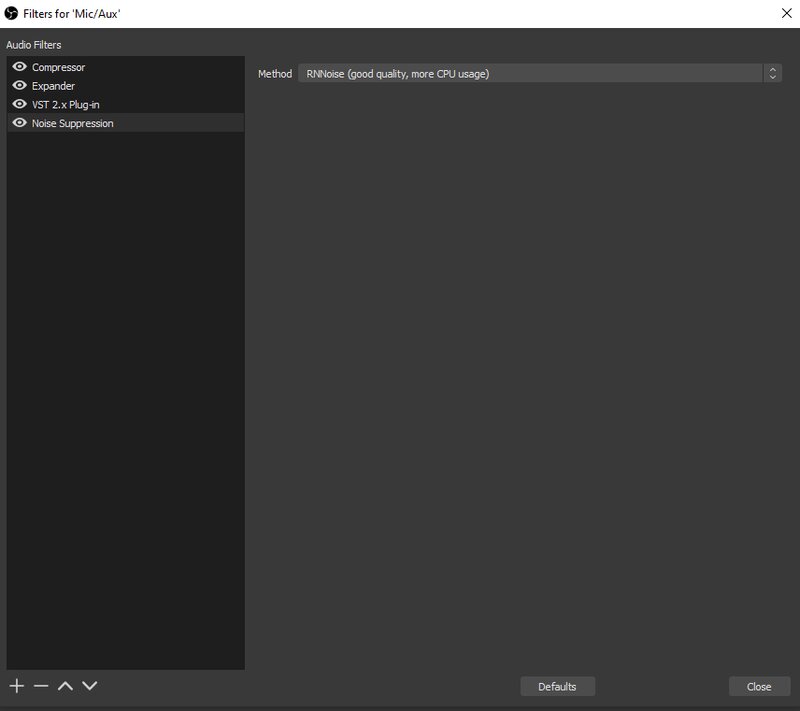
4. Noise Suppression
Another potential issue you may encounter, particularly when using a less expensive mic, is the irritating hissing background noise. However, you can easily eliminate it by adding the Noise Suppression filter.
5. Limiter
The final filter I want to discuss today is the Limiter. It essentially performs the same function as the Compressor, but the Limiter is utilized in very extreme situations where background noise can be sudden and unexpected, requiring you to instruct your mic not to capture it.
For example, if you’re playing the game, die in-game, become frustrated, and hit your desk with your hands.
To resolve this, simply drag the Threshold slider to the right until you are satisfied with the result. The goal is to avoid exceeding the start of the red line.
This ensures that no noise can penetrate and disrupt your stream quality.

Conclusion
There you have it! These were our tips for making any microphone sound great during a stream!
I hope you found this information helpful. Try these filters for yourself, and you will certainly sound much better on your Twitch stream.
