When you put yourself in their shoes, you can only assume that, as a viewer on this particular streaming platform, you would want to watch the best quality Twitch streams. If you cannot provide that, you can only speculate on what will happen next. They will seek good quality entertainment elsewhere.
I’m going to show you, the broadcaster, how to run a Twitch test stream, so you can ensure the best possible quality of your streams.
1. Go to inspector.twitch.tv and click on the purple button on the right side named “Run a stream test”;
2. In your Twitch Dashboard, copy the stream key by clicking the “copy” button;
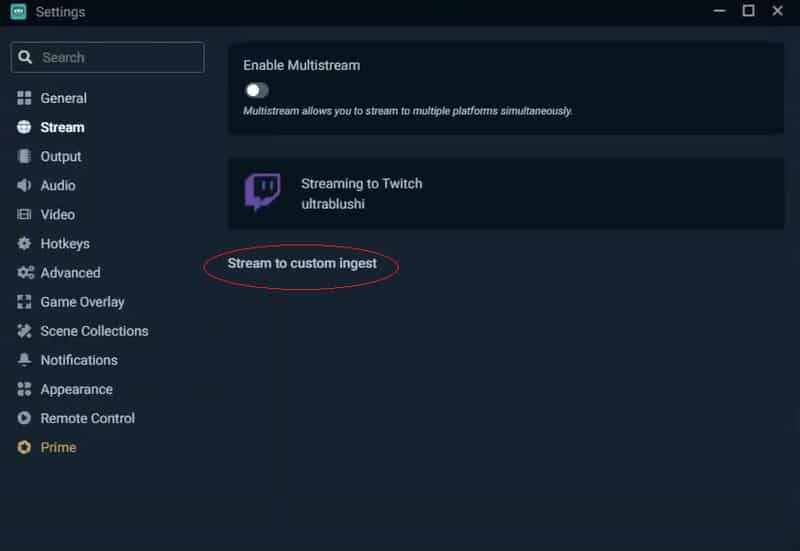
3. Open Streamlabs settings and go to the Stream tab;
4. Click on “Stream to custom ingest”;
5. Check the warning message;
6. Put the copied stream key in the inspector.twitch.tv tool;
7. Go live by clicking the green button in the bottom left corner;
8. In the Twitch inspector tool, click “Stream manager” on the right side;
9. Here you will see that your stream is actually not live, which is good!
Below, I will outline a simple tutorial for you to follow, enabling you to run your Twitch stream test without encountering any major issues.
Table of Contents
Where to Run Your Twitch Test Stream
The primary site you should use for this is inspector.twitch.tv. Here, you can ensure that your upload bitrate and settings are optimized for streaming on Twitch, helping you avoid any significant issues.
When you conduct a stream test, one way to identify if you have encountered an issue is:
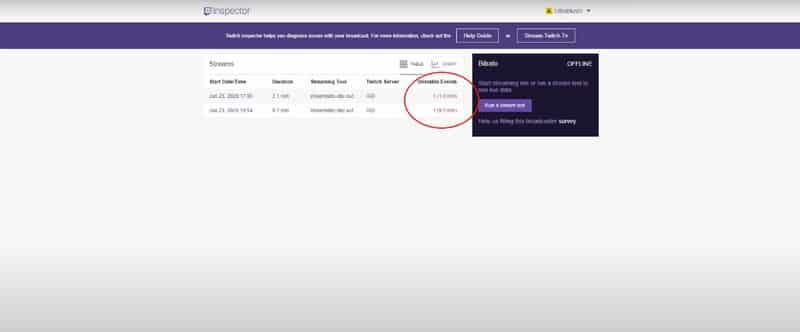
If unstable events arise after the test, you can click on them and use the information provided here (from the screenshot below) to identify some issues with your stream.
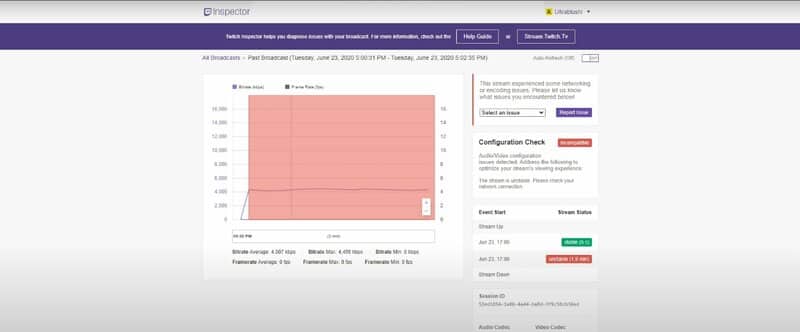
For example, during my test Twitch stream, I aimed to stream at 6000 kbps. However, as you can see here, the average kbps recorded was 4000, with a maximum of 4500.
If you attempt to stream at 6000 and notice issues, you will need to troubleshoot to determine what is happening with your internet connection. It could be too slow, or it might be unstable at the moment (you can check your internet speed by running a simple speed test in your browser).
If that is the case, you may need to lower your settings or switch to a better internet connection if you truly want to start streaming high-quality videos on your Twitch account.
How to Test Your Twitch Stream?
Perhaps I got a bit ahead of myself; let’s take a step back and outline a few simple steps on how to test your stream on Twitch.
1. Run a Twitch Test Stream
On inspector.twitch.tv, you will find a purple button on the right side of your screen that says “Run a stream test.” This will be your first step in learning how to test your Twitch stream. When you click on it, you will be prompted to retrieve your stream key from your Twitch dashboard.
This outlines three simple steps you need to follow to optimize your stream and conduct a proper stream test.
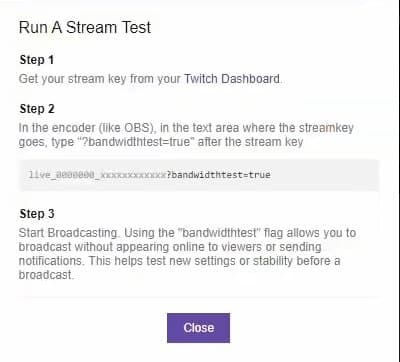
To obtain the stream key, simply navigate to the Twitch dashboard (you can right-click on it and open it in a new tab), which will direct you to your channel settings.
2. Copy Stream Key
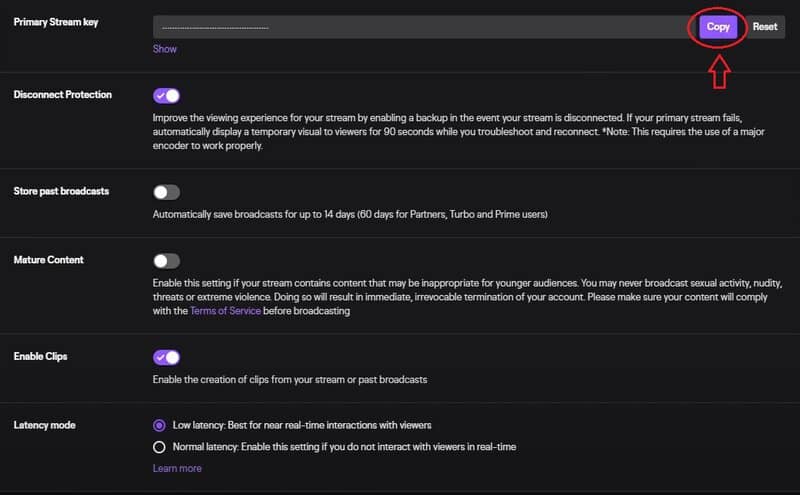
The next step is to copy this number (Primary Stream Key) to Streamlabs. When we click on Streamlabs, we can select “settings,” and then navigate to the “stream” button that appears upon opening settings. In this tab, you will want to choose “stream to custom ingest.”
3. Check the Warning
When you click on that at the top, you will see a warning that essentially states that if you choose a customized setting instead of using the defaults in Streamlabs OBS test stream, it may cause some issues. Therefore, after you finish here, you will need to switch back to the recommended Streamlabs settings, but that will be addressed later.
4. Insert Stream Key
The next step to successfully run a Twitch test stream is to enter the stream key. However, that’s not all; you will also need to return to the Twitch inspector and copy this.
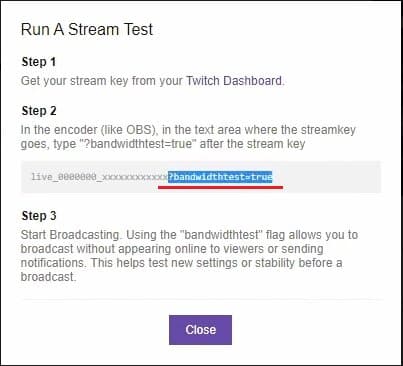
After copying this, you will need to return to the Streamlab settings and add the copied section to your stream key.
That concludes the settings section. To ensure accuracy, click the “show” button next to the stream key and verify that it matches your stream key and that the bandwidth test has been pasted correctly. Once you have completed these steps, you can click the “OK” button.
Now that we can go live and start streaming, it will begin sending data to the Twitch servers. But don’t worry; it’s not going to publicize your stream on your Twitch page.
5. Go Live!
In the bottom left corner, you will see the green “go live” button. When you click on it, a stream info box will pop up on your screen, but this isn’t particularly relevant right now since you are not actually streaming.
Simply click “confirm” to go live, allowing the Twitch server to begin receiving the data.
6. Verify Stream Manager
Once you have completed everything, return to Twitch Inspector. On the right side of your screen, you will find the “stream manager” option located beneath the “home” button.
You will hit that button because you want to demonstrate that, although you are sending data to the Twitch servers, it does not actually make you go live.
Therefore, as you can see in this screenshot, it should remain offline.
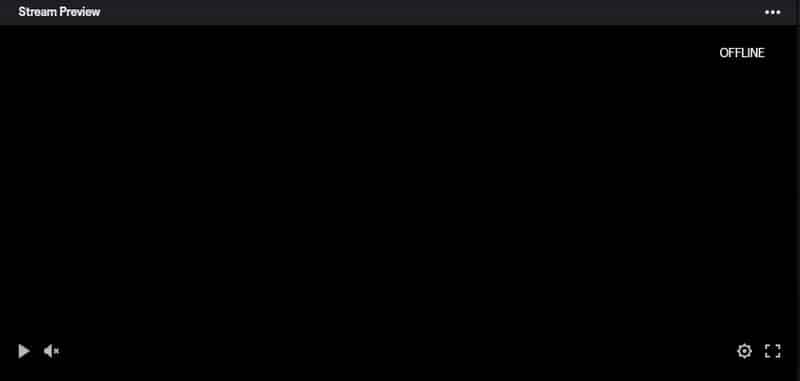
Otherwise, there wouldn’t be much purpose, as it would simply be live streaming.
7. Data Received
Once everything is completed, we will return to Twitch Inspector, where we can observe that it has begun to receive the data.
This should be the final step regarding how to test your Twitch stream. Below, you can see how to monitor the frame rate and other specifications of your stream.
My Stream Test Twitch Specs
For 29 seconds, it indicates that the stability is at 5900 kbps. This is significantly better than the other stream tests I conducted. The idea is that if we open Stream Labs OBS, our output upload bitrate should align closely with our settings.

The settings I used for twitch.tv are 6000 kbps. If I open the settings, we can all see that.
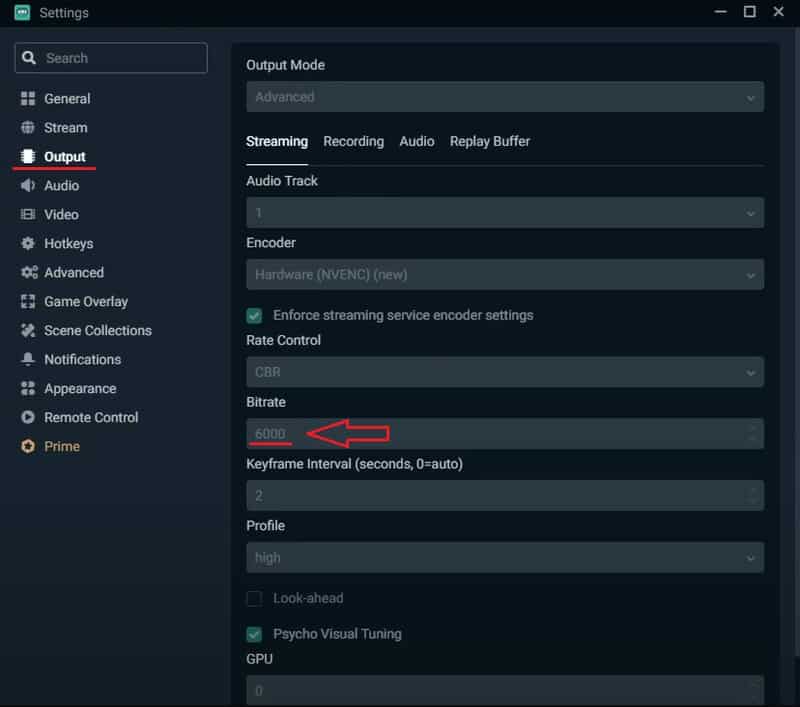
Currently, my settings appear to be quite good. I’m not experiencing any frame drops, the FPS is satisfactory, and the CPU usage is not excessively high. You can also check Twitch Inspector to confirm that everything is functioning well.
In the stream manager, it still indicates that we are offline, which is precisely what we want. This allows us to conduct our stream test without revealing any information to anyone who might visit our Twitch channel.
Now that we are nearly finished, we can proceed to end the stream. When we return to the Twitch inspector and refresh the page, we can see that I encountered a minor event where the kbps dropped slightly, as shown in the screenshot below.
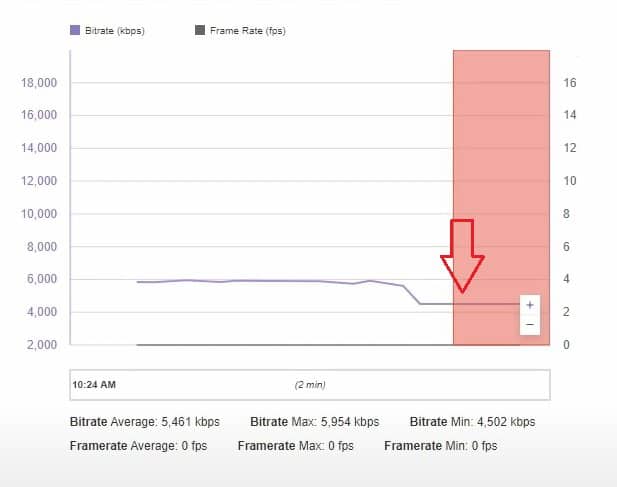
Essentially, what you want to see here is a flat line at the preset bitrate for your upload speed. If you did not encounter any unstable events like I did, you will be all set; otherwise, you will need to do some troubleshooting.
Frequently Asked Questions
How do I test stream audio?
The answer to this question is quite simple, all you need to do is go to OBS and hit record (not stream). When you’ve done that just run the game that you like to play. Talk into the mic for a couple of minutes, and the best part is that you don’t even have to start up your webcam. When you have finished with the recording just simply play the audio and the test will be complete.
How can I test my live stream?
Obviously, the answer to this question is this whole text. But here I will try to put it as simple as possible and dedicate a few sentences to it. The quality of your stream on any given streaming platform will mostly depend (besides the quality of your webcam) on your internet connection. So, to test your live stream, first, you’ll need to test your internet speed and check the signal strength. Therefore, if your internet speed is good the quality of your stream should also be good.
Conclusion
At this point, you should know how to test your stream on Twitch Inspector without going live on your Twitch channel. I hope you enjoyed the content and learned something along the way.
If I was able to assist you in any way, I am grateful. Many thanks, and best of luck to all you future streamers out there. I also wish you the best possible experience on Twitch.
