As a beginner, you may be curious about why someone would want to use a green screen. Let's address that question first. Consider Spider-Man soaring through the sky and leaping from one building to another.
What actually occurred was shooting in front of a green screen, with editors later adding special backgrounds and visual effects. Isn't a green screen a true game-changer?
In this article, we will find out how to use a green screen in your streaming sessions.
How To Set Up The Green Screen
1. Buy a green screen
2. Stretch it out nicely and iron it
3. Keep the distance between the subject and the screen
4. Light the screen first
5. Properly position the camera (with your body in the center)
6. Avoid green objects in the scene (clothes, stuff around you, etc.)
7. Think of the camera movements in advance (plan everything ahead)
8. Test everything before shooting
9. Record your video or image in high resolution
What Do You Need For Your Setup Beside Green Screen?
1. PC and Camera
2. Software Encoders (such as OBS, Adobe Premiere, or Streamlabs)
3. Lighting
Incorporating a green screen background, or chroma key, enhances the professionalism and creativity of your stream, elevating the overall gaming experience.
The most important feature is that you can replace the green screen with your chosen background image, video, presentation, or similar content using editing software.
Additionally, it is a color that complements any hair and skin tone and does not alter its appearance.
Setting it up is quite easy, yet it makes a significant difference compared to standard live streams. So, join the party and showcase your professional streams.
What is Chroma Keying
Chroma keying, or chroma key software, is specialized green-screen software designed to remove a green background (or other colored backgrounds) and replace it with another image, film, clip, video file, or presentation as your new background.
The green color is particularly effective for this purpose, as it does not distract from the elements in the foreground.
First Use of Chroma Key
Chroma keying first emerged in filmmaking. Rather than performing in numerous dangerous locations and situations, it was easier, less demanding, and safer for actors to shoot in front of a green screen.
Additionally, green screens have proven to be significantly less expensive than constructing real movie sets, while also reducing travel and insurance costs.
Now that green screens are accessible to everyone, why not utilize them in your live streaming? Let's explore how you can use a green screen on your own.
How to Use a Green Screen
Utilizing a green screen enables you to create a custom background of your choice, enhancing your professional appearance during live streams.
Additionally, you can modify the screen during the editing phase to match the theme of your clip and utilize the new background for advertising, recording sessions of various types, for your YT channel, or even for a platform featuring educational content.
There is a slight difference in the process when creating a live session compared to post-production. Specifically, you will need to replace the green screen while recording during live sessions, whereas in post-production, this is done after recording.
What Do You Need to Use Green Screen?
1. PC and Camera
It is essential to have a PC and a camera. Your PC must be capable of handling the additional workload. As you strive to create quality content, ensure that you invest in a high-quality camera as well.
2. Software Encoders
Additionally, you will need to install software encoders like OBS, vMix, and XSplit, which enable you to change backgrounds for your green screen video or image. You can also use Adobe Premiere Pro, but that option is not free.
3. Green Screen
Green screens are now accessible to everyone at affordable prices, and you can buy a green screen online on Amazon for just 15 dollars.
Alternatively, you can purchase a green poster, cotton muslin, or double-sided backdrops. Ensure that the color is consistently green and free of wrinkles before recording a green screen video or image. I discussed this on Porch.com.
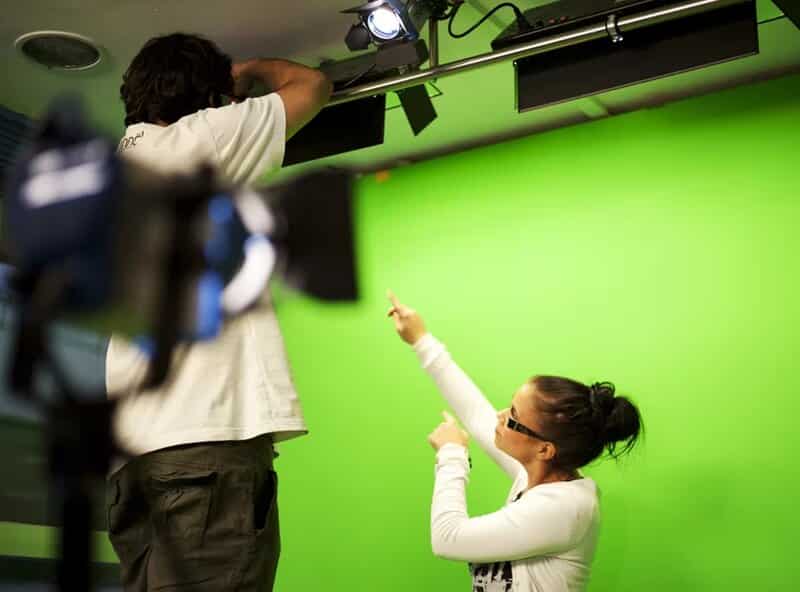
4. Lighting
Finally, you need additional lighting for optimal results. In fact, lighting is the most costly aspect of setting up a green screen. It is essential that your screen is evenly lit; otherwise, the software will struggle to key it properly.
A green screen needs sufficiently even background illumination for the camera and keyer, but the exact number of fixtures depends on screen size, distance, beam coverage, room spill, and the lights already available.
Some typical artificial light sources include key lights (your main light, such as LED), fill lights (umbrellas and softboxes), backlights, ring lights, and LED or fluorescent lights. If you must choose only one, opt for the ring light, as it evenly illuminates everything in front of it.
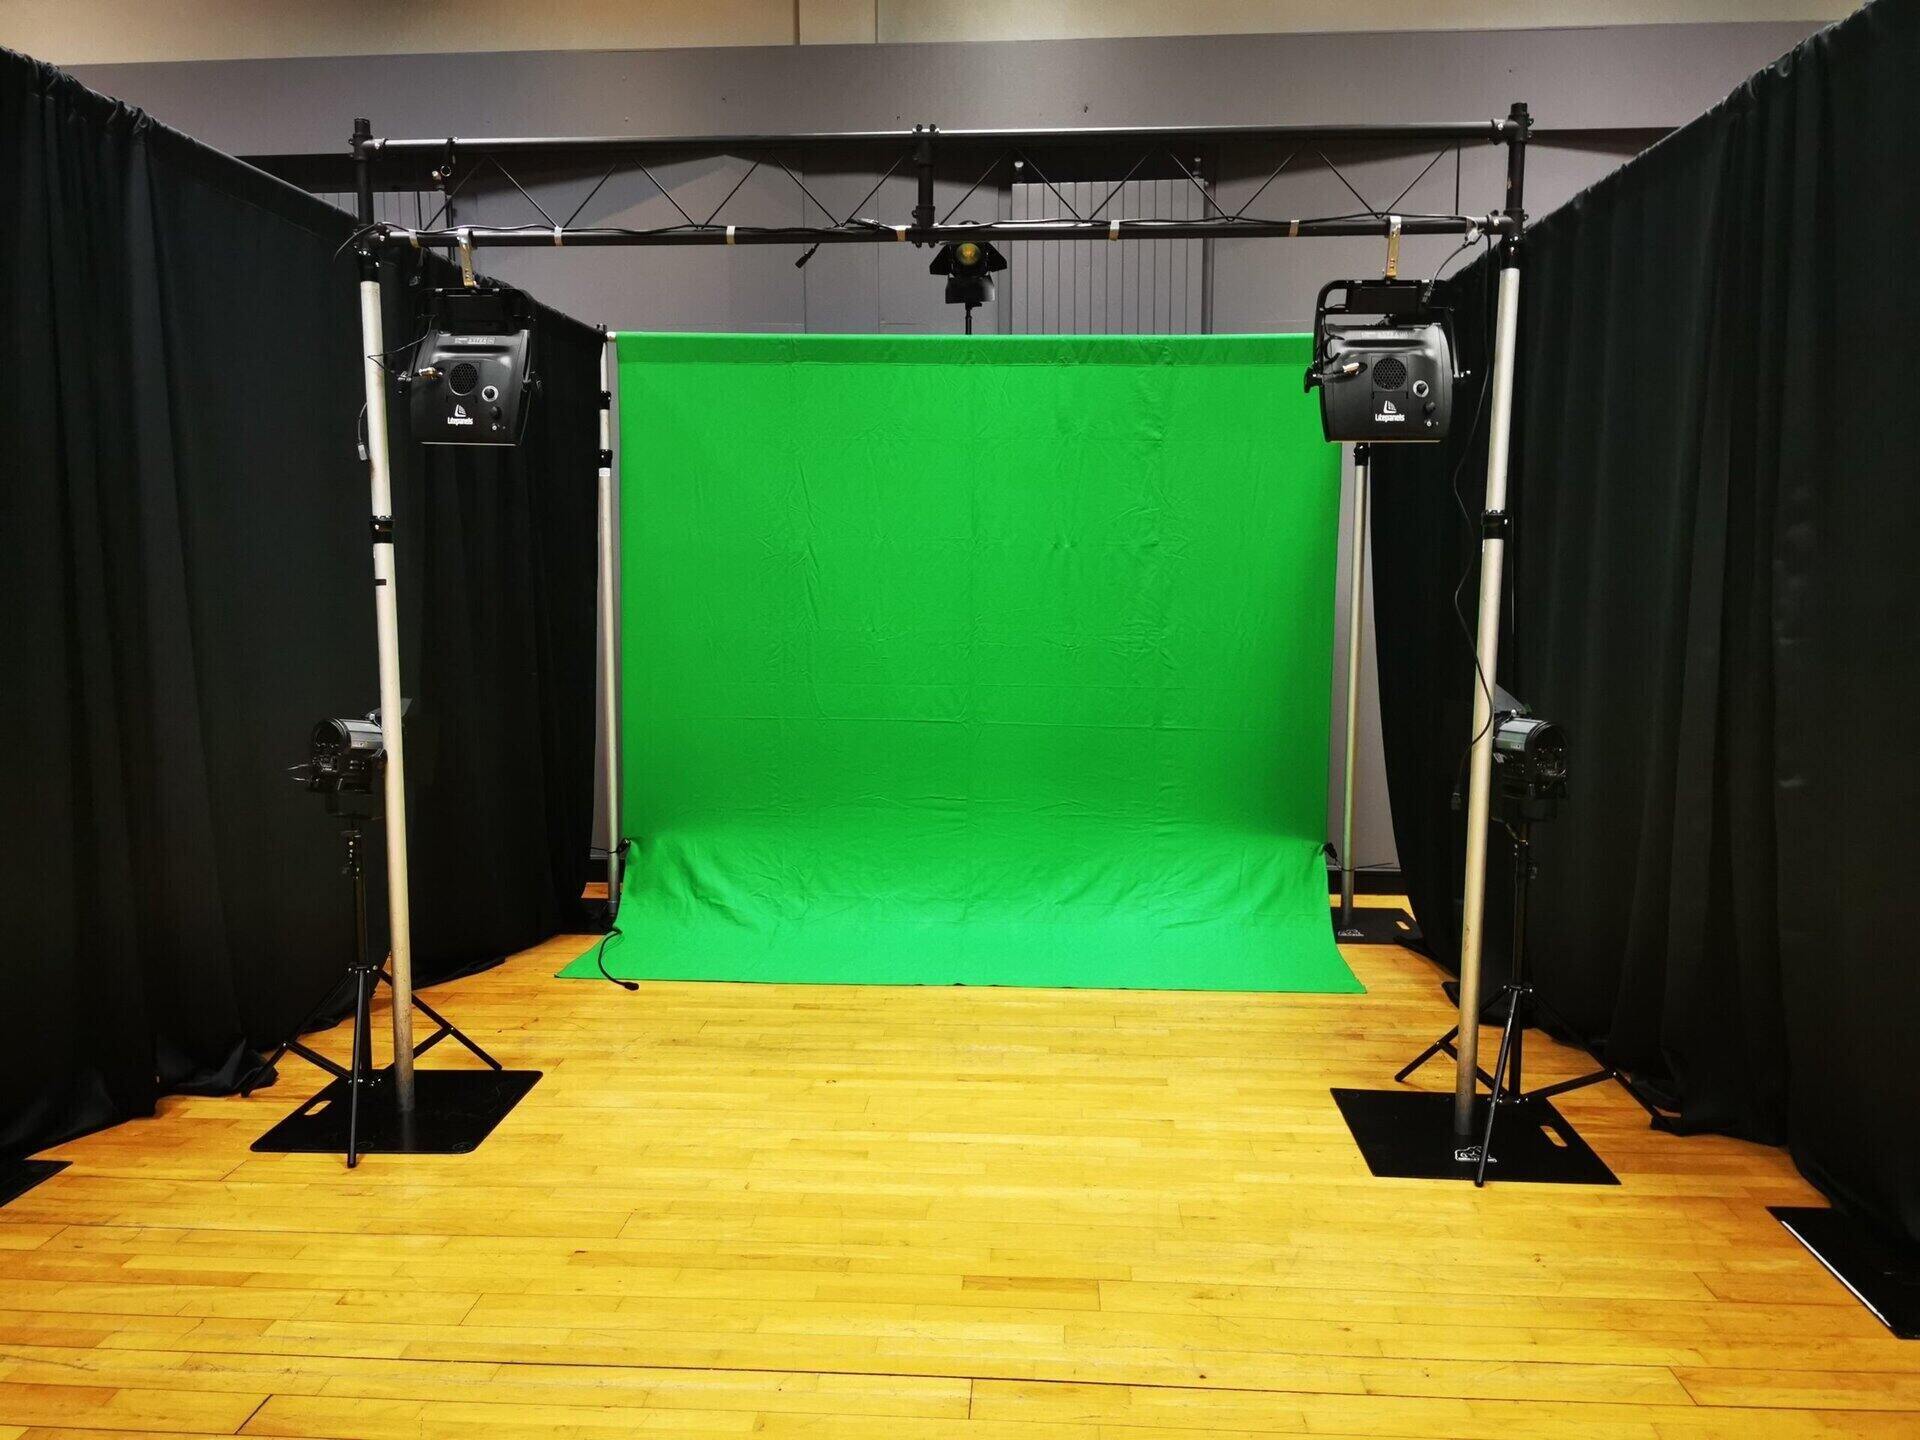
Setting Up the Scene
Here are the steps you should follow to ensure the scene is properly set before you begin filming your video or taking your image.
Obtain a green screen
Purchase a green screen online, along with green paper backdrops, posters, cotton muslins, or double-sided backdrops. Avoid using your old screen if the color is faded or has spots. The screen should have a uniform color. It is advisable to choose a larger size than you initially think you will need.
Keep It Wrinkle-Free
Gently stretch it out to eliminate any wrinkles. You may also iron it if needed.
Maintain distance
Maintain a proper distance between the subject and the screen. Position the wrinkle-free screen approximately 12 feet away from you, ensuring it fills the frame of your camera. This will reduce the risk of the subject casting shadows on you.
Proper screen lighting is essential
Never illuminate the screen and the subject simultaneously; instead, light the screen first. Use two thousand-watt lights with softboxes around them for the screen. To light your subject, use a ring light or a less powerful bulb.
Position the Camera
Position the camera to capture your entire body, placing you at the center. This will enhance the quality of your green screen video or any video you create.
Avoid Anything Green
Avoid wearing green clothing, as it may cause you to blend in with the background. Additionally, remove any green or light-reflective items from your surroundings.
Plan Your Shooting in Advance
Consider the camera movements and lighting you will employ; this will provide you with the confidence needed throughout the entire process.
Test Everything Beforehand
Ensure there is no green light spill, bleeding, or unwanted reflections. You want everything to be flawless before making the final cut.
High Resolution
Record your video or image in high resolution, ensuring you are exclusively in front of the green screen; otherwise, any movement you make outside the screen will be removed from the final video.
Content Storage

Transfer the video to your PC. The cloud provides convenient storage options, for example.
Add a New Background
After filming a green screen project, it's time to add your background clip, image, icon, or film.
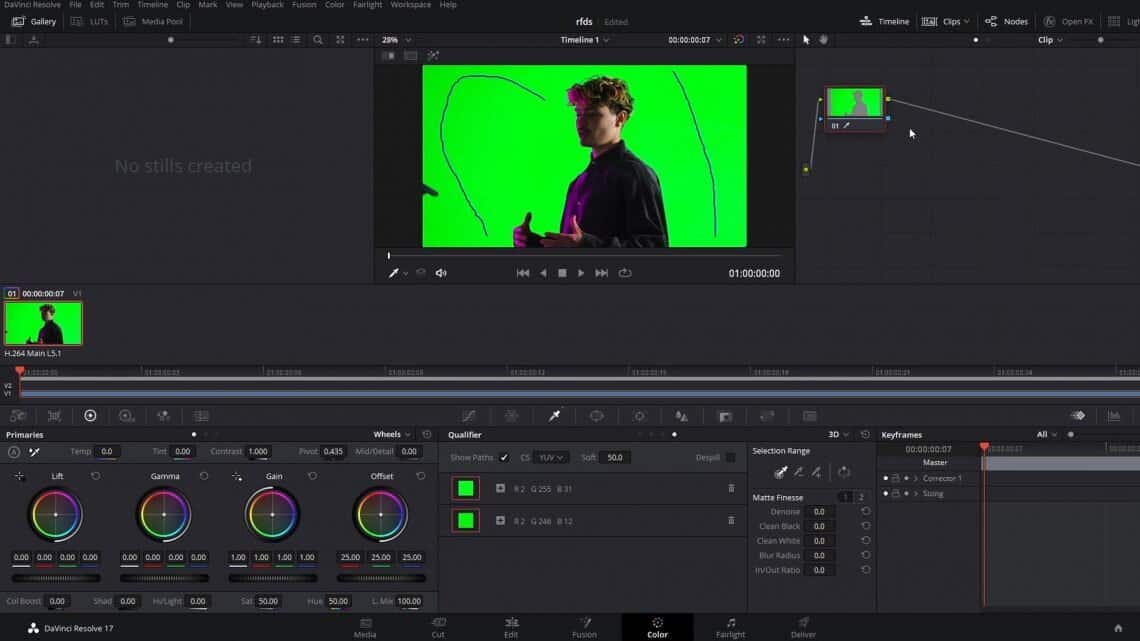
Utilize the free tools Shortcut or LightWorks to replace the green screen with your preferred background. Alternatively, you can use Adobe Premiere Pro for a seamless edit.
This software will make the color transparent, enabling you to choose any other color. Use the eyedropper tool to select the color you wish to make transparent.
Edit
Be sure to edit the content roughly before replacing the chroma background. At this stage, you can also add special effects, make adjustments, and finally save your project.
It is clear that planning a live stream requires more preparation than a typical streaming session, but it is certainly worthwhile.
This feature will make broadcasting much more enjoyable for you and your viewers. After your initial attempt, you will find that you can save time.
Using a Green Screen for Zoom
You can also use green screens in your Zoom meetings to hide your actual background and maintain the privacy of your home. The green color complements all human skin tones, making it an ideal choice for a colored background.
You can also use the same color to paint your wall green; however, if you can invest, opt for a green screen background. With chroma key technology, you will have many virtual backgrounds to choose from during a meeting.
Once you have mounted your green screen, ensuring there is enough space between you and the screen, go to Settings - In Meeting (Advanced) - Virtual Background and ensure the button is on the right side.
Next, launch the meeting and click the Start Video button located in the bottom left corner. Select Choose Virtual Background and check the box labeled "I have a green screen." After that, you will be able to select your preferred virtual background.
Should I Use a Green or Blue Screen?
A green screen is typically the preferred option because it works well with digital cameras (your capture device) and complements all skin tones. Additionally, it does not interfere with objects in the foreground. Conversely, a blue screen is a better choice if your background receives less light.
Whether you are using green or blue screens, having a reliable lighting source is essential to avoid interference with other objects. Lighting is the most crucial step in creating high-quality images and videos.
Conclusion
Chroma key green backgrounds (chroma keying) are sometimes used as backdrops in video production and photography.
Chroma keying allows you to isolate the object from the background and replace the green background with a new one. Consequently, chroma key is extremely popular among YouTubers, live streamers, and influencers.
Green screens provide endless opportunities to unleash your creativity and transport yourself into an entirely different environment, even while sitting in front of your green screen.
Simply shoot a scene and digitally remove it, meaning you key out the green color and select a new background once you have created a project, such as a photo or a video. Hopefully, this article has helped you learn the basics.
Frequently Asked Questions
What apps support a green screen?
How do you use a green screen for beginners?
Create distance between your subject and the screen. Adjust the lighting and plan your video or image in advance. Once filming is complete, install the free featured products we mentioned for removing the green screen, access the settings, remove the old background, and add a new one.
What software do you need to use a green screen?
Where can you get a green screen?
Alternatively, you can use a green tablecloth or any other green fabric.
In the worst-case scenario, you can always paint the walls green and remove any furniture behind you while streaming.