As open-source software, OBS is quite popular; it allows for customization and is relatively easy to use.
Multiple individuals are continuously working on the code to ensure that everything functions correctly and that streamers using this software receive the latest updates.
So, updating OBS is quite important! Otherwise, you might experience a black screen, maybe lags, or other problems during the stream. How to update OBS?
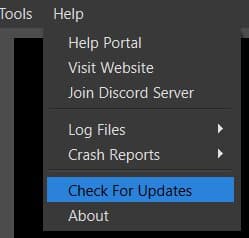
1. Check for updates – in OBS, click “Help” and select “Check for Updates”;
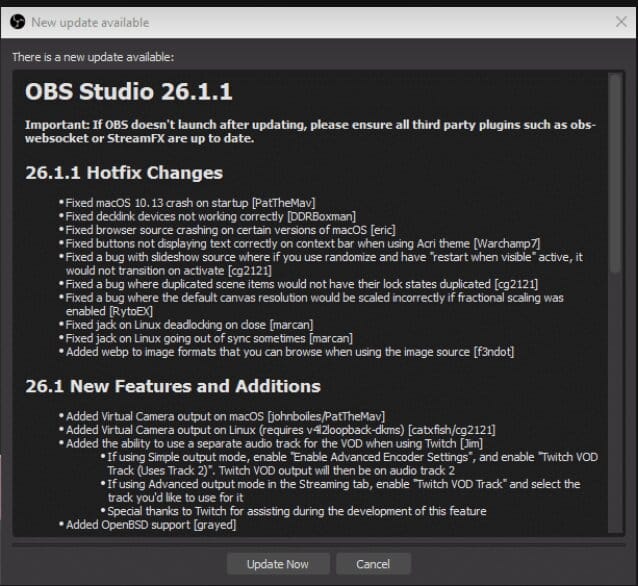
2. Click “Update now” if there is a new update available;
3. Allow Changes when the pop-up is shown;
4. After the update is done, restart OBS and you are all set!
Updating OBS is very important! Otherwise, you may encounter a black screen, lag, or other issues during the stream.
How can you obtain updates for OBS?
Let’s walk through the process step-by-step together, so you can soon try out the new OBS update!
Table of Contents
How to Update OBS Studio?
To enjoy the latest version of OBS, you must first update it.
Wondering how to update OBS?
Simply follow these steps:
1. Check for any updates
First, you should check for any new updates.
Just because you are encountering some difficulties during the stream doesn’t mean that the issue lies with updating OBS.
It is easy to check for any updates.
Open the software and find Help in the top bar. Then select “Check for updates.”

2. Confirm the Action
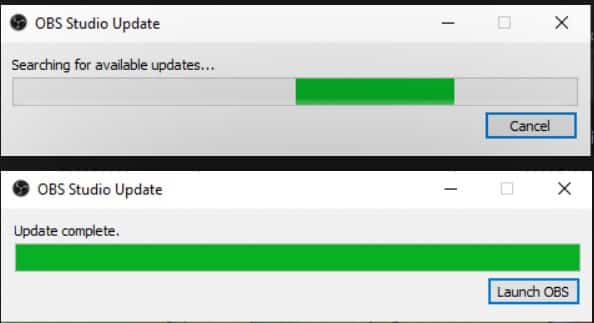
The software will take a few minutes to check for any updates.
Once the checking is complete, a pop-up window will appear.
Here, you can read all about the new update—what problems have been fixed and whether anything new has been introduced.
Select “Update now.”

In some instances, this button may not function, but don’t worry—there is an alternative!
An OBS updater is available on its official website – obsproject.com.
This process is similar to installing OBS for the first time; all you need to do is follow the instructions provided by the installer wizard.
I still recommend updating using the Update now button, and then reinstalling the program. If you choose the latter, you will gain access to the new features (which are amazing!), but you will need to complete the setup process again.
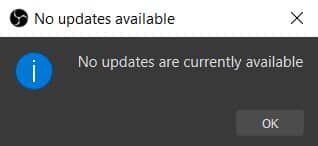
If there are no updates, this window will appear on the screen:

3. Allow Changes
Once the action is confirmed, OBS will promptly begin the update.
First, it will ask for permission to make changes to your computer—simply select “Allow” to initiate the process.
It only takes a few minutes, and once the update is complete, the program will perform a quick check to ensure that all new features are present and any issues are resolved.

Next, you should restart the program to apply the new updates.
Launching the program right after the update is particularly important if you encountered any issues previously. This allows you to verify whether the problem has been resolved and if the old version was the cause.
Related: Best OBS Settings for Twitch
How to Determine If You Should Update OBS Studio
You don’t need to visit the Help page to check if the program requires an update.
There are several other methods to verify whether the new version is available.
1. Visit the website
On the OBS website, you can easily find the latest version available.
If you notice a different version on the website compared to the one you are currently using, it means you should complete the update.
2. Automatic Check
OBS also offers an option to notify you when new updates are available.
If you would like to receive these notifications, you will need to adjust the settings slightly.
Open the Settings and navigate to the General tab.
Directly beneath the Theme options, you will find a checkbox for automatic updates check.

Check the box, and now, whenever you open the program, it will perform a quick check for updates. If any updates are available, you will be prompted to update it immediately.
Remember that there is no option to schedule the desired time for updating the software. If you prefer not to update it upon opening, select “remind me later” to defer the update.
Related: OBS Tips to Improve Your Stream
Why Is It Necessary to Complete the OBS Update?
There are several reasons to update OBS.
The first reason is quite clear: each update introduces a new set of features that could help enhance the quality of your stream.
Secondly, updates serve as solutions to common problems. When numerous users report a particular issue, the creators quickly address it and release an update that eliminates these bugs.
Lastly, the program will be less resource-intensive when updated. If you notice that OBS is using more CPU than usual, it may be due to running an older version. Updating should resolve this issue.
Related: How to Stream on Twitch with OBS
Frequently Asked Questions
Can OBS update on its own?
Unfortunately no. OBS requires you to confirm each update. It can check for new ones automatically, but won’t update automatically. When a new update is detected, you have to confirm the action – either by updating it at that moment or setting a reminder for later.
Will I have to set up settings again?
No! The update won’t change any of your settings, so you don’t have to worry about adjusting them again. The settings will be changed only if the wrong version is chosen. Also, you will have to adjust the settings again if you decided to download the new version from the website, instead of doing a classical update.
Do I have to update OBS manually?
Yes, all updates have to be approved manually – if you don’t choose automatic check, you will even have to check for new ones manually.
How long is the update process?
The time varies – some updates are only fixing a few smaller problems, and these are quite fast (only a few minutes). In case there are many new features, along with the fixes, the update process can take longer. However, keep in mind that the time required for an update will depend on your internet connection. If you have slower internet, it will take more time for the program to complete the update.
