After reading this article, you will be able to add a custom cod tracker to your Streamlabs live stream using the simple method outlined below.
Like you, I am an avid gamer and always want my cod tracker to be overlayed on the Livestream. After trying many other methods, I have finally developed a technique that answers the question of how to add CoD tracker to Streamlabs!
1. Go to Tracker.gg to create an overlay;
2. Click “Create Your Overlay” and choose CoD: Warzone;
3. Log in to your Tracker.gg account;
4. Click “Search for Profile” and add your Warzone username;
5. Edit overlay settings and check the preview;
6. Click “Continue”, add your Twitch/Youtube username if you want, and click “Generate URL”;
7. Create a browser source Streamlabs;
8. Paste the tracker URL in the Streamlabs URL box you created;
Without any further delay, let’s get started!
Table of Contents
Using Tracker.gg to Create an Overlay
You are displaying on-screen statistics using tracker.gg’s custom stream overlays, which is the simplest method available.
Many games, such as Destiny 2, Warzone, Call of Duty: Black Ops Cold War, Rainbow Six, and others, provide overlays to display your data.
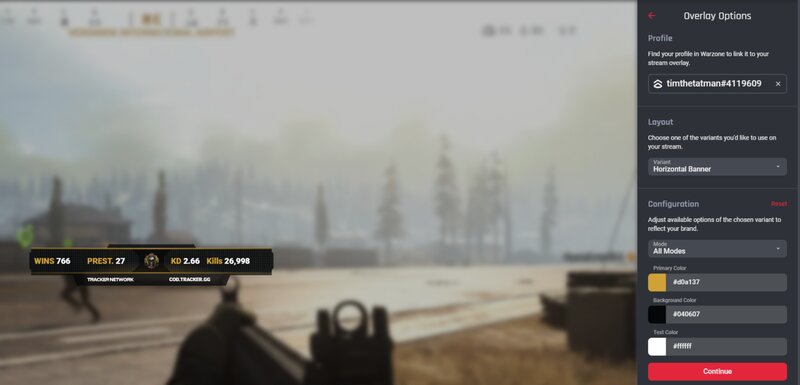
The following action involves adding your profile. Your Activision ID, Xbox Live profile, and Battle.net account can all be used to search for your profile. You should begin to see results from the search box as soon as you start typing in your login.
Selecting our variant will be our next step. The design style of the banner can be considered a variant. Depending on what resonates with you, you can choose between the traditional horizontal banner and the more compact boxed banner. The colors can then be modified to accurately reflect your brand.
How to Add COD Tracker to Streamlabs in 8 Steps
Step 1: Begin Creating an Overlay in Tracker.gg
Click “Create Your Overlay” located beneath the Tracker.gg overlay section.
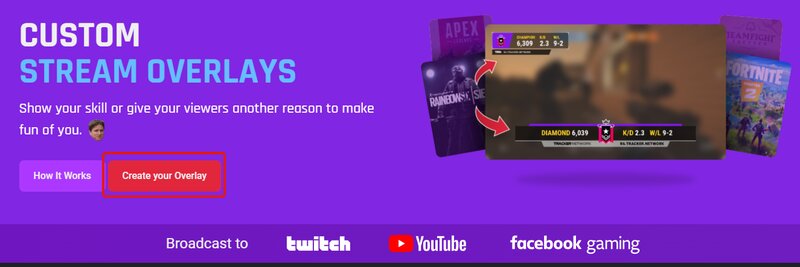
Step 2: Select CoD Warzone
Next, you can choose Warzone as your preferred game in the “Select Your Game Section.”
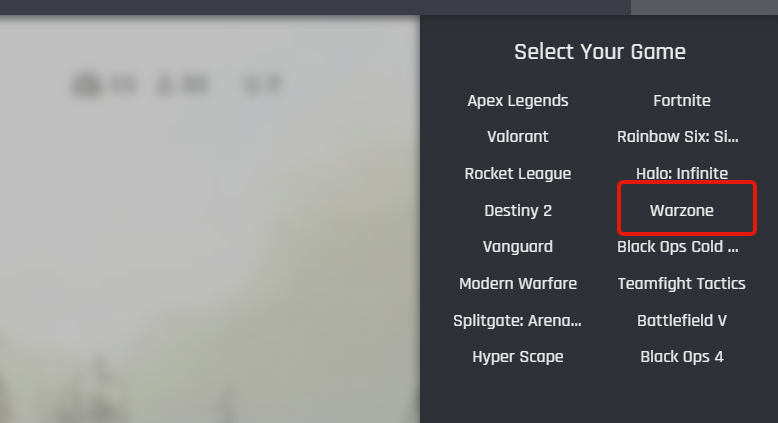
Step 3: Log in to your Tracker.gg account
To view overlays, please log in or create a Tracker.gg account.
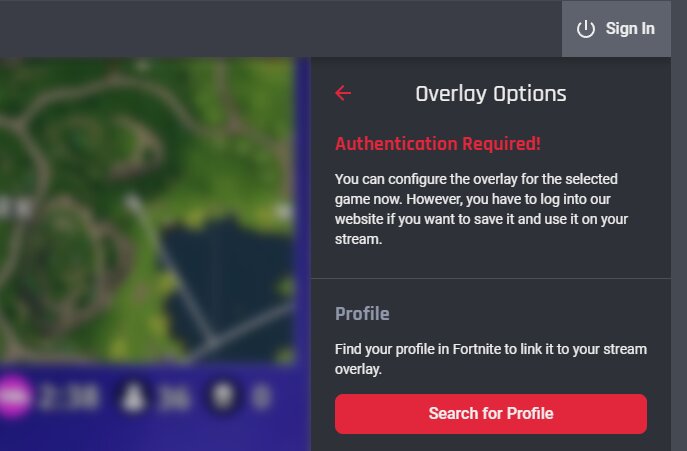
Step 4: Locate your Warzone username
After logging in, select “Search for Profile,” then enter your Warzone username.
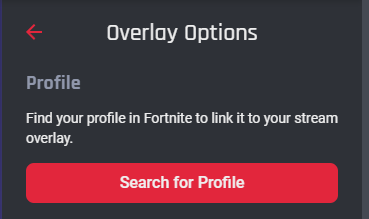
Step 5: Edit the Overlay Preview
You can choose your username from the list. Once you select your name, a preview of your overlay will be displayed.
You can modify the overlay style in the Layout section on the right. The overlay colors can be adjusted to match your stream’s branding.
You can view the live statistics from your current session by selecting the “Live Session” overlay.
Step 6: Generate Tracker URL
Click “Continue” after configuring your tracker. While it’s not required, you may include your Twitch or YouTube username if you wish to have the option to be featured on the Trackers stream page. Once you’re finished, click “Generate URL.”
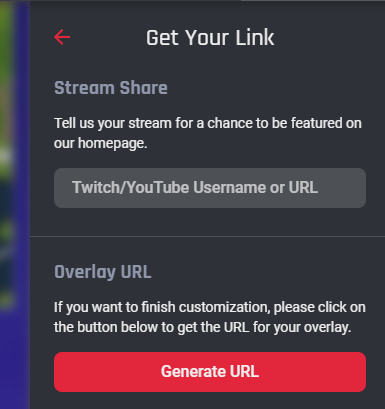
You will receive a browser source URL that you can enter into Streamlabs. You will need this URL in the upcoming steps, so be sure to copy it now.
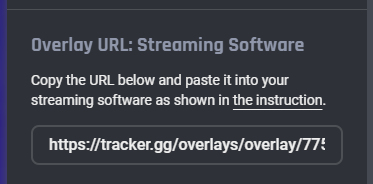
Step 7: Add a New Source in Streamlabs
After starting Streamlabs, navigate to the Sources panel. Click the “+” sign to add a new source. Select Browser source, then click add source after naming your source.
Step 8: Insert the Tracker Link in Streamlabs
Paste the Tracker.gg link into the URL box and select “Done.”
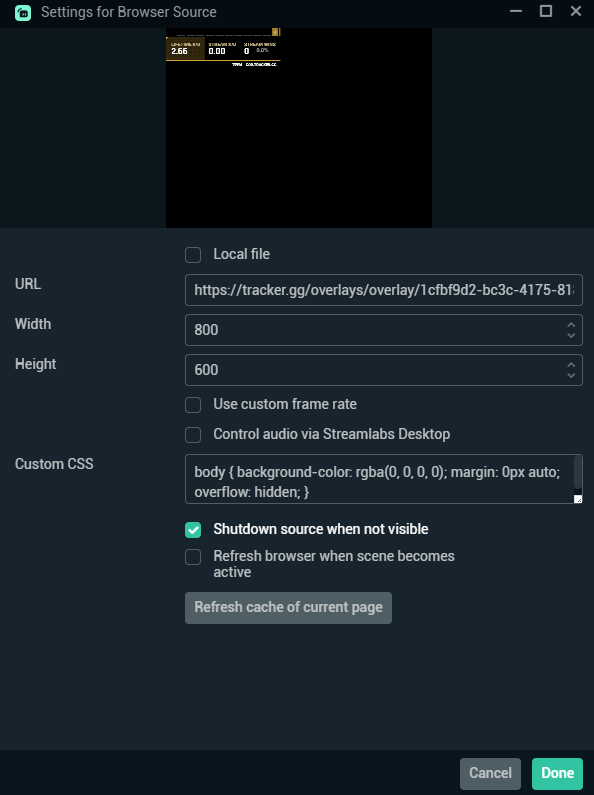
The COD tracker overlay is now visible on your stream and can be moved to the optimal location. With COD Tracker no longer being a requirement, your fans can now follow your live stats and victories.
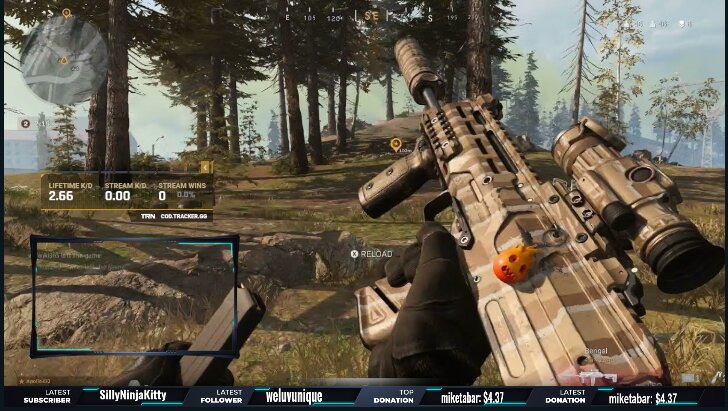
How to Add COD Tracker to OBS in 5 Steps
Integrating the COD tracker with OBS Studio is also quite straightforward.
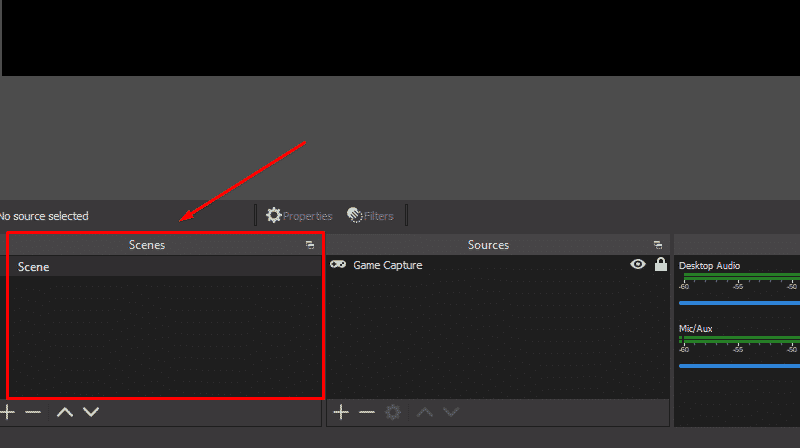
Step 1: Add a New Scene
You can add any scene to the box by using the ‘+’ in the bottom left. Be sure to include scene locations by adding overlays.
Scenes come in various types, such as Primary scene, Overlay scene, Starting and Ending scene, AFK scene, and BRB scene, among others.
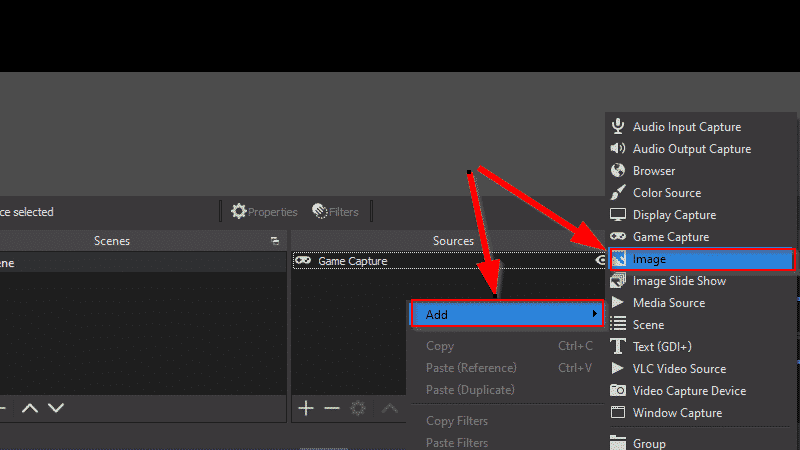
Step 2: Add Image Source
After selecting the scene, click on the Sources box and navigate to the Scenes tab. To add an image, right-click in this tab and select Add. As you can see, additional items can also be included. You can use the “+” icon in the Sources tab to insert a picture as well.
Step 3: Name the Source
After selecting the Image option, another box will appear. If you sell, you can create a new source. If you choose “create new,” you can also use one of the sources you have already uploaded by simply selecting “Add Existing.”
In this situation, select the first option, Create New. Then, name the source and click ‘OK.’
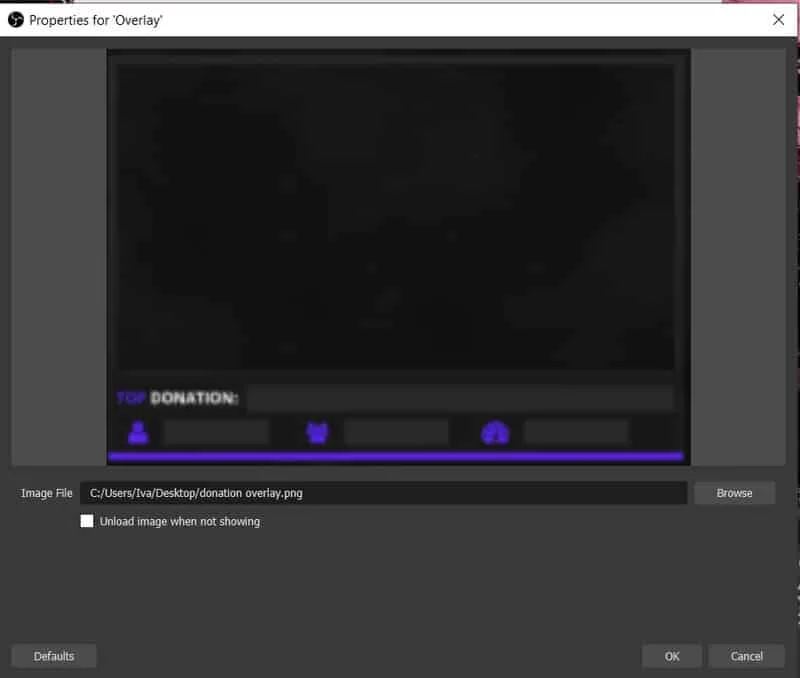
Step 4: Upload Overlay
You can upload overlays in the Properties tab. As mentioned earlier, these can include streamers’ images, videos, text, and webcam overlays. To choose the overlay’s location on your computer, click Browse. Then, click OK.
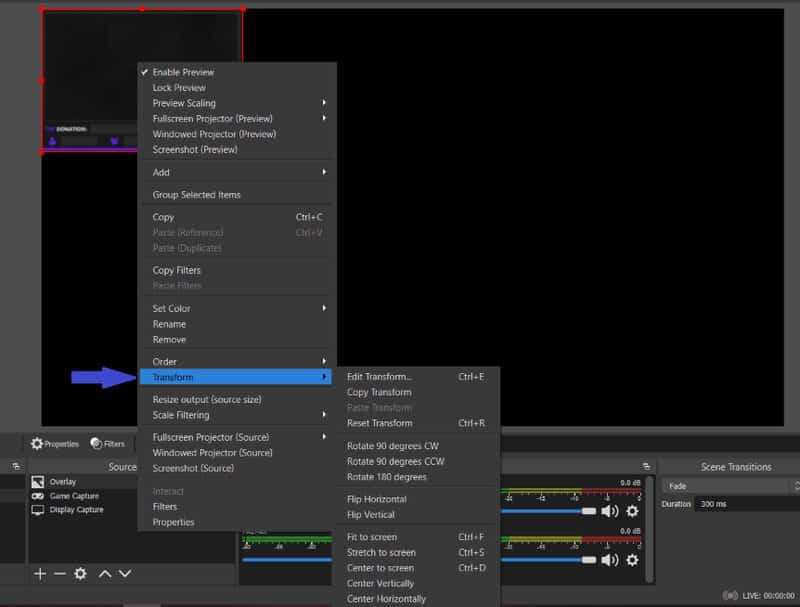
Step 5: Edit the Image Settings
OBS determines the image size and placement. Therefore, after adding it, you must adjust these settings.
The Options tab will appear when you right-click the overlay in the Sources tab. To change these default settings, select Transform.
If needed, reposition the preview window on the screen until you find the perfect location for it.
Click and drag one of the dots on the image to change its size. You can also resize the photo without accessing the Options tab by left-clicking on the overlay while holding down the shift key.
Additionally, images can be cropped by left-clicking on them while holding the Alt key.
Twitch Overlay Maker
Selecting the right stream overlay is essential because Twitch streamers rely on them as much as they do on Twitch panels.
We can all agree that the ultimate goal is to make your stream look professional and visually appealing; here are some Twitch overlays you can use.
Own3d

Streamers can discover both static and animated webcams, as well as talking webcam overlays, on OWN3D.
Kudos.tv
Kudos is relatively new to the industry. Their main offerings consist of packages of static and animated full-stream overlays that include Twitch panels, chat boxes, alert widgets, stinger transitions, labels, and stream screens.
Nerd or Die

Along with providing exceptional designs, Nerd or Die also features a free overlay builder that allows you to create free Twitch themes and panels that reflect their offerings.
StreamElements

This Twitch overlay creator is completely web-based. The setup process is faster and simpler since there is no need to manually add your overlay design to OBS Studio.
Conclusion
Navigate to your live scene and add a new browser source by selecting “Add Sources” to incorporate your overlay into Streamlabs OBS.
Choose a name for your reference and paste it as provided in step 8 of how to add a CoD tracker to SLOBS. You’re done now! Just keep in mind to turn it off when you switch games, as your viewers may not understand otherwise.
There are several methods for streaming your stats overlay, with cod.tracker.gg being the simplest and most widely used. By following the straightforward steps outlined above, you can overlay your stats element.
FAQ
How do I add Warzone stats to Streamlabs?
To add your overlay to Streamlabs OBS, navigate your live scene and add a new browser source under add sources. Choose a name for your reference and paste the URL provided in the step on how to add CoD tracker to SLOBS.
How do I add CoD to OBS?
Choose the scene and then add an overlay to the OBS, name the new source, upload the overlay, and do the necessary adjustments.
How do I see my CoD stats?
COD stats are available in the ‘stats’ tracker in the profile menu of your cod account.
