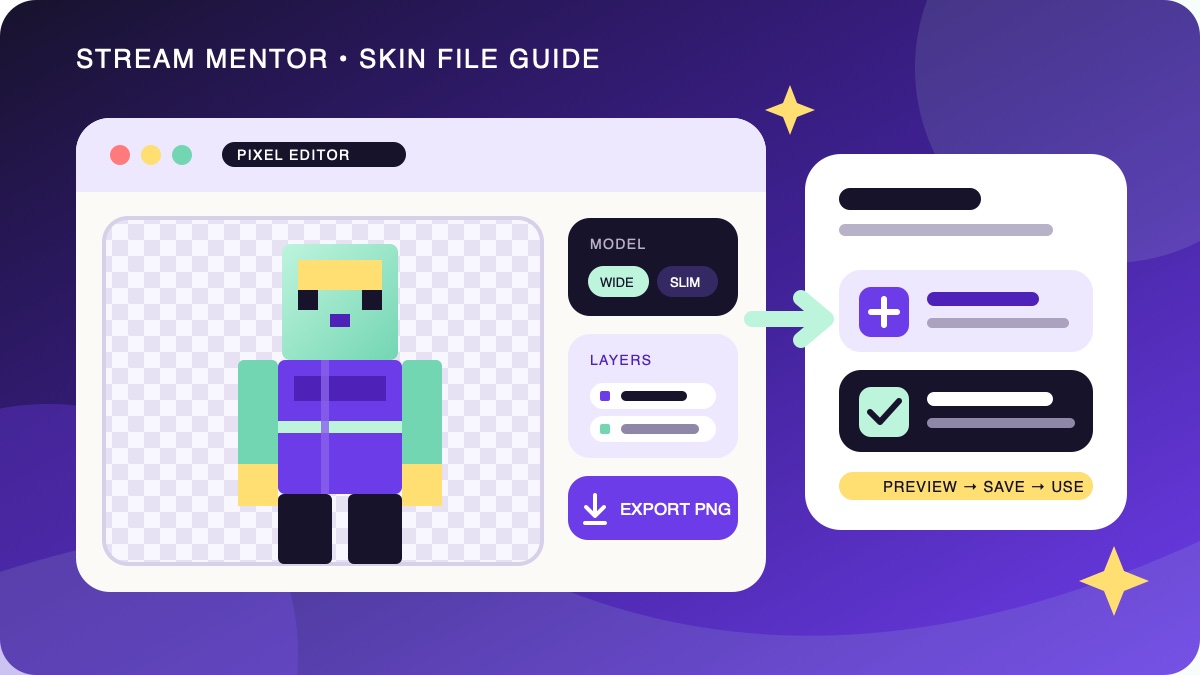
Quick answer: choose a Minecraft skin maker that previews both the front and back of the character, lets you switch between Classic and Slim arms, keeps the body and outer layer separate, and exports the finished design as a PNG file. For a simple browser editor, The Skindex, SkinMC, or MinecraftSkins.net can cover the basics. NeedCoolerShoes is useful when you want a layer-focused workflow, while PMCSkin3D exposes more advanced brushes, palettes, mirroring, and reference-image controls.
Review note: this guide was substantially rewritten on July 24, 2026 after checking Minecraft's current Java skin instructions, Bedrock Dressing Room guidance, Usage Guidelines, and the public pages of the editors listed below. It is a feature and workflow comparison, not a claim that Stream Mentor created and uploaded a new skin with every tool. The former marketplace recommendation, obsolete links, unsupported “best” claims, and old screenshots were removed.
First choose Java Edition or Bedrock Edition
A skin editor paints the flat image that wraps around a player model, but the route for equipping that image depends on the edition and device. Confirm the destination before spending time on a design.
| What you play | What to create | Where you equip it | Important limitation |
|---|---|---|---|
| Java Edition on computer | A skin PNG mapped to the Classic/Wide or Slim model | The Java section of Minecraft Launcher or the skin page in your Minecraft profile | The selected model must match the arm layout used by the file |
| Bedrock Edition | Character Creator items or a Classic Skin available to the account | Dressing Room | Current first-party help documents Character Creator and Marketplace-owned Classic Skins, not a universal external-PNG import path across Bedrock devices |
Minecraft's official skin introduction distinguishes these two Bedrock workflows: Character for Character Creator items and Classic Skin for a traditional mapped appearance. If your aim is simply to combine hairstyles, clothing, and accessories already offered in Bedrock, start in Dressing Room instead of a third-party editor.
What a Minecraft skin file contains
A player skin is not an ordinary portrait. It is a flat, unwrapped texture whose small regions are mapped to the head, torso, arms, and legs. A good editor shows a 3D preview so you can paint the texture without memorizing that layout.
Classic versus Slim arms
The Classic model has four-pixel-wide arms, while the Slim model has three-pixel-wide arms. Minecraft's official guide uses Classic/Wide and Slim as the choices in the Java Launcher. Pick the model before drawing sleeve edges or hands, and keep the same choice during upload. A mismatch commonly produces missing strips, shifted sleeves, or dark pixels around the arms.
Base layer versus outer layer
Modern editors normally separate the main body from an outer layer. The base should contain the complete character. The outer layer can add details such as a jacket edge, hair, glasses, or a brim that sits slightly above it. Toggle the outer layer off while reviewing the base; otherwise, a transparent gap or unfinished face can hide beneath the extra detail.
Use the editor's PNG export
Minecraft's Java instructions call for a flat .png skin file. Use the editor's own download or save command and leave the exported dimensions intact. Do not take a screenshot, convert it to JPEG, stretch it in a document editor, or save a web preview image. Those operations can remove transparency or change the pixel map.
Current Minecraft skin makers compared
These are independent community tools, not official Mojang or Microsoft products. No ranking below implies endorsement, security certification, or a permanent feature guarantee. The practical choice is the editor whose visible controls match your project.
| Editor | Good starting point for | Current published controls | Watch for |
|---|---|---|---|
| The Skindex editor | A straightforward browser-based create-or-edit session | A skin-editing workspace connected to The Skindex's community skin library | Community uploads can have separate creator rights; download the skin file rather than copying somebody's design without permission |
| SkinMC editor | Creating or adjusting a skin with an in-browser model preview | A dedicated skin-editor page plus public skin and profile tools | Check that the chosen model and downloaded file still match before uploading |
| PMCSkin3D | More detailed pixel work | Basic and advanced modes, 2D/3D views, file import, reference images, palettes, mirroring, brushes, local saves, and PNG export | The interface has many controls; save a backup before experimenting with resolution or destructive edits |
| NeedCoolerShoes | Building an outfit from layers and reference colors | Classic and Slim support, layer-first editing, reference images, color picking, blend palettes, and a mobile interface | The current site describes itself as a fan-made restoration; accounts from the old service do not carry over |
| MinecraftSkins.net editor | Basic body and overlay painting | Upload and download controls, Body/Overlay visibility, Steve/Alex model choices, poses, and a grid | Preview every side and both layers before download; a good front view does not prove the back is complete |
Tynker also maintains a Minecraft skin-editor route within its broader learning platform. Its surrounding product, account flow, and intended audience differ from a single-purpose editor, so review those details before creating an account. For any tool, the safest workflow is to export a local PNG and upload it through Minecraft's official interface; an editor does not need your Microsoft account password.
How to create a custom skin without losing work
- Pick the model first. Choose Classic/Wide or Slim before placing arm details. If you are modifying a downloaded skin, identify its existing model instead of assuming.
- Keep an untouched source copy. Download or duplicate the starting file before editing. Use a new filename for each meaningful version.
- Block in the base colors. Complete the head, torso, arms, and legs on the base layer. Rotate the model after each part so the rear, sides, tops, and undersides are not blank.
- Add contrast deliberately. Adjacent pixels need enough difference to remain readable on a moving character. Test the design at the small size seen during play, not only while zoomed in.
- Add optional outer-layer details. Use the overlay for depth, but do not rely on it to cover an unfinished base. Toggle each layer to inspect it independently.
- Check symmetry choices. Mirroring is efficient for boots or sleeves, but turn it off before adding an emblem, scar, hair part, or other intentionally asymmetric detail.
- Preview every angle and pose. Look for reversed symbols, disconnected cuffs, transparent holes, or colors painted onto the wrong limb.
- Export the PNG. Use the editor's file-save control. Keep a working copy as well as the final file, especially if the editor stores progress only in the browser.
A filename such as purple-jacket-slim-v3.png records the model and version without changing the file itself. Do not place private information in the filename if you plan to publish the skin.
How to upload a custom skin in Java Edition
The current Minecraft Java skin guide documents both Launcher and browser routes. In the Launcher:
- Open Minecraft Launcher and select Minecraft: Java Edition.
- Open the Skins tab and choose New Skin.
- Give the skin a name.
- Choose the Wide/Classic or Slim model that matches the editor file.
- Select Browse and choose the exported PNG.
- Select Save & Use.
The browser route uses the skin area of your Minecraft profile: select Classic or Slim, choose the local file, and upload it. Use the official domain and sign-in flow rather than a link sent in a chat or a skin site's imitation login page.
How to use a custom look in Bedrock Edition
Open Dressing Room from the Bedrock start screen. To assemble an appearance from in-game items, choose Create Character and the Character option. To equip a traditional mapped skin already available to the account, open Classic Skins and select it from the available collection.
Minecraft's current Dressing Room help documents Character Creator items and Marketplace-owned Classic Skins. It does not promise one external-PNG import workflow across every Bedrock platform. A Java upload does not automatically equip the same file in Bedrock, so check the current interface on the exact device before creating or buying a file for that use.
Fix common skin problems
The arms have black lines or missing pixels
Recheck the model. Upload a Slim design as Slim and a Classic/Wide design as Classic/Wide. Minecraft also notes that Slim arms are only fully supported in Java version 1.8 and later, which matters if you intentionally launch a much older installation.
The skin file is rejected
Confirm that you selected the actual PNG exported by the editor, not a screenshot, JPEG, zipped project, HTML download, or preview thumbnail. If the filename ends in something like .png.jpg, return to the editor and export again rather than merely renaming the extension.
The design looks correct in 2D but wrong in game
Open it again in a 3D preview. Check the backs and undersides of limbs, then toggle the base and outer layers. A pixel placed on the overlay can appear to float; a front and back panel can also be reversed when painting directly on the flat template.
Other players still see an older skin
First confirm that the new skin is selected, not merely saved in the library. Restart the game and allow the official account service to update. Server software, cached resources, offline mode, or a temporary service problem can affect what appears. Avoid repeatedly uploading random formats while the correct file is already saved.
Bedrock does not show an import button
Do not assume the button must exist. Consult the current Dressing Room help and the interface on the exact device. Minecraft's current public help does not document universal external-PNG importing across Bedrock platforms, and a third-party editor cannot add a game feature that is absent.
Security, publishing, and creator rights
- Do not give an editor your Microsoft password or verification code. A normal workflow downloads a file that you later upload through Minecraft.
- Check downloads before opening them. A skin should be an image file. Do not install an executable, browser extension, configuration profile, or “unlocker” to obtain one.
- Respect the original artist. A publicly viewable skin is not automatically free to republish, sell, or claim. Check the creator's stated permission and the community site's rules.
- Avoid misleading branding. Minecraft's Usage Guidelines explain how the Minecraft name, brand, and assets may be used. Do not present a fan-made skin, store, or editor as official.
- Use appropriate designs. Multiplayer servers can set additional rules, and Minecraft's Community Standards apply to online conduct. A technically valid PNG can still be inappropriate or infringe somebody's rights.
Frequently asked questions
What is the best free Minecraft skin maker?
There is no universal winner. Start with The Skindex, SkinMC, or MinecraftSkins.net for a simpler browser editor; consider NeedCoolerShoes for a layer-first process or PMCSkin3D for more advanced brushes and references. Verify the live tool's privacy, account, and export behavior before using it.
Can I make a Minecraft skin on a phone?
Some browser editors advertise mobile support, including NeedCoolerShoes and PMCSkin3D. Editing individual pixels is easier with a precise pointer, so save often and inspect the exported file in a 3D preview. Designing a PNG on a phone does not guarantee that the device's Bedrock edition will import it; check the current Dressing Room options first.
Should I choose Classic or Slim?
Choose the silhouette you prefer, then use it consistently. Classic has four-pixel-wide arms; Slim has three-pixel-wide arms. The artwork and upload setting must agree.
Can Java and Bedrock use the same custom skin?
Do not assume a PNG uploaded to Java will transfer to Bedrock. Java has a documented custom-PNG upload workflow; Bedrock's current public help documents Character Creator and Classic Skins through Dressing Room without promising universal external-PNG import. Check the exact Bedrock device before relying on one file for both.
Is a Minecraft skin maker the same as a Character Creator?
No. A skin maker paints an external texture file. Bedrock Character Creator assembles a character from in-game body and style items. Both change appearance, but their files, controls, and available items are different.
Sources and review scope
- Minecraft Help: Make a Custom Skin in Minecraft Java Edition.
- Minecraft: What is a Minecraft Skin?.
- Minecraft Help: Dressing Room items and skins.
- Minecraft Usage Guidelines and Community Standards.
- Current public editor pages for The Skindex, SkinMC, PMCSkin3D, NeedCoolerShoes, and MinecraftSkins.net.
Sources and editor destinations were reviewed on July 24, 2026. Third-party features, account requirements, advertisements, and availability can change. Minecraft's live interface and first-party help take priority for uploading and equipping a skin.