Streaming has been a popular activity for years, and there are numerous platforms that people use to stream or watch streams, including Twitch, YouTube, TikTok, Instagram, Facebook, and others.
Quick Overview
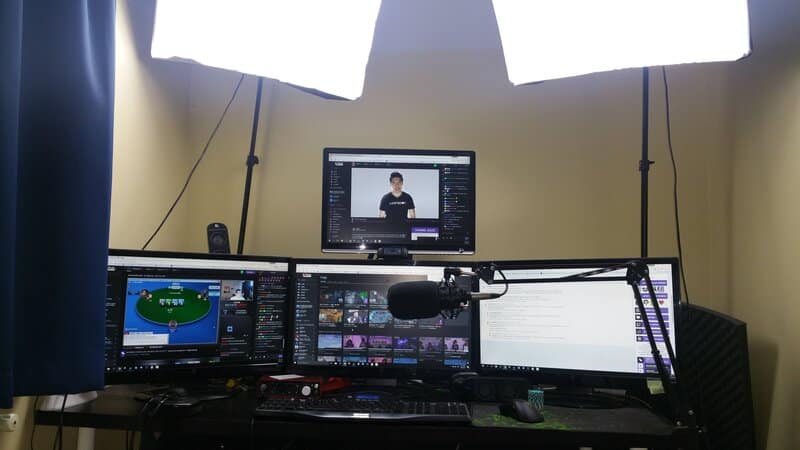
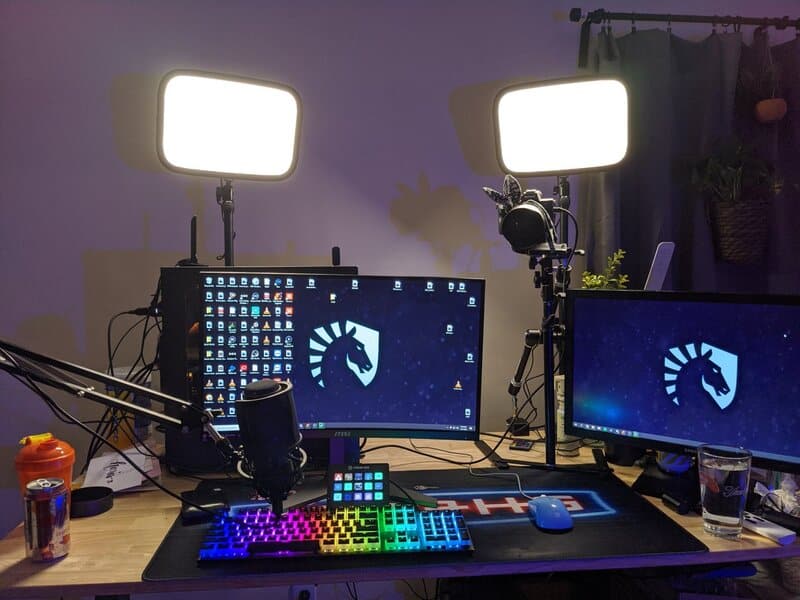
You wouldn’t believe what change light can make for your streams. That’s why you should consider 3-point lighting for your streams, or:
1. Key light - your main light, best placed to shine right in your face at 45° angle from your desk; righ lights are good for this as they are easy on the eyes
2. Fill light - meant to counterbalance the key light and get rid of hard shadows; these should be at 50% brightness and placed on the sides of your setup
3. Back light - meant to separate you from the background and highlight your face; best to place it so that it shines at your back from above
If you’re going to compromise and ditch one of these three, ditch the fill light
3 Point Lighting Setup
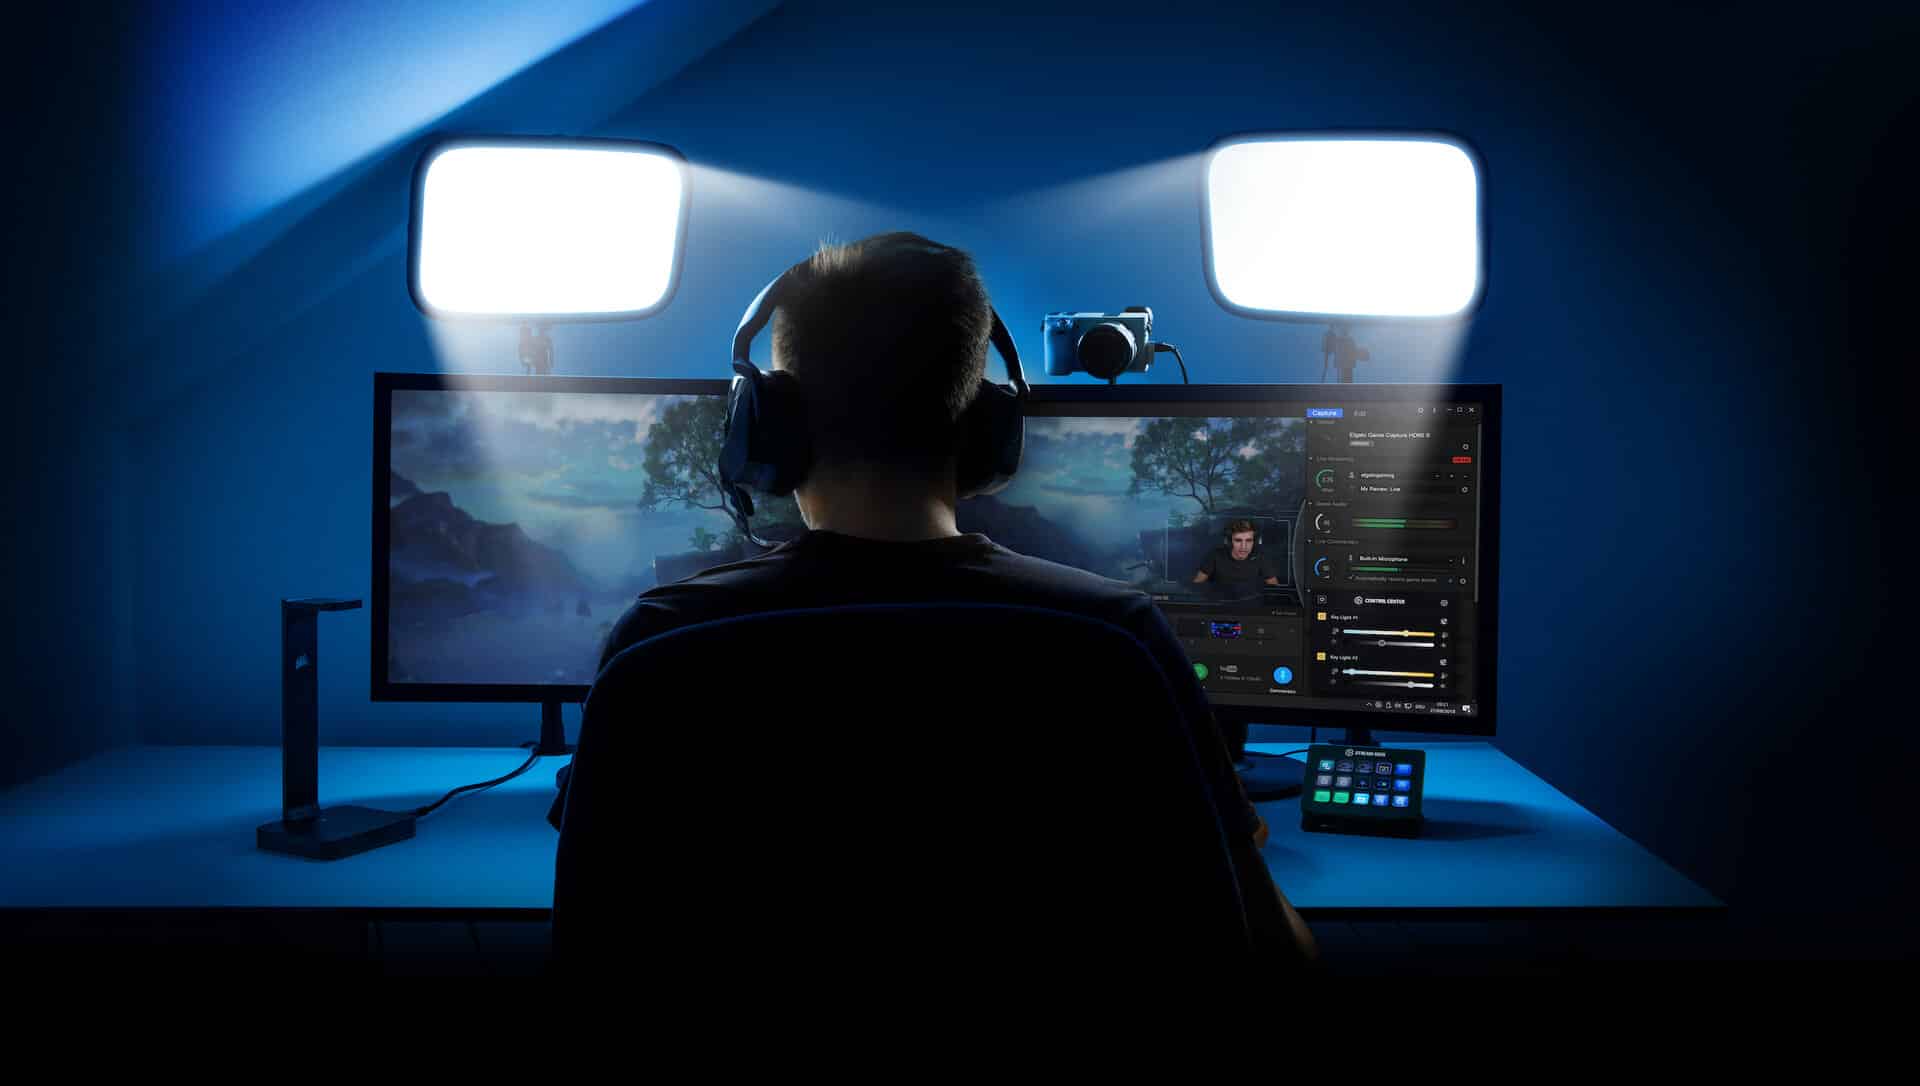
While you can simply purchase one light and be done with it, if you have the resources, you should consider implementing 3-point lighting. This setup can transform your streams from ordinary to extraordinary with just three light sources.
What is a 3-point lighting setup? As the name implies, it consists of three light sources that ensure you, as a streamer, and your setup are well-lit, allowing your viewers to see you more clearly.
This is important because streaming involves not only providing content but also engaging with your audience, so you need to appear sharp and bright at all times.
With this understanding, we can begin discussing three-point lighting. This setup requires three types of lighting, which we will explain individually along with instructions on how to set them up correctly.
Let’s not waste any time and explore what this is all about.
1. Key Light
The first light you need, even if you’re just starting your streaming career, is your key light. This light shines directly on your face and is typically positioned on your desk.
Positioning the key light is crucial, as you want to find the optimal angle for the light to illuminate your face while minimizing shadows that could interfere with the perfect shot. Additionally, you should avoid directing the light straight at your eyes, as this can lead to eye strain.
That’s why it’s a good idea to position the light at a 45° angle, typically at the corner of your desk. This isn’t a strict rule, but rather a suggestion, so you should experiment with different angles until you find the one that works best for you.
Additionally, although this is your primary light source, you should avoid setting it to maximum brightness, as prolonged exposure to bright light can easily lead to eye strain.
That’s why you should maintain a medium brightness level, but avoid making it too dim, as unnecessary shadows will begin to appear. If you are encountering fairly harsh shadows, consider using a light with a diffuser.
LED ring lights are excellent choices for your key light. Their shape typically reduces eye strain, and they are also quite affordable, allowing you to create your three-light setup without a significant financial investment.
Of course, if you’re not interested in ring lights, you can always use smaller LED lamps or any other LED-type light source, provided it’s not a reflector and includes a tabletop tripod.
2. Fill Light
In your three-point lighting setup, the fill light is used to counterbalance the light from the key light. This is essential for eliminating hard shadows and enhancing the subject's visibility.
The fill light can also be positioned at an angle between 15° and 45°, or it can be placed to the side of your setup. Additionally, you can use a larger light for your fill light, or use the same type of light as your key light.
Typically, you would use a diffuser on your fill light since you don’t require the same shine as you do with your key light. Additionally, your fill light should be set to approximately 50% brightness, but you should adjust it to what works best for you.
Fill lights can be positioned on a tabletop tripod placed in the corner of your desk or on a floor tripod next to your desk. Using a floor tripod is a better option, as it provides significantly more room to adjust the fill light's height and angle.
The ideal option for your fill light is a larger LED light mounted on a floor tripod, equipped with a diffuser or softbox. Additionally, brightness adjustment is essential; therefore, you should ensure that you can control the brightness of your fill light at any moment. This is particularly important if you’re streaming during the day near a window, as external shadows can impact your lighting.
You should avoid using ring lights as your fill light because they typically lack a diffuser, and the ring-shaped light they emit is not ideal for contrasting with the key light.
3. Back Light
The final light you should incorporate into your three-point lighting system is a back light. While a back light may appear to be the least significant element in a three-point lighting diagram, it is much more beneficial to have a back light than a fill light.
The reason is that it separates the subject, which is you and your face, from the background. By using a backlight, the background behind you will appear dimmer, while you will be highlighted.
As the name implies, the back light is directed at your back, creating a glow that contrasts with the background.
The light should be positioned so that it is emitted either from the side or at a diagonal angle. Ideally, you should set your backlight at a 45° angle, similar to your key light; however, this is not a strict rule, as it depends on your specific setup.
It is important to ensure that your backlight shines from above, making a tall floor tripod essential for placement. Additionally, you should use a large LED backlight equipped with a diffuser to avoid creating unwanted shadows.
Now, the brightness of your backlight should be set to a low percentage, around 20%, as you want to create a dimmer light effect that shines from behind.
You can also aim your backlight at your background. If you have a specific setup with a plain background, such as a wall or textured window drapes, you can illuminate it slightly. This way, when you use your key and fill lights, you will be highlighted while the background appears lit as well.
For back lights, a great option is to use large studio LED lights with a floor tripod. However, the best solution is to choose a light with a reflector, as it can cover a larger area. You will definitely need a diffuser, as reflector lights tend to be quite bright.
Avoid using ring lights due to their shape, and tabletop lights, as you need the ability to adjust the height of your backlight.
Factors to Consider When Purchasing 3 Point Lighting for Streaming
You don’t need to purchase three separate lights for a three-light setup; you can use the outside light as your fill light and a reflector as your backlight, requiring only a key light.
However, relying solely on sunlight streaming through your window is not advisable, as you'll find that a fill light is essential for nighttime streaming. Therefore, if you want to establish a proper three-light setup, you should invest in three lights.
Here are some factors to consider before purchasing your 3-point lighting setup.
3 Point Light Kit or Separate Lights
Understandably, there are 3-point lighting system kits that include all the lighting you need for your setup, so you don’t have to purchase them separately. There are both pros and cons to these kits.
The popularity of these kits stems from their affordability, typically priced around $150, and the inclusion of three lights that are perfect for streaming. However, this option may not suit streamers who prefer to customize their lighting or those who require specific lights for particular types of content creation.
In that regard, while acquiring your three-point lighting setup separately may cost more, you will benefit from higher quality lights and have the ability to select the exact lights you need.
For instance, if you’re interested in ring lights, it can be quite challenging to find a 3-point light kit that includes them. Therefore, the advantages and disadvantages of obtaining separate lights are:
Ultimately, this is a question of whether you want to implement a 3-point light setup immediately or if you prefer not to limit your lighting options.
What is Your Budget?
Streaming lights generally range from $20 to $150, but you can also find studio lights that cost up to $1,000. Therefore, your budget will determine how much you can invest in your three-light setup.
That being said, opting for a 3-light kit isn't a bad choice if you're looking to spend less on three lights. However, in the long run, it's wiser to save up and invest in high-quality lights that will last for years.
Sales are your best ally if you're on a budget. As streaming lights gain popularity, the demand for them is increasing, which will naturally lead to lower prices, especially with new manufacturers emerging almost daily.
We advise against settling for cheap lighting if you can avoid it. However, if you must start with lower-cost options at the beginning of your streaming career, aim to invest as much as possible in mid-range quality lights. This way, you can always upgrade once you begin earning money from your streams.
Portability
This is an important feature for some streamers because, with portable lighting, you aren't restricted to streaming indoors. While streaming outdoors, you can use the sun as your fill or backlight, but having at least one light from your portable light kit is a significant advantage.
That's why, if you're acquiring a 3-point light setup, you should ensure that at least one light is either battery-powered or can be charged via a USB cable.
Of course, you can always purchase a separate light as your portable option, but why spend more money than necessary?
This is where 3-point light kits tend to be less effective, as most require a wall socket for power. Therefore, obtaining separate lights is a wise choice if you are frequently on the move.
Which Light Should I Choose for My 3-Light Setup?
As previously mentioned, if you prefer to avoid the hassle of purchasing separate lights, you can choose light kits, which start at around $150 and can reach up to $1,000 to $2,000 for premium options.
Once you purchase a 3-point light kit, you’re essentially set, as it includes three lights that are ideal for your stream. Along with the lights, 3-point light kits often come with various accessories such as softboxes, diffusers, filters, travel bags, and more. Overall, it’s a great deal.
However, if you prefer to purchase them separately, it's a completely different situation. Therefore, we've created a quick list of suitable light options for each type.
For your key light, you should consider acquiring:
- Ring lights - portable and lightweight; often include a camera mount and a phone stand; the light serves as an ideal key light source; since a diffuser is not needed for a key light, it is the safest option.
- Small LED lights - portable and lightweight; come with a diffuser, softbox, and filters; some include tabletop tripods and camera/phone mounts; provide ample brightness.
- Large LED lights - compact; typically feature a floor tripod; offer adjustability; quite powerful; provide the best quality lighting.
For your fill and backlights:
- Reflector light - features a large surface area; powerful; includes a floor tripod; adjustable; comes with a diffuser and softbox;
Large LED light, as mentioned above.
Of course, you aren’t limited to these options, and if you can make it work, you can also use 3 ring lights and call it a day.
If you are looking for high-quality ring lights, here are some models you should check out on Amazon:
Regarding streaming LED lights, consider the following:
However, lights aren’t the only essential element in your three-light setup, so let’s discuss accessories for a moment.
Accessories
Accessories are essential because bare lighting alone is insufficient. You need to control the light and brightness emitted from your streaming lights, along with various tools that will assist you in achieving that.
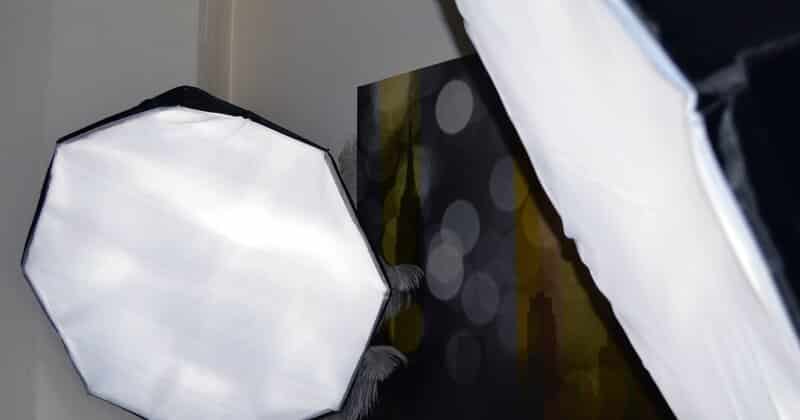
First, let’s discuss softboxes. A softbox is essentially a box that you attach to your light source to soften the light and create a more diffused beam.
It is typically constructed from reflective material on both sides and features a paper-like diffuser on the front, where the light is emitted. As you can see, softboxes are excellent for your back and fill light.
Next are diffusers. A diffuser is essentially a sheet of plastic that spreads the light beam evenly and eliminates harsh shadows. You can use diffusers with any of your three-point lights.
Lastly, we have filters, which are similar to diffusers as they are also made from plastic, but they can come in various colors. They are excellent for key lights if you want to achieve a specific effect.
With this in mind, you should always consider acquiring 3-point lights that include these accessories, or you can purchase them individually, based on your preferences.
Conclusion
We hope you now understand the fundamentals of setting up your 3-point lighting system, as well as what to consider when purchasing your lights and the importance of having various accessories.
We also hope you find the ideal 3-point setup for yourself so you can begin your streaming journey.